A roof leak usually announces itself at the worst moment. You notice a brown ceiling stain that wasn't there yesterday. You hear a drip in the attic during a storm. A light fixture looks damp. Your first instinct is often to wipe up what you can, set out a bucket, and hope the problem is small.
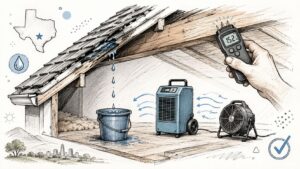
Sometimes it is small. The trouble is that small-looking leaks often spread farther than the visible stain suggests. Water moves along rafters, soaks insulation, collects above drywall, and settles into framing where you can't see it. In Central Texas, that hidden moisture can linger longer than homeowners expect, especially when outdoor humidity slows evaporation.
Drying a roof leak correctly means doing more than drying the surface. You need to stop active intrusion, protect the structure, remove trapped moisture, and verify the materials are dry before repairs begin.
That Sinking Feeling a Roof Leak Causes
The stress is real. When water starts coming through a ceiling, thoughts immediately turn to three things at once: safety, damage to belongings, and whether mold is about to become the next problem. That reaction makes sense. The first few hours matter.
The good news is that a roof leak can be managed methodically. Panic usually leads to the wrong priorities, like aiming a box fan at a wet spot before finding out whether water is still entering the house. A calmer approach works better. Contain the water first. Reduce safety risks. Then start thinking about where the moisture has gone, not just where the stain appeared.
In homes around Georgetown and Austin, roof leaks after hard rain often look minor from inside. A ceiling spot the size of a dinner plate may trace back to a wider wet area in the attic. That's one reason homeowners dealing with why roof leaks lead to serious water damage and how Georgetown homeowners can stop it fast need a plan that goes beyond cleanup.
What usually goes wrong first
Homeowners often make one of these early mistakes:
- They focus on the drip, not the source. Catching water is necessary, but it doesn't stop saturation above the ceiling.
- They trust what they can see. Ceiling drywall may look damp in one spot while insulation and framing stay wet over a much larger area.
- They stop drying too early. A dry-looking ceiling isn't proof that wood, insulation, or wall cavities have returned to normal moisture levels.
Water damage gets more expensive when drying starts before the leak is controlled, or when repairs begin before the structure is verified dry.
What a proper response looks like
A sound response has four parts:
- Stabilize the scene. Protect people, contents, and electrical systems.
- Control the intrusion. Temporary tarping, flashing protection, or drainage diversion comes before serious drying.
- Dry the assembly. Use airflow, dehumidification, and heat in a controlled way.
- Verify dryness. Don't rely on touch or appearance alone.
That sequence is what separates a quick cleanup from a complete dry-out.
Your First Response to Contain the Water
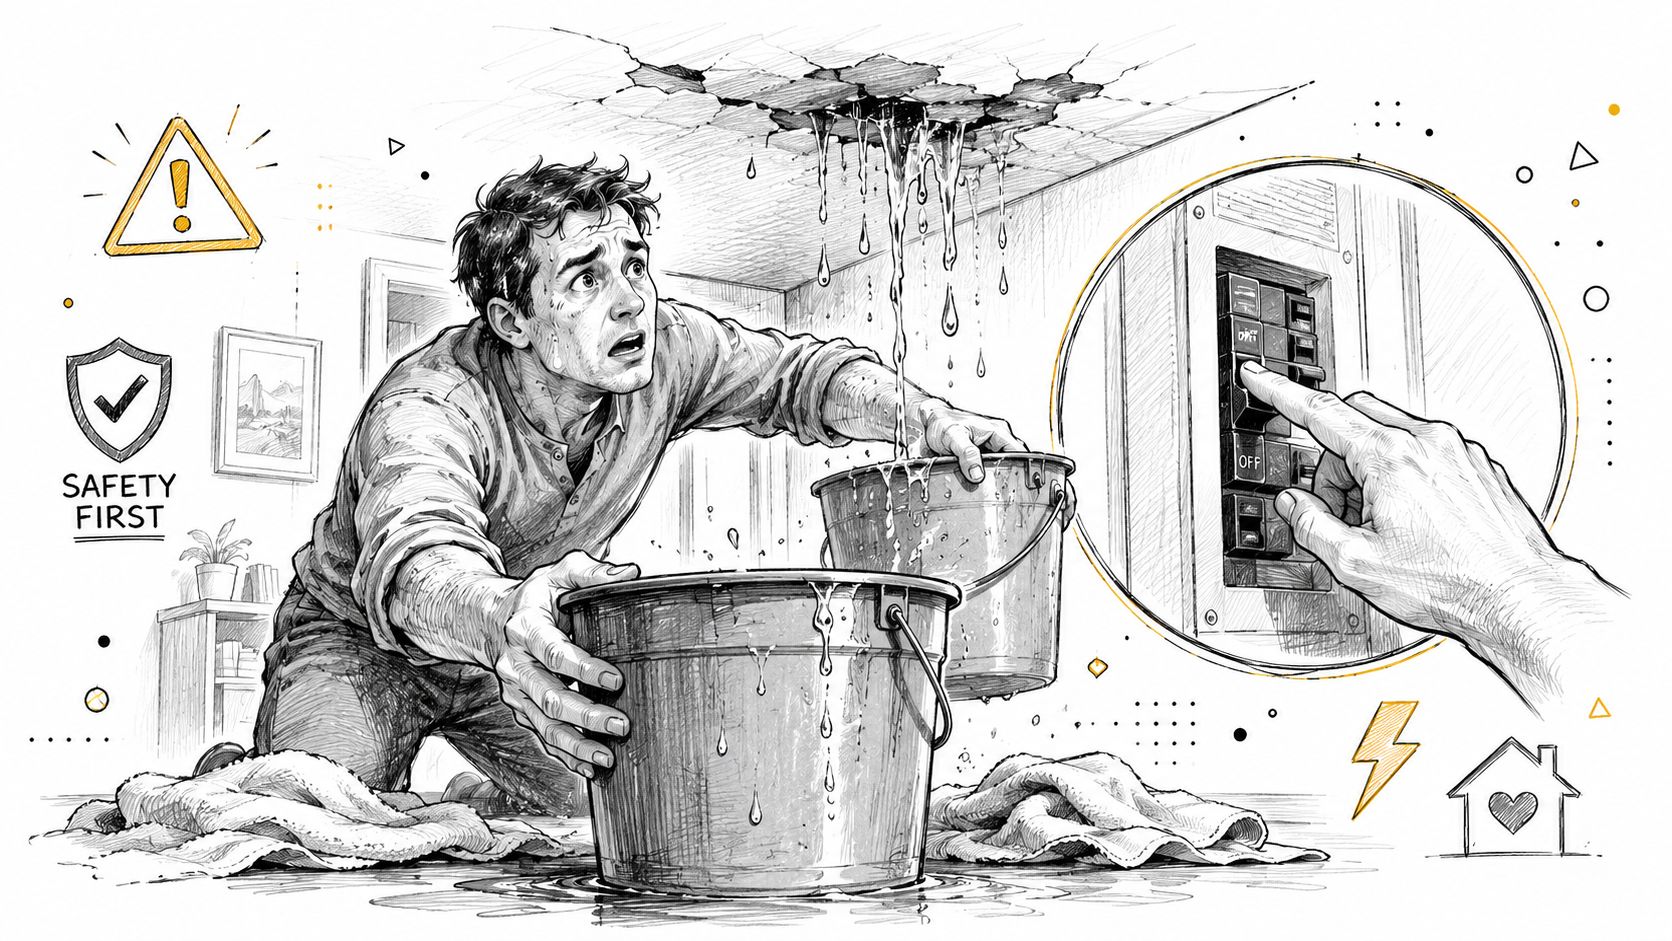
Water coming through the ceiling at 10 p.m. changes the room fast. A small drip can turn into a spreading ceiling bubble, wet carpet, and a live electrical hazard in minutes. The first job is to keep people safe and limit how far the water travels.
Start with containment.
Place buckets, storage bins, or a trash can under active drips. Put a towel in the bottom if splashing is spreading water onto nearby flooring or walls. Move lamps, electronics, rugs, paper goods, and furniture out of the wet path, then lay down plastic sheeting or trash bags under absorbent towels to protect wood floors, laminate seams, and carpet edges.
Treat power as a real concern, not an afterthought. If water is near a ceiling light, fan, outlet, or switch, shut off the affected circuit if you can do it safely. If you are not sure which circuit serves that area, leave the wet zone alone and call an electrician or water damage professional.
A sagging ceiling needs caution. Drywall can hold a surprising amount of water before it gives way. In some cases, a controlled drain through the lowest point helps prevent a wider collapse, but only if the area is clear, the power is off, and you can do it safely from stable footing. If any part of that feels uncertain, stop there.
What to check safely inside the house
A quick check can help you understand whether this is a localized drip or a broader attic and ceiling cavity problem.
- Look in the attic only if access is dry and stable. Use a flashlight.
- Follow water staining on decking or framing. Roof leaks often travel before they drop into the room below.
- Check insulation condition. Wet insulation stays heavy, holds moisture, and slows drying in the materials around it.
- Notice where flooring is affected below. Water that reaches carpet pad or subfloor usually spreads farther than the visible stain suggests.
Never get on a wet roof during an active leak. Temporary roof control matters, but falls and electrical injuries are the bigger emergency.
If you need a practical triage checklist during the first few minutes, this guide on what to do immediately after water damage in your Central Texas home walks through the immediate stabilization steps.
What causes trouble later
The mistakes I see after roof leaks are usually simple ones made under stress.
| What people do | What it leads to |
|---|---|
| Aim one box fan at the ceiling stain | Surface drying can leave insulation, framing, and cavity materials wet behind the finish. |
| Close up the area too soon | Paint, patching, or new drywall can trap moisture where you cannot see it. |
| Leave wet carpet and pad in place | Porous materials below the leak can stay damp long after the ceiling looks better. The EPA's mold cleanup guidance stresses prompt drying and removal of water-damaged materials that cannot be dried quickly, especially porous contents like carpet padding (EPA mold cleanup guidance). |
| Wait to see if it dries on its own | Moisture keeps wicking into nearby trim, subfloor, insulation, and wall cavities. |
This early containment step buys time. It does not confirm the assembly is dry. Roof leak jobs go sideways when the visible water is handled, but no one checks the true extent of the moisture's spread above the ceiling and into adjacent materials.
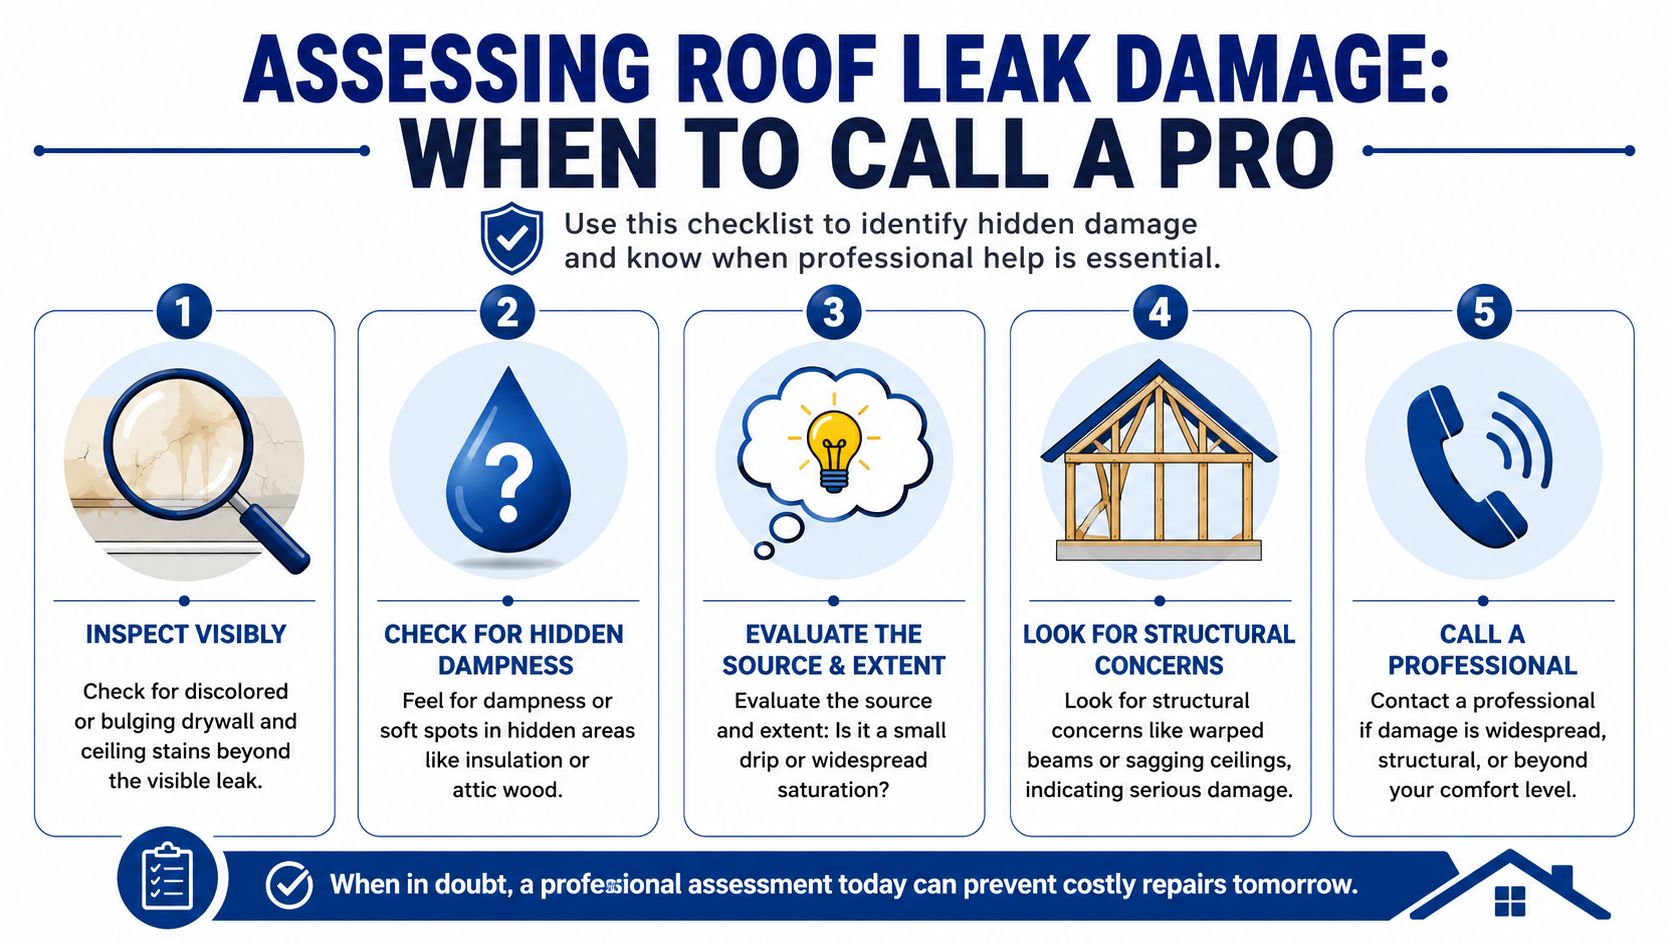
Assessing the Damage When to Call a Professional
A roof leak rarely stays where you first spot it. Water follows gravity, but it also follows materials. It can move sideways on roof decking, wick into drywall paper, soak insulation, and settle into top plates and wall cavities. That's why visible staining is a poor map of the actual damage.
The hidden moisture problem
One of the biggest misses in residential roof leak cleanup is skipping moisture mapping before drying begins. Homeowners often set fans and dehumidifiers in the room below the stain, but they never identify all the wet materials above and around it.
According to AmeriPro Roofing's discussion of hidden moisture after roof leaks, the National Institute of Building Sciences reports that 60% of post-water-loss microbial growth occurs in areas where moisture was not initially detected, and a cited EPA 2025 study found 45% of failed remediation projects resulted from skipping invasive moisture scanning before structural drying. The practical point is clear even if you never see the equipment yourself: if nobody mapped the wet boundaries, drying may be incomplete.
What professionals look for
The IICRC S500 standard requires technicians to map moisture boundaries using a grid of test points, because damage often extends beyond visible staining, as explained in Water Restoration Authority's roof leak restoration guidance. In plain terms, that means checking moisture in a pattern, not guessing from the stain.
A proper assessment usually includes:
- Moisture meter readings across the ceiling, adjoining walls, and trim
- Attic inspection of insulation, sheathing, rafters, and penetrations
- Boundary mapping beyond the wet-looking area
- Material assessment to decide what can dry in place and what must be removed
If saturated drywall and insulation aren't removed to the established dry boundary during major intrusion, airflow can't reach concealed framing. That's when mold and rot get missed until much later.
DIY or professional help
Some roof leaks are manageable with careful homeowner action. Others need a restoration crew quickly. Use the risk level, not optimism, to make that call.
| Situation | Reasonable DIY scope | Time to call a pro |
|---|---|---|
| Small, recent drip with no ceiling sag | Catch water, protect contents, monitor, arrange roof repair | If moisture spreads, odor develops, or insulation is wet |
| Visible attic moisture but limited room damage | Temporary containment only | Call for mapping and drying if insulation or framing is damp |
| Bulging drywall or widespread staining | Avoid disturbance except safety measures | Call immediately |
| Leak present for more than a short window or unknown duration | Very limited | Hidden moisture is likely |
| Multiple rooms or wall cavities involved | Not a good DIY situation | Call immediately |
Practical triggers that should end the DIY debate
- Sagging ceiling drywall
- Wet insulation in the attic
- Water near electrical fixtures
- Leak source still active
- A musty odor developing after the initial event
- Plaster, engineered wood, hardwood, or layered assemblies involved
In Central Texas, repeated rain can turn a small roof breach into a stop-and-start saturation event. That pattern is harder to judge because surfaces may partially dry between storms while cavities stay wet. That's exactly when instrumented assessment matters most.
The Structural Drying and Dehumidification Process
By the time drying starts, the easy part is over. The leak may be contained, but water has usually moved farther than the stain suggests, especially above ceilings, inside insulation, and along framing. Drying the structure means pulling that moisture out of the assembly, not just making the room feel comfortable again.

What actually dries a roof leak
Effective roof-leak drying depends on controlling the environment. Air movement lifts moisture off wet materials. Dehumidifiers pull that moisture out of the air. Careful heat can speed evaporation when the area is contained and monitored. Homes & Gardens makes a similar point in their ceiling leak drying guide, though homeowner methods are much slower than commercial drying equipment.
In Central Texas, humidity changes the job. Opening windows can help in a dry spell, but during humid weather it can feed more moisture into the space and stall progress. I see this mistake often after roof leaks. The ceiling surface starts to dry, but the insulation above it and the framing around it stay wet.
That hidden moisture is the main problem.
The drying sequence that protects the structure
A sound drying plan follows the building, not the stain pattern on the ceiling. The order matters:
- Remove any free water first. Pooled water, trapped ceiling water, and saturated contents need to be dealt with before evaporation can work.
- Expose materials that cannot dry closed. Wet insulation, layered ceiling cavities, and enclosed wall sections often need to be opened so air can reach the damp materials.
- Set equipment with purpose. Air movers should create circulation across the affected area, not blast one visible spot.
- Control humidity continuously. Dehumidifiers need to run long enough to keep released moisture from settling back into drywall, wood, or contents.
- Recheck and reset. Moisture shifts as drying progresses, so equipment layout usually changes over the next several days.
Many dry-outs commonly fail at this stage. Homeowners and even some contractors stop once the obvious wet area feels dry. A proper structural dry-out keeps going until readings show the framing, sheathing, and other affected materials are returning to normal moisture levels.
Some materials dry well. Others hold moisture or need removal
Different materials respond very differently after a roof leak. AM Restoration's guide to water-damage drying timelines notes that hard surfaces can dry faster than absorbent finishes, while drywall and insulation often become replacement decisions if they stay wet too long or lose structural integrity.
That trade-off matters. Saving materials reduces repair cost and disruption, but only if they can be dried thoroughly. Wet fiberglass insulation usually loses too much drying potential once it mats down. Drywall can sometimes be saved after a small, clean leak, but not if the core is breaking down or the cavity behind it stays damp. Hardwood, trim, and framing often can be preserved, but they need controlled drying and repeated moisture checks.
The longer materials stay wet, the higher the mold risk becomes. If you want a clear sense of that timeline, this breakdown of how long water damage takes to become mold explains why hidden moisture cannot be treated as a cosmetic issue.
Where homeowners help, and where a crew earns its keep
Homeowners can help by clearing the work area, protecting belongings, and improving access once the leak is stopped and the area is safe. Beyond that, structural drying becomes an equipment and measurement job.
RestoTek TX handles this phase by pairing drying equipment with moisture mapping and daily verification, which is what roof-leak losses usually require. Good crews do not default to tearing everything out, and they do not leave wet cavities closed up because the room looks better. They remove what cannot be dried, preserve what can be saved, and verify the result with instruments instead of guesswork.
How to Know When Its Truly Dry to Prevent Mold
A ceiling can look dry and still be unsafe to close up. That's the central mistake behind many failed dry-outs. Drywall paper dries at the surface first. Paint firms up. The room smells better. Homeowners stop the dehumidifiers, patch the opening, and assume the problem is over.
That assumption causes a lot of trouble later.

Looking dry is not the same as being dry
The EPA guidance referenced in Teague Roofing Plus's explanation of temporary roof leak response says materials must reach equilibrium moisture content below 15% for wood before drying can cease. The same discussion notes that 62% of homeowners incorrectly assume a space is dry based on surface appearance rather than instrumented verification.
That tracks with what restoration crews see all the time. Surface appearance is a poor measurement tool. A joist bay can stay damp after the painted ceiling below it feels normal. Insulation can hold moisture out of sight. Framing in attic corners can remain undried long after drips stop.
What verification should include
A proper final check should involve more than “it seems fine now.”
Use this standard:
- Moisture meter confirmation on wood framing and other affected materials
- Comparison readings in unaffected areas to establish a normal baseline
- Inspection of concealed spaces that were part of the wet zone
- No reconstruction until readings support it
The same source also notes that many consumer articles skip these dry standards. That omission matters because homeowners need to know what to ask. If a contractor says the area is dry, ask how they verified it. If the answer is visual inspection alone, that's not enough.
Stop drying based on meter readings and verified dry standards, not because the stain is lighter or the room no longer feels humid.
Mold risk rises on the wrong timeline
Mold doesn't wait for your repair schedule. As noted earlier, wet carpet and padding should be removed within the early window to help avoid microbial growth. Drywall and framing also become riskier the longer moisture stays trapped. If wet drywall can't be removed promptly, aggressive drying and humidity control become more important.
This is also the point where anti-microbial treatment may be discussed. It has a role, but it doesn't replace drying. Spraying a product into a wet cavity without reaching dry standards is not a fix. Moisture control is the foundation.
If you're wondering how fast a damp area can become a microbial issue, this article on how long it takes for water damage to become mold gives a useful homeowner-focused overview.
A few signs the job may not be done
- A musty smell returns after equipment is removed
- Paint blisters or peels during the following days
- Trim swells, joints open, or nail pops show up
- The area feels “cool damp” compared to nearby surfaces
- Attic insulation remains matted or heavy
Those aren't proof by themselves, but they should prompt another instrumented check. Verification may feel tedious when you're ready to move on, but it's what keeps a roof leak from becoming a mold or reconstruction problem months later.
Documenting for Insurance and Planning Repairs
A lot of claim problems start after the water stops dripping. A ceiling stain fades, equipment comes out, and everyone wants to call it done. That is often when missing records turn into disputes over what was wet, how far the moisture spread, and whether repairs started before the structure reached a dry standard.
Good documentation protects you on two fronts. It supports the insurance file, and it gives the repair team a clear map of what still needs attention behind the surface.
What to document right away
Start a single folder on your phone, computer, or both. Keep everything in date order.
- Take wide and close photos. Include the roof entry point if visible, ceiling stains, attic insulation, flooring, contents, and any wall or ceiling areas opened for drying.
- Record moisture findings. If a mitigation contractor uses a moisture meter, thermal camera, or hygrometer, ask for copies of readings, affected-area notes, and daily drying logs. Those records matter later if hidden moisture shows up behind trim, in insulation, or inside a ceiling cavity.
- Keep a communication log. Write down who you spoke with, the date, and what was approved, delayed, or disputed.
- Save every receipt. Emergency tarping, buckets, hotel stays, equipment rental, and material disposal all belong in the same file.
- Photograph equipment and containment. Air movers, dehumidifiers, floor protection, and opened cavities help show the work was necessary, not arbitrary.
Photos alone are not enough. On roof leaks, I want to see where moisture traveled and how dry-down was verified, because hidden wet areas are what come back as odor, staining, or microbial growth later.
Set expectations for the timeline
Drying time is not the same as repair time. Wet drywall, framing, insulation, and flooring all dry at different rates, and a roof leak that looks minor from the room below can hold moisture in the attic or ceiling cavity longer than expected.
Insurance adjusters and contractors usually want a reasonable explanation for why equipment stayed in place for several days or why reconstruction did not begin immediately. Your file should answer that clearly. Show the start date, the areas affected, what materials were removed, how readings changed over time, and when the structure was dry enough to close up.
For practical guidance on what insurers expect homeowners to do after a loss, the Texas Department of Insurance explains how to document damage, protect the property from further harm, and keep records for your claim at tdi.texas.gov.
Planning the repair phase
Repairs should follow the actual condition of the structure, not the calendar.
| Phase | What happens |
|---|---|
| Mitigation | Stop further water intrusion, remove unsalvageable materials, and begin structural drying |
| Moisture mapping and verification | Check exposed and concealed areas with instruments to confirm the wet perimeter and verify dry standards |
| Reconstruction | Replace insulation, drywall, texture, trim, paint, flooring, and any other damaged finishes |
That middle step gets skipped more often than homeowners realize. Surface materials can look normal while wood framing, roof decking, or insulation still holds moisture. In Central Texas humidity, that is how a simple leak turns into odor, staining, warped materials, or mold weeks later.
Before repairs are approved, ask two direct questions. What materials were confirmed dry with instruments, and what reference was used to decide they were ready for closure?
If you are dealing with an active leak or a ceiling that is still drying after a storm, RestoTek TX can inspect the affected area, document the moisture spread, dry the structure properly, and carry the job through reconstruction so you are not coordinating multiple vendors during a stressful loss.