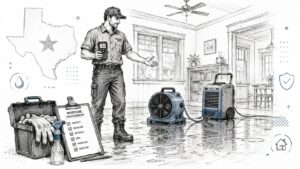
You walk into the room and know right away this is not a wait-until-morning problem. The floor is wet, the air feels heavy, and water is already working its way into baseboards, drywall, and anything sitting low to the ground. In Central Texas, that can start with a burst line under a slab, a washer overflow, a roof leak during a hard storm, or flash flood water that gets inside fast.
The first hour shapes the rest of the job. A calm, ordered response can limit structural damage, reduce drying time, and make the insurance side much easier to document. A delayed response usually means more tear-out, more odor, and a higher chance that humidity turns a simple water loss into a mold problem.
This checklist follows the same order a restoration crew uses on a real call, from the first safety check to drying, testing, documentation, and final repairs. It is built for Georgetown and Austin homes, where sudden downpours, high humidity, and drainage issues create a different set of problems than a slow leak in a dry climate. If you need a practical first-day plan, start with what to do in the first 24 hours after water damage in Georgetown or Austin.
You do not need to guess your way through this. Use the steps below to protect your family, save materials that can still be saved, and recognize the point where a local restoration team like RestoTek TX should take over.
1. Immediate Safety Assessment and Emergency Response
A soaked floor is stressful. A wet room with live power, contaminated water, or a sagging ceiling is dangerous.
Start with a safety check before anyone steps in to move rugs, furniture, or boxes. In Georgetown and Austin homes, I see the same pattern after hard storms and flash floods. Water rarely stays in one neat area. It can reach a garage wall, run under flooring into an adjoining room, or collect around appliances and HVAC equipment before the source is obvious.
The first decision is simple. Can you enter the area safely, or does a professional need to assess it first?
Treat the area as unsafe if you notice any of the following:
- Water near electrical components: outlets, extension cords, appliances, the breaker panel, or HVAC equipment
- Ceiling movement or staining overhead: bubbling paint, sagging drywall, or active dripping from above
- Gray or black water: sewage backups, toilet overflows involving waste, or floodwater that entered from outside
- Slip and trip hazards: slick hard floors, loose flooring, fallen drywall, or hidden debris under murky water
- Fast-rising or deep standing water: especially after a Central Texas storm where runoff may still be entering the home
What to do right away
- Shut off power only if you can do it without entering standing water: If the panel is in a dry, accessible area, turn it off. If not, wait for an electrician, utility provider, or restoration crew.
- Stop the source if it is safe and reachable: A supply valve, washing machine line, or sink shutoff may prevent a much larger loss.
- Keep children and pets out of the area: They are at the highest risk around contaminated water and unstable materials.
- Document the starting condition: Take wide photos, then close-ups of the water line, damaged contents, and the point of entry if you can see it.
- Separate clean-water events from contaminated-water events: A broken supply line is handled differently from stormwater or a sewer backup. That affects cleanup methods, material disposal, and insurance documentation.
One trade-off matters here. Homeowners often want to start pulling up wet materials immediately. Sometimes that helps. Sometimes it spreads contamination, disturbs unsafe materials, or makes the claim harder to document. If the water came from outside, involves sewage, reached electrical systems, or has been sitting long enough to create odor and heavy humidity, get a local restoration team onsite first.
For a practical local guide, review what to do in the first 24 hours after water damage in Georgetown or Austin. If conditions are unsafe, or if the loss involves storm intrusion, plumbing failure, or a backup, this is the point to call RestoTek TX for emergency response and an on-site safety assessment.
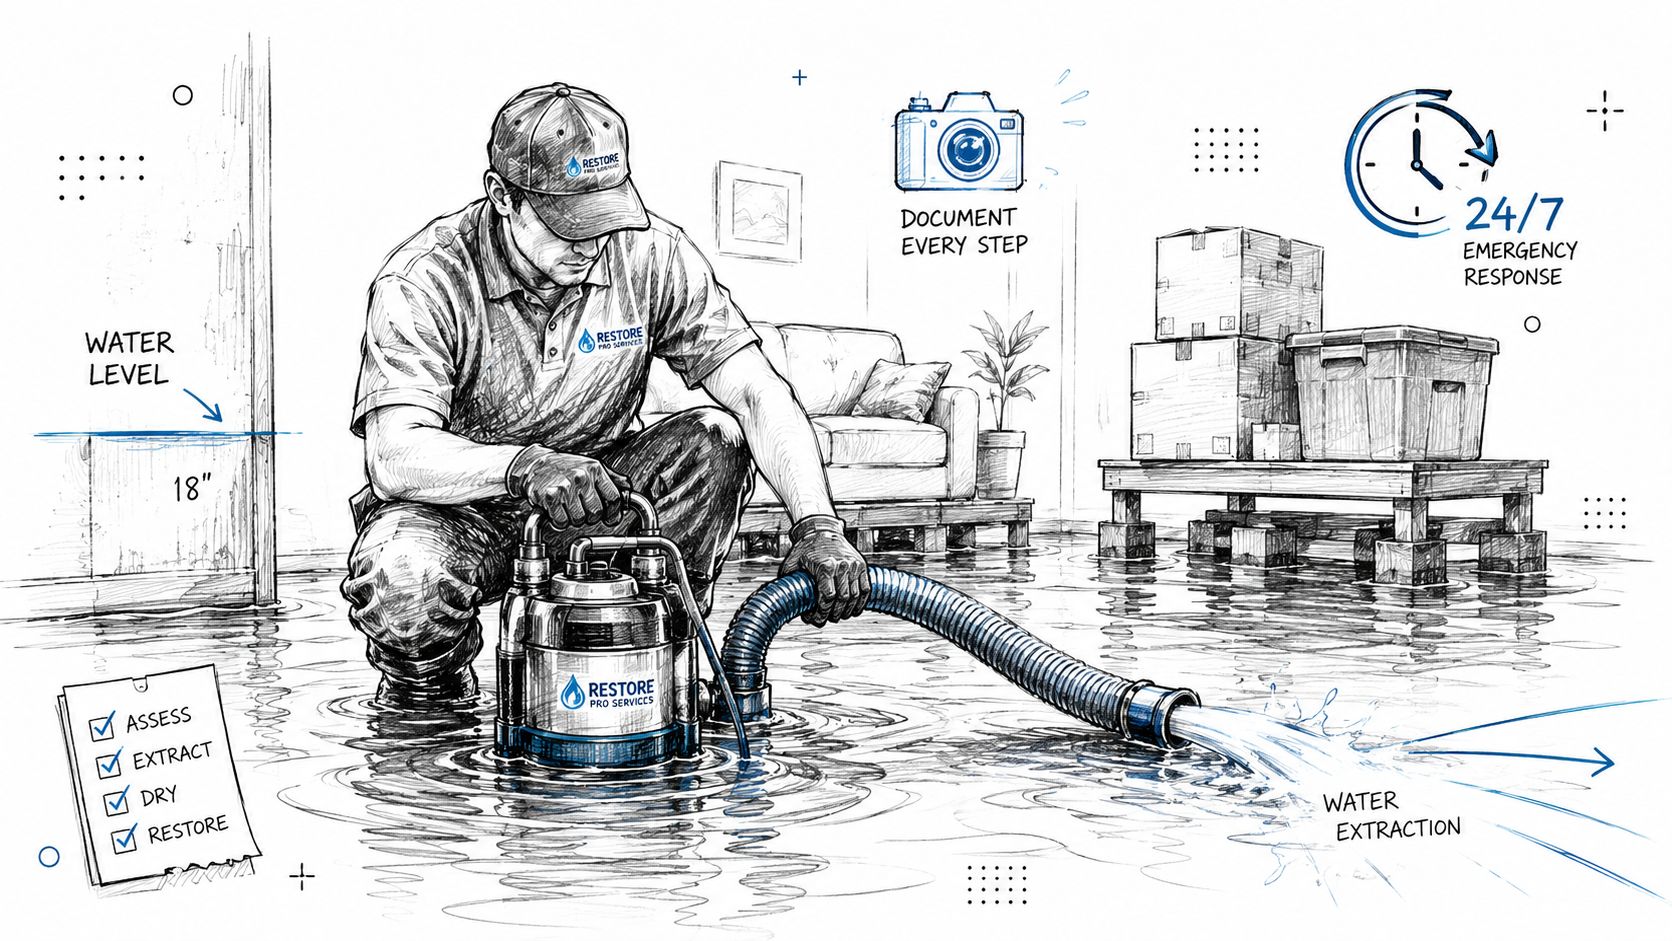
2. Water Extraction and Removal
Water removal is the point where a manageable loss often turns into a much larger repair.
In Central Texas, that happens fast. Flash-flood water can move room to room across a slab, and our humidity slows evaporation even after the visible puddles are gone. A floor may look clear while water is still sitting under vinyl, inside cabinet bases, along tack strips, or behind baseboards.
Time matters here because extraction affects the rest of the job. The sooner water is removed, the better the odds of saving flooring, lower drywall sections, trim, and contents. Delay gives moisture more time to wick upward, soak insulation, swell wood products, and create the humid conditions that lead to odor and microbial growth.
Homeowner equipment has limits. A shop vac can help with a minor clean-water spill on a hard surface. It will not pull enough water from carpet pad, subfloor joints, underlayment, or the recessed spaces under cabinets. I see this often after an Austin kitchen overflow. The tile looks mostly dry, but the toe kicks are saturated, the sink wall is wet behind the cabinet line, and the pantry next door has already taken on moisture. In Georgetown storm losses, the obvious standing water is usually only part of the problem because runoff follows low spots and doorway transitions into rooms that did not look affected at first glance.
What to do before and during extraction
- Take photos before water is removed: Capture the water line, affected rooms, damaged contents, and any visible source.
- Protect items that are easy to save: Move documents, electronics, medications, and small valuables to a dry, higher location.
- Make access easier: Clear hallways, doorways, and parking access so extraction hoses and equipment can get in quickly.
- Sort the loss by water type: Clean water from a supply line is handled differently than stormwater or sewage. That decision affects disposal, cleaning methods, and what materials can realistically be saved.
- Call a local restoration team if water covers more than a small area or came from outside: RestoTek TX should be brought in at this stage for storm intrusion, hidden saturation, contaminated water, or any case where cabinets, walls, or multiple rooms are involved.
Professional extraction is more than vacuuming the surface. Crews use weighted extractors, truck-mounted or portable units, and targeted removal methods based on the floor type and the category of water. The trade-off is straightforward. Fast extraction with the right equipment usually reduces demolition and shortens drying time. Waiting to see if the area will air-dry often leads to more tear-out, a longer drying plan, and a harder insurance conversation later.
The goal in this step is simple. Remove as much liquid water as possible before it has more time to spread and soak deeper into the structure.
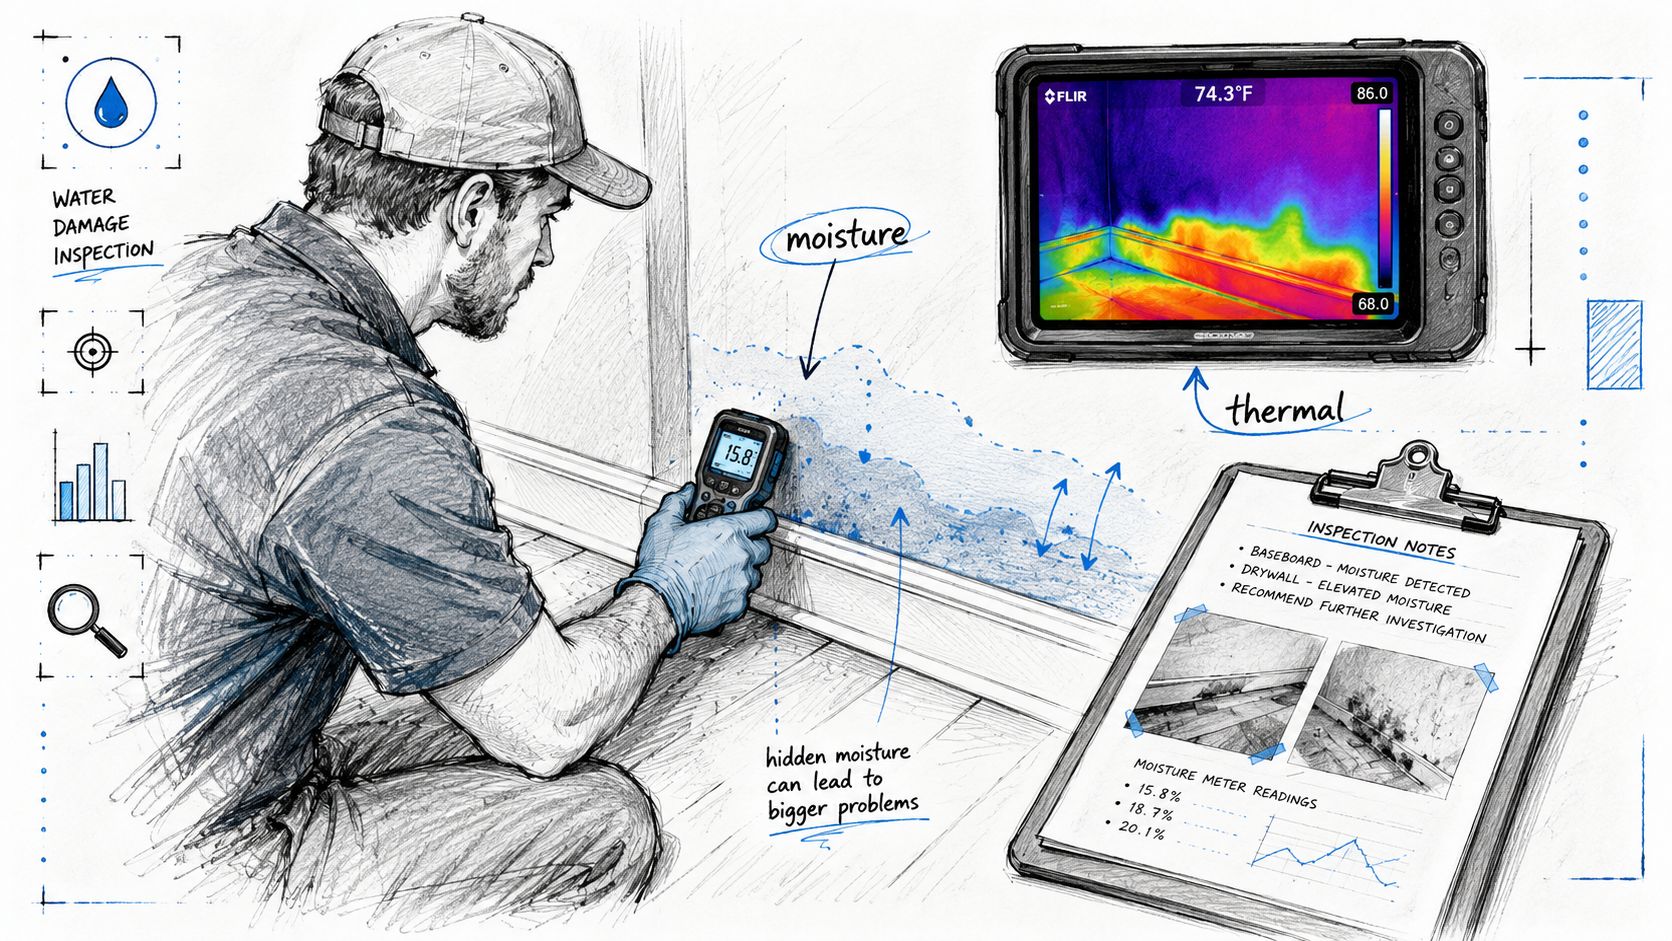
3. Water Damage Inspection and Assessment
The floor may look better once the standing water is gone, but this is often the point where the full scope of the loss becomes clear.
Inspection is where a restoration team maps the job. They need to confirm the source, trace how water moved through the structure, and measure what is still wet. Visible staining only tells part of the story. In Central Texas, flash-flood intrusion, slab leaks, and humidity can push moisture into wall cavities, insulation, subflooring, and cabinet bases long after surface water has been removed.
This stage also shapes the insurance claim. Good documentation includes structural damage, affected finish materials such as flooring and paneling, and damaged contents such as furniture, electronics, and clothing. Crews should support that file with moisture readings, room-by-room notes, and clear photos that show both the obvious damage and the hidden spread they found with meters or thermal imaging.
What a solid assessment looks like
A Georgetown crawl space loss can show light staining indoors while moisture has already migrated below the floor system. In an Austin kitchen, the tile may look dry while the cabinet toe-kicks, drywall behind the boxes, and insulation in the shared wall are still holding moisture. Those findings affect what can be saved, what needs to be opened up, and how long the job will take.
Ask direct questions. Which materials are wet right now? Which ones are likely to dry in place? Which areas need removal because they trapped contaminated water or will stay damp too long? A good crew can answer that without vague language and can show you the readings behind the recommendation.
Hidden moisture gets missed all the time. If the crew cannot show meter readings, thermal images, or a written moisture map, they are working from assumptions.
For homeowners in this region, local building conditions matter. Pier-and-beam homes, older wall assemblies, storm-driven rain, and persistent humidity can all change the assessment. If the loss involves more than one room, exterior water intrusion, or signs of moisture under floors or inside walls, bring in a team that handles structural drying in Central Texas after water intrusion before hidden damage turns into a larger tear-out.
Keep every photo, note, and report from this step. Write down when you first noticed the problem, what you saw, what the weather was doing, and whether the area had leaked before. Those details help connect the source, timeline, and damage pattern when the adjuster reviews the claim and when the restoration plan is finalized.
4. Structural Drying with Dehumidification and Air Movement
Extraction removes liquid water. Drying removes what soaked into the building.
Professional restoration distinguishes itself from basic cleanup. Air movers, dehumidifiers, containment, and targeted airflow are used to bring framing, drywall, flooring, and other materials back to dry standards. In Central Texas, humidity slows evaporation and can keep materials damp longer than homeowners expect, especially in homes with limited ventilation or shaded interiors.
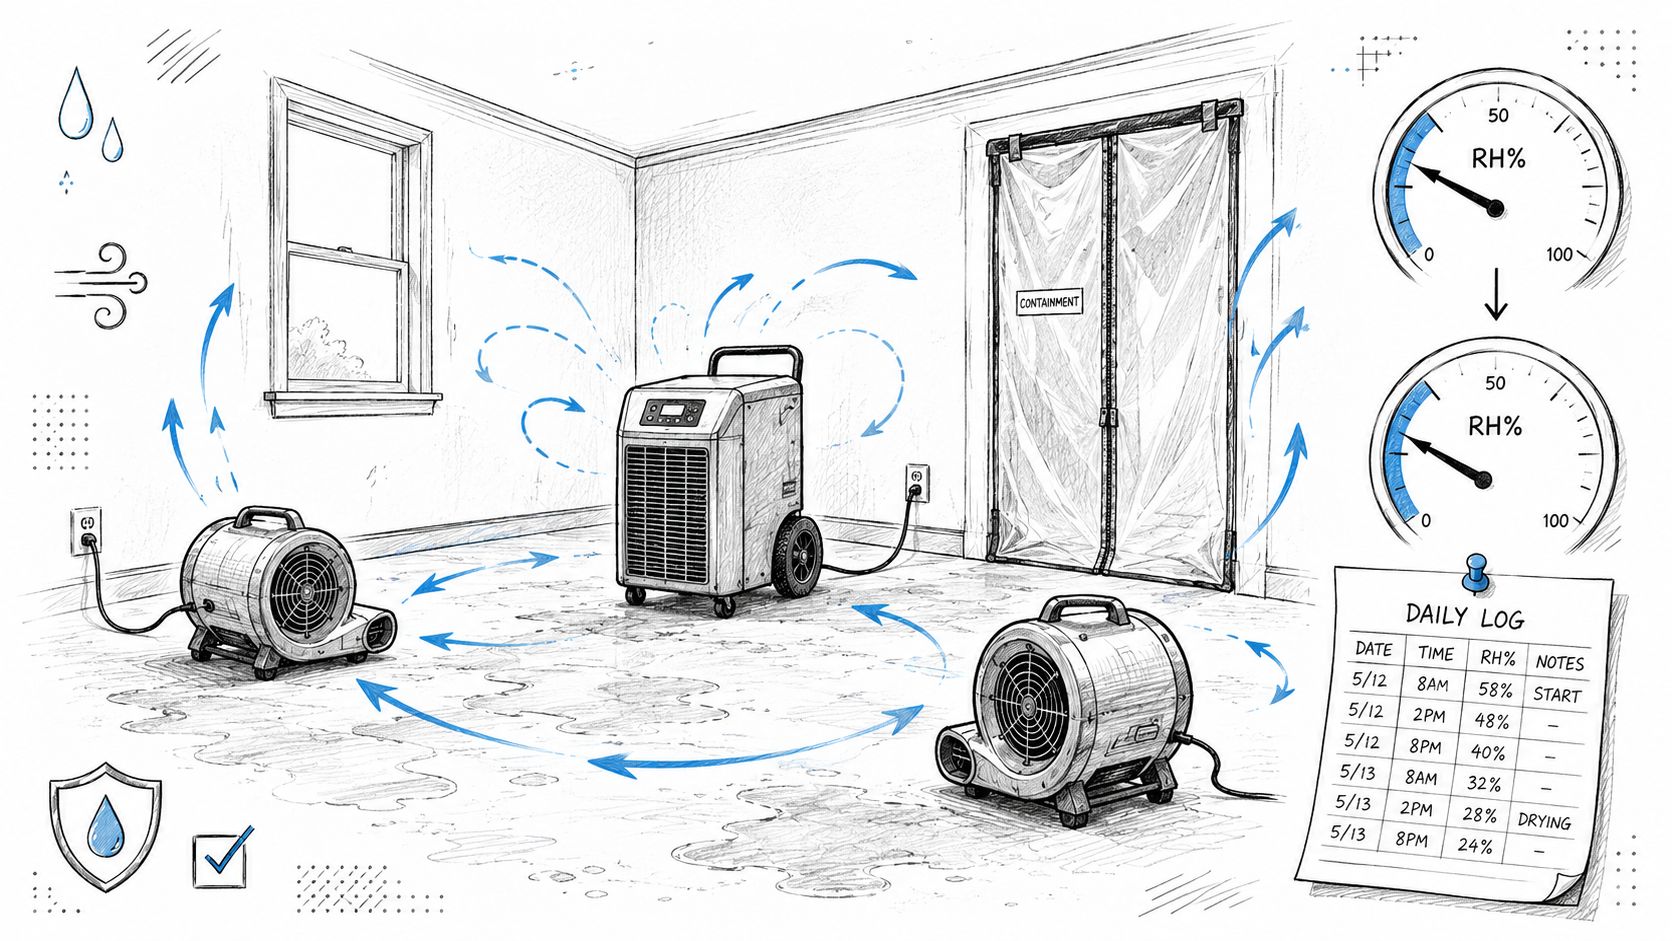
One of the most misunderstood parts of any water damage restoration checklist is what "dry" means. Consumer advice often stops at "dry the area." That's not enough. A strong restoration process uses instrumented readings taken daily in multiple locations and compares those readings to pre-loss conditions or accepted dry baselines. The overlooked benchmark many homeowners never hear is that building materials are typically considered dry at below 15% moisture content, as discussed in NoblePA Group's dry-standards checklist article.
What homeowners should watch during drying
- Keep equipment running: Don't shut machines off because they're loud or inconvenient.
- Leave vents clear: Air movers and dehumidifiers need open intake and discharge space.
- Ask for daily readings: You want more than "it's getting better." You want measured progress.
- Expect some rooms to dry unevenly: Exterior walls, subfloors, and insulated cavities often lag behind.
A Georgetown living room with storm intrusion might dry fairly quickly at the surface but hold moisture at tack strips, base plates, and lower drywall. An Austin attic leak may need focused dehumidification to protect framing and insulation even if the ceiling stain below seems minor.
For a closer look at that process in local conditions, RestoTek TX breaks it down in its article on structural drying in Central Texas after water intrusion. That's the standard you want. Measured drying, not hopeful drying.
5. Leak Detection and Source Identification
If nobody finds the source, the job isn't finished.
Water losses often start with an obvious symptom and a hidden cause. You see warped flooring in the kitchen, but the underlying issue is a slow supply-line leak inside the wall behind the refrigerator. You notice ceiling staining after a storm, but the roof penetration around a vent boot is where the water is getting in. You keep drying the same corner of a room, but the moisture is coming through a slab edge or foundation crack.
This step deserves attention because rebuilding over an unresolved leak wastes time and money. Drywall can be replaced. Cabinets can be rebuilt. None of that matters if water returns to the same spot the next time it rains or the next time pressure spikes in a line.
Clues that help pinpoint the source
- Timing matters: Water that appears only during rain points in a different direction than water that shows up all day.
- Pattern matters: A tight stain below a bathroom can suggest plumbing. Broad staining along an exterior wall can suggest roof or envelope issues.
- History matters: If this is the third time the same area got wet, mention that immediately.
- Access matters: Attics, crawl spaces, utility chases, and exterior penetrations often hold the answer.
An Austin home with recurring moisture near a patio door may need envelope inspection, not just interior drying. A Georgetown property with kitchen cabinet damage may need pressure testing and tracing behind the wall before any rebuild starts.
RestoTek TX explains the process in practical terms in its guide to professional leak detection for homes and buildings. In real jobs, source identification works best when it happens early, while the evidence is still fresh and before reconstruction covers anything up.
6. Microbial Prevention and Deodorization
Drying alone doesn't address every contamination concern.
Once water has affected porous materials, especially in warm and humid conditions, you have to think about microbial growth and odor control. That risk changes based on the source. Clean water from a supply line is one thing. Gray water from an appliance overflow is another. Sewage backup or floodwater raises the stakes because sanitation, disposal, and occupant safety become part of the job.
In Central Texas, heat and humidity speed up unpleasant smells and make damp materials hold odors longer. A room can look cleaner than it smells, and smell tells you a lot. Mustiness, sour cabinet interiors, wet insulation odor, and HVAC blowback all point to materials or spaces that still need attention.
If a room still smells wet after extraction and drying equipment have been running, treat that as useful information, not a nuisance.
What proper treatment usually includes
A Georgetown sewage backup may require removal of contaminated materials, antimicrobial application, and careful cleaning of surrounding surfaces. An Austin laundry overflow may call for antimicrobial treatment in wall cavities, deodorization inside cabinetry, and humidity control so odor doesn't return.
Homeowners should ask what products are being applied and where. They should also ask whether HVAC components or duct-adjacent areas were affected. If a system keeps circulating humid or contaminated air, the house won't feel normal even after visible repairs are done.
What works is targeted treatment after the affected materials are identified. What doesn't work is masking odor with air fresheners or assuming that because the carpet feels dry, the microbial risk is gone. Odor control should follow source control and drying, not replace them.
7. Mold Testing and Inspection
Sometimes mold is obvious. Often it isn't.
If drying was delayed, if water sat in hidden cavities, or if you notice musty odor after the initial emergency response, mold inspection becomes the next logical step. You don't need to test every water loss. You do need to test when the conditions or the evidence suggest growth may already be present, especially in a humid market like Georgetown and Austin.
The timing matters. Mold can begin developing within the early post-loss window already noted earlier, which is why delayed extraction and superficial drying so often lead to a second round of work. By the time a homeowner sees discoloration on drywall or smells a stale odor near a closet wall, the actual growth may be inside the cavity or beneath flooring transitions.
When testing helps and when it doesn't
Testing is useful when the scope is unclear. For example, an Austin home may have a persistent odor in the pantry after a refrigerator-line leak, but no visible growth in the open room. Inspection and sampling can help determine whether the issue is isolated behind one wall section or more widespread. In a Georgetown property with visible staining inside a bathroom wall cavity, inspection helps separate cosmetic staining from active mold growth that changes the remediation plan.
- Close off the area if possible: Limit traffic and avoid stirring dust before inspection.
- Don't run the HVAC unnecessarily: Air movement can complicate localized investigation.
- Save every report: Testing results, photos, and inspector notes belong in your file.
- Avoid DIY disturbance: Cutting into suspect walls without controls can spread contamination.
A common mistake is cleaning what you can see and assuming the issue is solved. That may work for a tiny, isolated spot. It doesn't work when a wall cavity, insulation pocket, or cabinet void stayed wet. Professional inspection gives you a scope you can act on instead of a guess.
8. Asbestos Testing and Safe Material Handling
Older homes bring another layer of risk. The material that got wet may not be the only problem.
If your property was built decades ago, damaged drywall compound, flooring, insulation, ceiling texture, mastic, or pipe wrap may need to be tested before demolition begins. Water restoration often requires opening walls, removing flooring, or cutting out damaged sections. On an older property, that disturbance should never happen on assumptions alone.
This matters in both homes and small commercial buildings around Central Texas, where remodel histories are mixed. One room may have newer finishes while the adjoining room still contains original materials. A wet floor tile or textured ceiling can look ordinary and still require regulated handling if it tests positive.
How to handle this step without slowing the whole job down
Tell the restoration company the age of the home right away. If you already know certain materials contain asbestos, say so before any cutting starts. If you don't know, ask whether testing is appropriate before demolition in affected areas.
A Georgetown house from the 1970s with water-damaged pipe insulation should be tested before any tear-out around plumbing chases. An older Austin property with wet floor tile that must be removed to address saturated subfloor should be evaluated before crews start lifting material.
Disturbing suspect material without testing can turn a straightforward water job into a health and compliance problem.
What works is coordination between restoration, testing, and licensed abatement when needed. What doesn't work is skipping the check because the water emergency feels more urgent. Safe demolition is part of proper restoration, not a separate issue.
9. Insurance Claim Documentation and Support
Good documentation doesn't just support the claim. It protects your version of events.
Water losses move fast. Crews arrive, equipment goes in, wet material gets removed, rooms start changing by the hour. If the condition of the property isn't documented clearly from the start, it gets much harder to show what happened, how serious it was, and what work was necessary to stabilize it.
This is one reason professional workflows matter. Specialized restoration software platforms such as Encircle, Albi, and CoreLogic's DASH are used in high-volume insurance-funded operations because they integrate moisture mapping and psychrometric drying logs, as discussed in MyQuoteIQ's review of restoration software trends. For homeowners, that means a better record of what was wet, how it was dried, and whether dry standards were reached.
The documents worth collecting
- Loss photos: Before cleanup, during mitigation, and after rebuild.
- Moisture records: Daily readings, mapped locations, and final dry confirmation.
- Scope of work: What was removed, treated, dried, and rebuilt.
- Invoices and receipts: Emergency purchases, hotel stays if covered, and contractor charges.
- Communication logs: Claim number, adjuster name, and dates of conversations.
An Austin owner with disputed cabinet replacement needs more than a wet-floor photo. They need documentation showing water reached cabinet bases or wall cavities. A Georgetown owner dealing with a ceiling collapse after a plumbing failure needs records that connect the source, the affected rooms, and the mitigation steps taken right away.
Ask RestoTek TX to share reports in a format you can save. The smoother claims tend to be the ones where the file tells a clear story from discovery through final drying.
10. Reconstruction, Final Inspection, and Customer Handoff
Reconstruction starts only after the structure is dry and the underlying issue is resolved.
This phase includes removing unsalvageable materials, rebuilding what was lost, and making sure the home is ready for normal use again. Drywall, insulation, trim, flooring, cabinets, paint, fixtures, and finish carpentry all come back into the picture here. For some homes, this is a focused repair in one room. For others, especially after flood intrusion, it becomes a coordinated rebuild across multiple trades.
The restoration industry itself reflects how central this process has become. The global Disaster Restoration Services Market is projected to reach USD 58.46 billion by 2031 from USD 45.20 billion in 2026, with Water Damage Restoration holding the largest share at 38.56% in 2025, according to Mordor Intelligence's disaster restoration services market report. For homeowners, the practical takeaway is simple. Water-loss rebuilds are common, specialized projects, and the best outcomes come from a disciplined handoff between mitigation and reconstruction.
What to confirm before signing off
A Georgetown home that took on stormwater in the lower level may need new drywall, flooring, trim, and drainage improvements outside. An Austin kitchen may need cabinet replacement, paint blending, fixture reset, and plumbing corrections so the same failure doesn't happen again.
Before you approve final completion, ask for:
- Written final moisture confirmation: The property should be documented as dry.
- A punch-list walkthrough: Note anything unfinished, mismatched, or still concerning.
- Maintenance guidance: Know what to watch after move-back in.
- Permit and repair records: Keep them with your home file.
The last walkthrough should feel calm, not rushed. If something still smells damp, looks unfinished, or hasn't been explained, ask. A proper handoff includes answers, records, and confidence that the house is ready again.
10-Step Water Damage Restoration Comparison
| Service | Implementation complexity | Resource requirements | Expected outcomes | Ideal use cases | Key advantages |
|---|---|---|---|---|---|
| Immediate Safety Assessment and Emergency Response | Low–Moderate, rapid protocols and trained responders | Qualified technicians, PPE, basic electrical/contamination tests, 24/7 dispatch | Hazard identification, containment, safety clearance, initial documentation | Active flooding, electrical/structural hazards, sewage contamination, emergency evacuations | Prevents injury, enables safe mitigation, supports insurance, reduces liability |
| Water Extraction and Removal | Moderate, equipment logistics and skilled operators | Industrial submersible pumps, truck-mounted units, wet/dry vacs, crew | Rapid removal of standing water, reduced secondary damage, quicker access for assessment | Large-volume standing water, sump failures, post-storm interiors | Minimizes structural damage, lowers mold risk, reduces restoration time/cost |
| Water Damage Inspection and Assessment | Moderate, detailed testing and reporting | Moisture meters, thermal imaging, cameras, certified technicians | Moisture mapping, documented scope, baseline for drying and claims | Hidden moisture suspicion, insurance documentation, pre-drying planning | Detects hidden damage, informs accurate scope, supports claims |
| Structural Drying with Dehumidification and Air Movement | Moderate, ongoing monitoring and equipment management | Commercial dehumidifiers, air movers, RH monitors, daily measurements | Reduced moisture to acceptable standards, mold prevention, stabilized materials | Post-extraction drying, humid climates, wood/subfloor saturation | Prevents mold, protects structural integrity, monitored drying progress |
| Leak Detection and Source Identification | Moderate–High, diagnostic testing, sometimes invasive | Thermal cameras, moisture tracing tools, pressure testers, system access | Pinpointed source, repair recommendations, prevention of recurrence | Recurring moisture, unknown source, pre-reconstruction checks | Addresses root cause, prevents repeat damage, supports repair planning |
| Microbial Prevention and Deodorization | Low–Moderate, timing critical during drying window | EPA-approved antimicrobials, foggers/enzyme agents, HVAC access | Reduced microbial growth, neutralized odors, improved indoor air quality | Sewage/gray water events, persistent musty odors, warm humid conditions | Protects occupant health, avoids costly mold remediation, restores odor-free spaces |
| Mold Testing and Inspection | Moderate, sampling and lab analysis required | Sampling kits, accredited lab services, certified inspectors | Objective mold identification, species data, remediation guidance | Visible mold, persistent odors, disputed insurance or scope | Targets remediation, prevents unnecessary demolition, documents condition |
| Asbestos Testing and Safe Material Handling | High, regulated testing and abatement coordination | Certified samplers, laboratory analysis, licensed abatement contractors | Confirmation of ACM, abatement plan, regulatory compliance for work | Older properties before demolition/disturbance, suspected ACMs | Protects health and legal compliance, prevents fiber release during rebuild |
| Insurance Claim Documentation and Support | Low–Moderate, consistent documentation workflow | Cameras, moisture logs, detailed reports, claims liaison | Comprehensive records, faster claims processing, stronger reimbursement | Any insured water loss, disputed coverage, complex restorations | Streamlines claims, provides evidence, protects owner reimbursement |
| Reconstruction, Final Inspection, and Customer Handoff | High, multi-trade coordination, permits, inspections | Construction crews, materials, permits, final testing and verification | Restored habitable property, code-compliant rebuild, final verification package | Unsalvageable damage, post-remediation rebuild, full restoration projects | Full property restoration, opportunity for upgrades, documented final handoff |
Your Georgetown & Austin Partner in Restoration
A water loss can make even a familiar home feel uncertain. Rooms you use every day suddenly become off-limits. You're trying to protect belongings, make insurance calls, understand what can be saved, and decide who to trust with the work. That's why a chronological water damage restoration checklist helps. It gives you a clear order of operations when the situation feels chaotic.
The sequence matters. Start with safety. Then remove standing water. Inspect thoroughly. Dry with instruments, not assumptions. Find and fix the source. Address microbial risks. Test for mold or asbestos when the situation calls for it. Keep your documentation organized from day one. Rebuild only after the property has reached dry standards. When homeowners skip steps or compress them, they usually pay for it later in the form of recurring moisture, odor, denied portions of a claim, or repairs that have to be opened up again.
Central Texas adds its own complications. Flash floods can bring water in fast. Heavy humidity can slow drying and make wet materials stay risky longer than they look. Roof and building-envelope leaks may show up only during certain storms. Plumbing failures in slab-on-grade homes can send water into places homeowners don't think to check. That's why local experience matters. A company working regularly in Georgetown and Austin knows what these losses typically look like, how weather affects timelines, and where hidden moisture tends to travel in this region.
RestoTek TX is built for that kind of full-cycle response. The team handles inspection, extraction, drying, microbial prevention, documentation, and reconstruction so you don't have to coordinate multiple vendors while your house is already disrupted. That continuity matters. The people measuring the moisture and setting the drying plan are connected to the people responsible for repairs, final verification, and handoff. Problems are less likely to get lost between stages.
Just as important, homeowners need calm communication during a stressful loss. You want straight answers about what happens today, what happens next, and what decisions can't wait. You want to know whether a room is safe, whether a cabinet can be saved, whether the odor is normal, and whether the house is dry. That's the value of working with a local, family-operated company that treats the process like guidance, not just a job ticket.
If you're dealing with water damage in Georgetown, Austin, or surrounding Central Texas communities, don't wait for the situation to sort itself out. Fast, methodical action gives you the best chance to protect the structure, preserve materials, and keep the claim process on track. RestoTek TX is available for emergency response and can help you move from the first call to the final rebuild with a plan that makes sense.
If water has entered your home or property, contact RestoTek TX for prompt help in Georgetown and Austin. The team can guide you through inspection, extraction, drying, documentation, and reconstruction so you can stop the damage, protect your claim, and get back to normal with less guesswork.