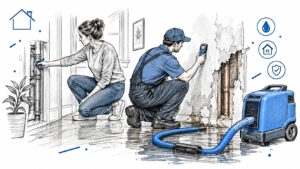
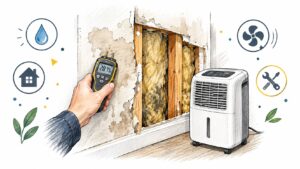
Most homeowners start with the wrong question. They ask what drywall mold killer will wipe the stain away, when the core issue is usually that the wall got wet and stayed wet long enough for mold to take hold. Around Georgetown and Austin, that happens after roof leaks, plumbing failures, HVAC condensation, and the kind of heavy rain that pushes water where it doesn't belong.
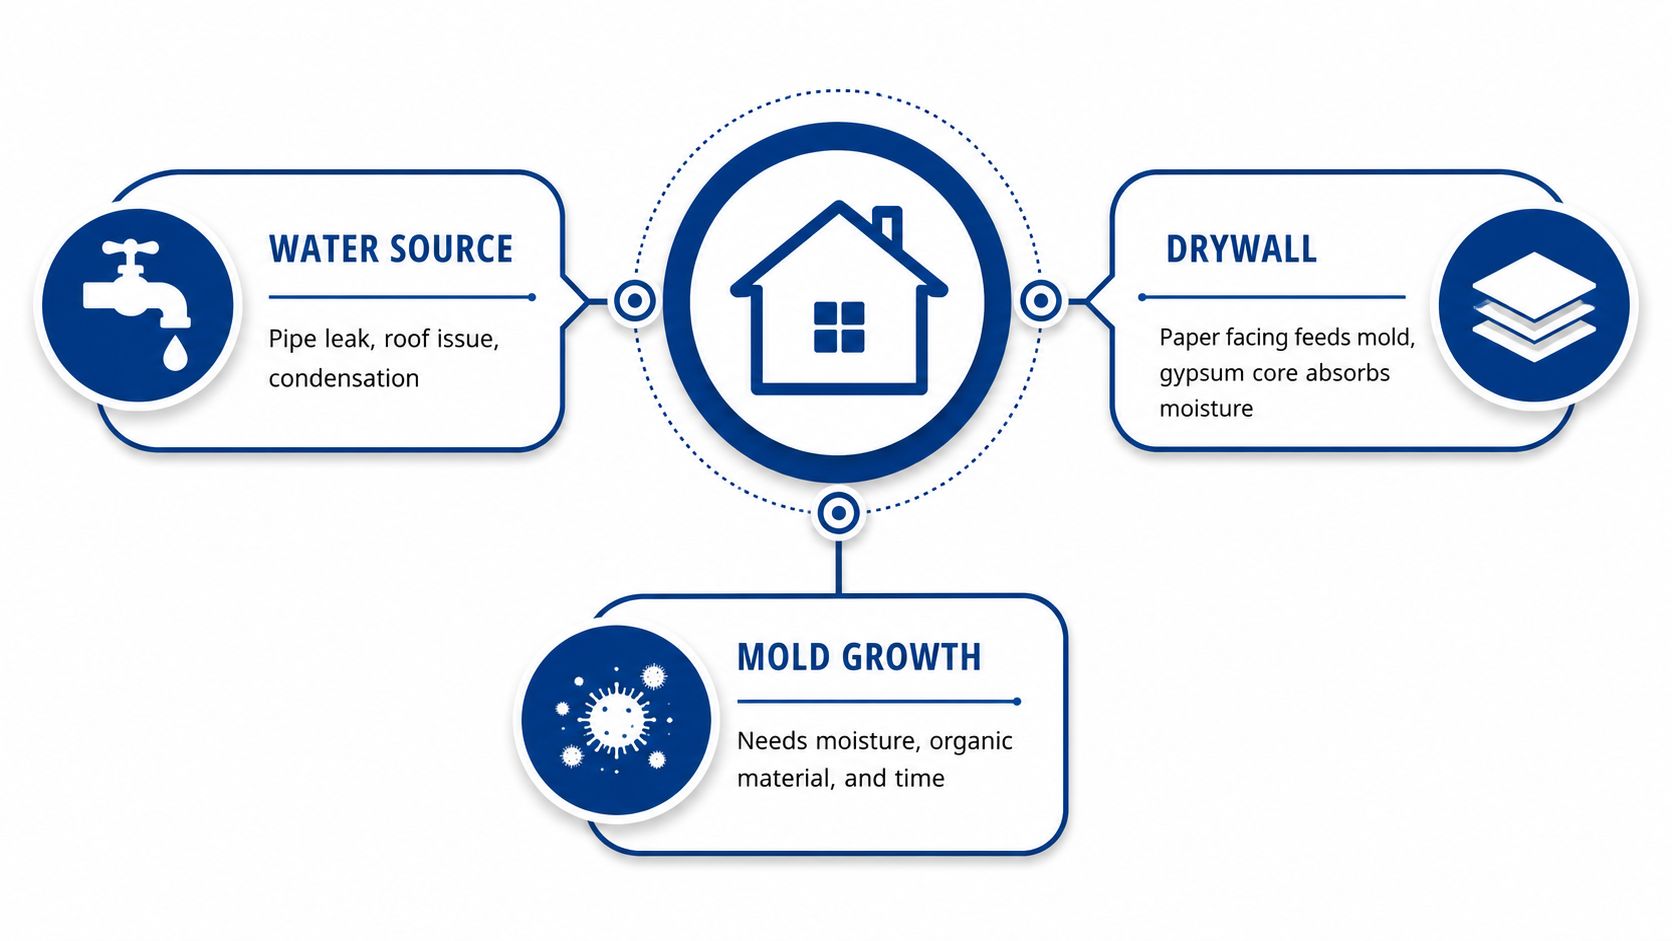
That's why the spray is rarely the whole answer. On drywall, porosity matters more than marketing, because the paper facing can feed growth and the gypsum core can hold moisture behind the surface. The CDC says wet areas should be cleaned and dried within 24 to 48 hours to help prevent mold growth, and when bleach is used for cleanup, it recommends no more than 1 cup per 1 gallon of water CDC cleanup guidance. If the board is soft, swollen, or the smell keeps coming back, the question isn't what kills mold, it's why the drywall is still contaminated.
If you're trying to connect the leak to the damage, this water damage and mold guide helps frame the bigger picture. Once drywall has absorbed moisture, the fix is usually a moisture problem first and a cleaning problem second.
Why Drywall Mold Is Mostly a Moisture Problem
A lot of people treat mold like a stain. On drywall, that gets expensive fast because the board is porous, layered, and built with a paper facing that can hold organic material. Once water gets in, surface cleaning may only deal with what you can see.
Why Central Texas homes get hit so often
In Georgetown and Austin, the pattern is familiar. A spring storm pushes water into a wall assembly, a summer HVAC system sweats at the wrong spot, or a small plumbing leak sits behind a cabinet long enough to soak the board. The mold is not coming from nowhere. It is taking advantage of moisture that stayed in place.
Practical rule: if the wall got wet and did not get dried quickly, assume the problem is bigger than the stain on the paint.
That is why the 24 to 48 hour drying window matters. The CDC's cleanup guidance says wet areas should be dried quickly to help prevent mold growth, and its cleanup recommendations also explain basic handling steps for contaminated material CDC cleanup guidance. In a Central Texas home, a leak under a bathroom sink, a roof intrusion after a storm, or condensation in a hot wall cavity can turn into a drywall problem before the homeowner even notices the odor.
Why the spray-first approach fails
The phrase drywall mold killer sounds decisive, but drywall is the wrong surface to treat like a simple clean-and-disinfect job. When the paper facing is involved, a product can hit the surface without reaching what is embedded underneath. That is why a durable fix usually means finding the leak, drying the cavity, and removing contaminated board if the substrate has already been compromised.
The core lesson is simple. If water is still entering the wall, any chemical you spray is working against an active source. The wall will not stay clean until the moisture stops.
If you are trying to connect a leak to the damage, this water damage and mold guide helps frame the bigger picture. Once drywall has absorbed moisture, the fix is usually a moisture problem first and a cleaning problem second.
How to Tell If Drywall Can Be Treated or Has to Come Out
Not every patch of moldy drywall needs a saw. Some small, sealed, surface-only spots can be cleaned if you catch them early and the board still feels solid. Others need to come out right away, because the drywall itself has already become part of the contamination problem.
What your hand and nose can tell you
Press the area gently. If it feels soft, spongy, swollen, or crumbly, that's a sign the board is no longer a good candidate for treatment. Watch the paper facing too. Bubbling, peeling, or frayed edges usually mean moisture got past the paint film and into the material.
Odor matters just as much as appearance. If the musty smell returns after cleaning, there's a good chance you're dealing with hidden wall-cavity moisture or contamination that wasn't reached on the first pass. Staining near the baseboard, around an outlet, or along the bottom edge of a wall often points to water traveling where you can't see it.
A patch that looks small can still be a removal job if the drywall is soft or the odor keeps coming back.
The decision threshold that saves time
Mainstream guidance isn't perfectly consistent, but the direction is clear. Small mold on sealed drywall may be scrubbed, while unsealed drywall or a larger area usually needs professional remediation, and stubborn board is often better cut out and replaced SERVPRO sheetrock guidance. That lines up with what I see in the field. If the wall is painted, solid, and clearly surface only, there's a chance cleaning makes sense. If the paper is damaged, the staining is spreading, or the issue tracks into a cavity, replacement is the honest answer.
For a deeper self-check on whether you're looking at a surface issue or something hidden, use this house mold testing guide as a starting point. It's not about chasing a cosmetic fix. It's about deciding whether the drywall is still salvageable before you spend money on the wrong product.
Pre-Work Before Any Mold Killer Product Touches the Wall
The mistake I see most often is grabbing a spray bottle before the room is ready. If the moisture source is still active, the area is open to the rest of the house, or the drywall is already soft and compromised, the spray just spreads the problem around. Around Georgetown and Austin, that shows up a lot after heavy rain events and during humid summers, when wet wall cavities stay wet long enough for the paper face to feed growth.
Gear and safety come first
Use an N95 or P100 respirator, gloves, eye protection, and clothes you can launder hot afterward. Do not mix bleach with ammonia or other cleaners, because that creates a dangerous mix and does not make the job safer. If you decide to use bleach at all, keep the dilution within the CDC's cleanup guidance of no more than 1 cup per 1 gallon of water CDC cleanup guidance.
Stop the water, then dry the cavity
A spray cannot outrun an active leak. Shut off the supply line if plumbing failed, fix the roof issue if storm water got in, or clear the HVAC condensate drainage if that is where the water is coming from. Then dry the cavity, not just the face of the wall. The source-control point matters because mold keeps feeding as long as the materials stay wet.
Containment does not need to be elaborate, but it does need to hold. Plastic sheeting, tape, and a box fan exhausting to a window can keep the work area from spreading dust and spores through the house. Close HVAC returns in the room if you are doing a small DIY cleanup. That kind of basic field discipline keeps the rest of the house from becoming part of the problem.
For a more technical look at drying, this Central Texas structural drying resource describes wall work after water intrusion in a way that matches what we see in the field. If the framing behind the wall is still wet, the product on the shelf is not the fix. Drying is.
What Drywall Mold Killer Products Actually Do
On non-porous surfaces, a drywall mold killer is the wrong phrase but the right category of tool. On tile, metal, or another hard surface, these products can do useful work when the surface is cleaned first and the label directions are followed. On drywall, they're limited because the board can absorb moisture and hide contamination below the surface.
The product matters less than the workflow
Bleach solutions, hydrogen peroxide cleaners, quaternary ammonium sprays, and dedicated mold-remediation products all have a place. Their effectiveness depends on where they're used. A cleaner can work on visible surface growth on painted, sealed board, but it can't turn compromised drywall into a healthy substrate.
The contact time matters too. One commercial disinfectant-mold product specifies a 10-minute wet contact time, requires re-cleaning heavily soiled areas, and says to repeat use every 7 days or more frequently if growth occurs commercial product directions. That's the kind of detail homeowners skip, then blame the product when the spot comes back.
What gets missed most often
The most common failure is skipping pre-cleaning. Dirt, grime, and loose debris block full contact, so the cleaner never reaches the surface evenly. The second failure is treating porous drywall like it's a bathtub wall. If the paper facing is damaged or the gypsum core has been soaked, the chemistry on the surface isn't solving the core problem.
| Mold Killer Products Compared | Best on | Drywall performance | Key usage rule |
|---|---|---|---|
| Bleach solution | Non-porous surfaces | Limited on drywall, can wet the board further | Use only in the CDC-recommended dilution and never mix with other cleaners |
| Hydrogen peroxide cleaner | Painted hard surfaces | Can help on small sealed spots | Pre-clean first, then keep the surface wet for the full contact time |
| Quaternary ammonium spray | Hard, clean surfaces | Poor fit for porous board | Follow the label exactly and don't skip debris removal |
| Dedicated mold-remediation product | Non-porous and some sealed surfaces | Useful only when the drywall is still intact | Treat it as a surface tool, not a structural fix |
The bottom line is blunt. On drywall, the label doesn't matter as much as whether the wall is still sound. If the substrate is compromised, a spray is a temporary cosmetic step, not a cure.
Treating Small Surface Mold on Drywall Step by Step
This is the narrow case where a drywall mold killer can earn its keep. The drywall has to be sealed, the growth has to be small, and the board has to be dry and structurally intact. If any of those conditions fail, skip the cleaning job and move to removal.
A careful DIY sequence
Start with an inconspicuous spot if you're unsure how the finish will react. Then remove loose material with a HEPA vacuum or a damp cloth so the cleaner can touch the surface. Apply the product with a spray bottle or sponge, and keep the area wet for the full contact time listed on the label.
Wipe the surface after the contact time, then let it air-dry completely. “Dry” means more than looking dry under kitchen light. If you have a moisture meter, use it to confirm the area has dried rather than just feeling cool to the touch.
What to watch over the next two weeks
Monitor for the odor coming back, fresh spotting, or any softening at the edges. If the growth returns, the paper facing is damaged, or the area was larger than a dinner plate, stop treating it and switch to removal. Re-spraying the same spot over and over is usually a sign the board absorbed the problem.
If a second cleaning doesn't hold, the wall is telling you the moisture problem was deeper than the surface.
Small surface cleanup has a place, but only in the right conditions. That's the distinction that saves homeowners from buying the wrong bottle twice.
When Removal Is the Real Fix and What That Looks Like
I've seen plenty of Georgetown and Austin walls that looked like a cleaning job until the drywall knife went through them. One common scenario is a lower wall after a washing machine supply line fails during a summer storm. The stain looks modest from across the room, but the back of the board tells a different story.
What a real removal job involves
The affected area gets measured and marked, then cut out with a utility knife or drywall saw. The removed material goes into heavy plastic bags while it's still damp so spores and debris stay contained. That bagged material should be handled as construction debris, not tossed around loose.
Once the board is out, the studs, cavity, and the back side of the remaining drywall need to be cleaned and dried. The benchmark I use is the remediation-style guidance that affected areas should be dried to below 20% moisture content before reapplication or rebuild remediation specification. New drywall shouldn't go up until the framing is completely dry. Otherwise, you're closing moisture into the wall and inviting the same failure again.
Why this isn't a defeat
Removal sounds dramatic until you compare it with repeated staining, odor, and patch repairs that never hold. A compromised sheet of drywall isn't something a spray can restore structurally. Once the cavity is clean, dry, and source-controlled, the wall can be rebuilt properly.
That's the durable answer when mold has moved beyond the surface. It's also why product-first advice so often wastes a homeowner's time. The board itself may be the contaminated material.
Prevention, Documentation, and When to Call a Professional
The easiest mold job is the one you never start. In Central Texas, that means watching indoor humidity, checking the areas that sweat or flood first, and staying ahead of the next storm or summer condensation cycle.
Prevention that actually fits local homes
Use a cheap hygrometer and keep an eye on humidity, especially after rain or during the hottest months. Run exhaust fans in bathrooms and kitchens, and inspect baseboards, window trim, and low wall areas after every heavy rain event. If you catch a condensate issue before it soaks a wall, you avoid the drywall repair altogether.
What to document if you might file a claim
Take dated photos before, during, and after any mitigation work. Keep moisture readings, invoices, and product names together in one place. If a restoration company gives you a written scope, save it. Claims run better when the evidence is clear and organized.
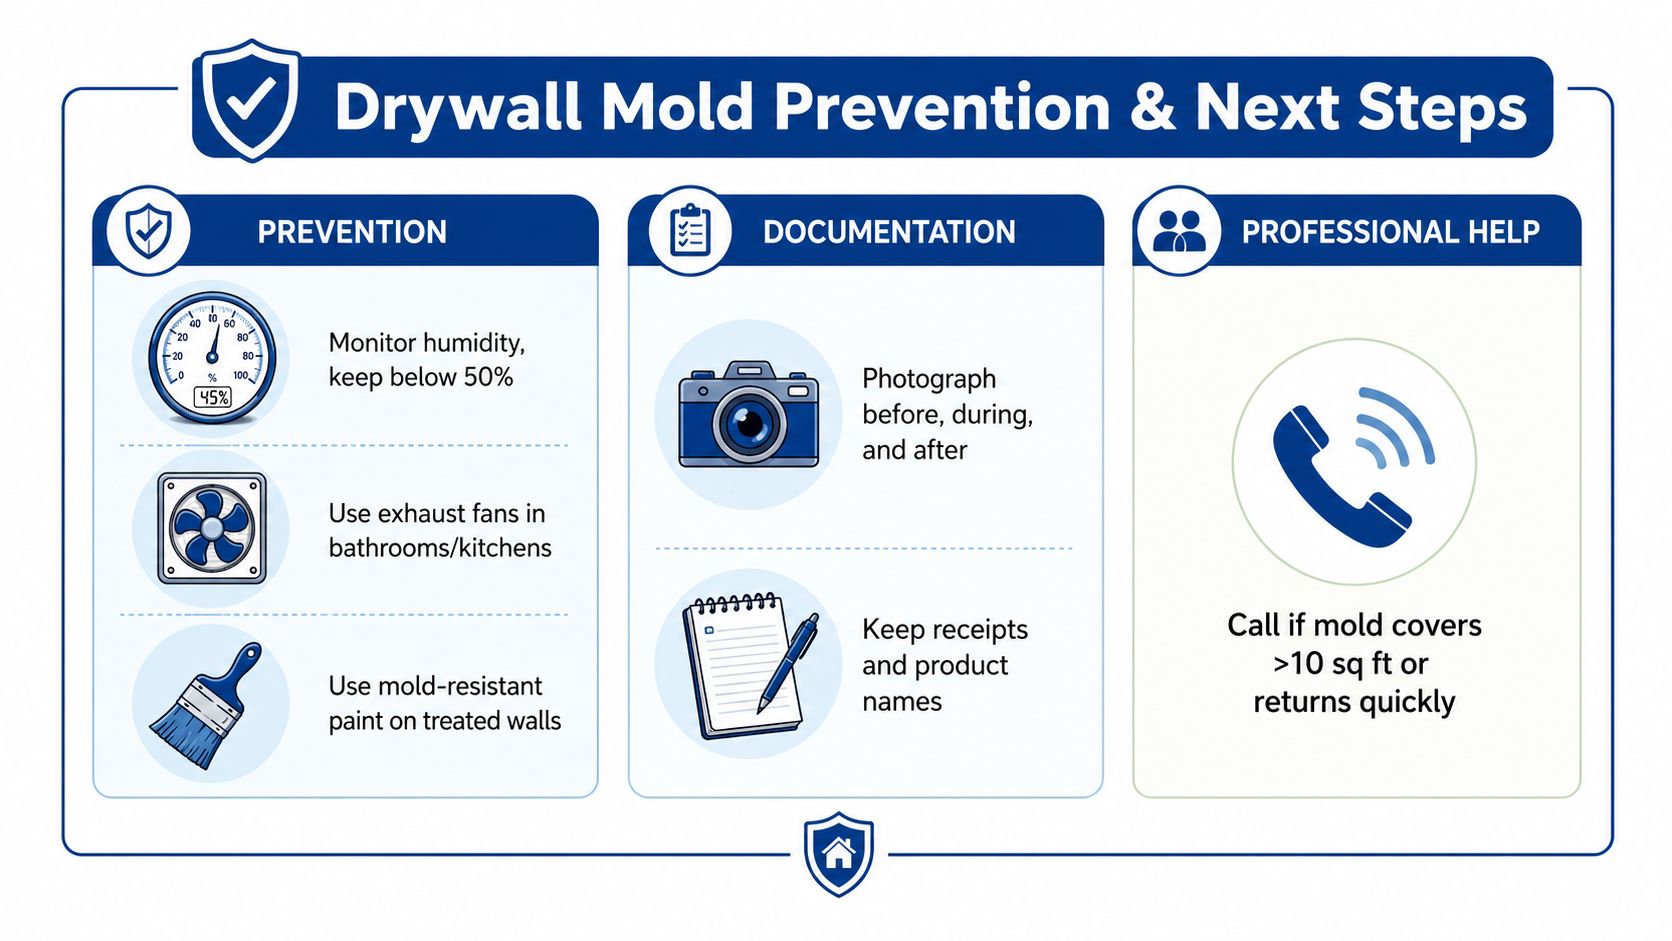
Stop DIY and call a professional when the affected area is larger than roughly 10 square feet, the moisture readings stay high, the odor keeps returning, or any sewage or HVAC-related contamination is involved. If you want a local team that handles inspection, mitigation, structural drying, prevention, and reconstruction in Georgetown and Austin, visit RestoTek TX and ask for a no-cost estimate. They work this problem end to end, which is exactly what moldy drywall usually needs.