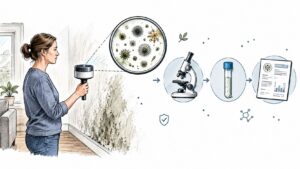
The equipment can be gone, the dehumidifiers can be silent, and the house can still fail the last mile. In Austin and Georgetown, a water-damage job is only finished when the final inspection checklist proves the structure is dry, the repairs are complete, and the property is ready for handoff without surprises. That matters for homeowners who want the place livable again, for adjusters who need defensible documentation, and for restoration teams that have to close out work cleanly.
The mistake I see most often is treating the final walk-through like a cosmetic sweep. A room can look polished and still have hidden moisture, incomplete drainage, exposed wiring, or a repair that won't survive the next storm. The smarter approach is to separate appearance from readiness, then verify both with a checklist that matches the project's risk.
For water-damage restoration, the best practice is to use the right checklist for the right job. A small supply-line leak does not need the same closeout process as a flood that touched framing, finishes, and contents. The seven checklists below give you that side-by-side view, with practical examples for local Austin and Georgetown projects.
1. IICRC Water Damage Final Inspection Checklist
The IICRC approach is the backbone for a serious final inspection checklist after water loss. It fits the closure phase because it ties the finished work back to drying standards, documentation, and the actual loss path, not just how the room looks on camera. For a Georgetown homeowner, that matters when a pipe leak damaged a hallway, baseboards, and the lower portion of a wall. For a commercial space in Austin, it matters even more because the handoff has to stand up to insurance review and future dispute.
The strongest IICRC-style closeout starts before the last piece of equipment leaves. Moisture readings should be captured at baseline, then compared at the end, with photos that show the meter display and the exact location. Ambient conditions also matter because temperature and humidity help explain why one room dried faster than another.
Practical rule: If a reading cannot be tied to a location, a photo, and a date, it is weak evidence during a claim dispute.
What to verify before sign-off
- Meter calibration records should be current, so readings are defensible.
- Baseline moisture photos should exist before extraction or demolition starts.
- Final readings should be taken at the same points used during drying.
- Ambient conditions should be documented during the closeout visit.
- Homeowner summary sheets should explain what the numbers mean in plain language.
For teams like RestoTek TX water damage restoration technician, this checklist supports a cleaner handoff because it connects field work to the final record. That record is what homeowners, adjusters, and contractors use when the project is questioned later. Keep the files organized long after the job closes, because water-loss arguments rarely happen on the same day as the walkthrough.
2. Xactimate Digital Final Inspection Template
A digital closeout template is the practical choice when the job has multiple stages, multiple parties, and a paper trail that cannot be sloppy. Xactimate works best when the restoration scope, the photos, and the final note set all live in one workflow. For an Austin rebuild after mitigation, that means the same project file can show extraction, dry-out, repairs, and final verification without forcing everyone to dig through separate email threads.
The primary strength of a digital template is consistency. If the photo angles change from job to job, the documentation gets harder to compare and defend. If the staff enters different labels for the same defect, the closeout gets messy fast. Standardized templates keep the handoff from turning into a scavenger hunt.
What makes the digital version work
A technician should use the same photo positions across common loss types, because that makes before-and-after review much easier. A project manager should also train the crew on data entry, since bad field notes create rework at the office later. If the company already uses accounting software, syncing the report helps reduce billing delays and avoids extra manual entry.
A digital checklist is only as strong as the person entering the data.
That is why the template is most effective when one person owns the final report review before it leaves the office. For Central Texas properties, especially mixed residential and small commercial jobs, the ability to export a clean PDF matters because owners, agents, and adjusters often want the same version. The value is not the software itself, it is the discipline it forces across the closeout process.
3. EPA and State Health Department Microbial Remediation Final Inspection Checklist

When water sits too long, the final inspection has to answer a different question. It is no longer just “is it dry,” it is “is it safe enough for occupancy, and is the remediation complete.” That distinction matters in flooded Austin homes, older Georgetown properties, and commercial spaces where people need to re-enter quickly.
Microbial closeout should verify that contaminated materials were removed or treated, that the work area is contained properly, and that any testing supports re-occupancy. Air quality testing belongs at the end of the job, not as an afterthought once the equipment is already out. If the job included hidden cavities, crawlspaces, or attic spaces, those areas need the same attention as the living room.
What a defensible microbial closeout includes
- Material removal records with photos, so the scope is clear.
- Clearance testing timing on the final day of remediation, before equipment comes down.
- Area-by-area review of living spaces, crawlspaces, and attics.
- HEPA and negative-air continuity during active remediation.
- Plain-language results summary for the homeowner or property manager.
The point is not to overwhelm the occupant with jargon. The point is to leave a record that shows what was found, what was removed, and what supports safe use of the space. For teams using RestoTek TX mold remediation, that kind of final inspection helps connect prevention work to the actual handoff. It is especially useful after prolonged standing water, where the surface may look acceptable long before the hidden conditions are.
4. Structural and Contents Final Inspection Checklist for Reconstruction Phase
A reconstruction closeout is where restoration stops being about drying and starts being about livability. If framing, drywall, trim, cabinets, flooring, or contents restoration were part of the scope, the final inspection needs to check more than cleanliness. It has to confirm that the rebuild matches the approved scope and that the repaired area functions like a real part of the home or business again.
Side-by-side review proves particularly helpful. Structural items should be checked first, then mechanical, electrical, and plumbing systems, then finishes. That sequence keeps the team from polishing a room before the concealed work is verified. In a Georgetown residence with damage across two rooms, this order avoids the common mistake of calling the job done after paint and flooring look good.
The sequence that catches problems early
Start with the scope of work and match each repaired item to a location. Confirm permits, inspection sign-offs, and contractor licenses are in the file before the final walk-through begins. Then move through the job in layers, because a trim issue is easier to fix before the homeowner moves furniture back.
A useful field habit is to walk the property with the homeowner before final sign-off. They often spot details the crew has stopped seeing, especially around doors, hardware alignment, or transition strips. If a cabinet door binds or a floor transition lifts, that is a closeout issue, not a future maintenance note.
Keep the documentation simple and complete. A clean scope, a complete permit file, and a photo set of finished rooms prevent unnecessary arguments later. This checklist works best when reconstruction is treated as the final stage of restoration, not as a separate afterthought.
5. Safety and Hazmat Final Inspection Checklist for Asbestos and Environmental Concerns
Older properties change the final inspection completely. If the water loss disturbed materials that could contain asbestos or other hazards, the checklist has to prove that the site is safe, not just repaired. In Austin neighborhoods with older construction, that can mean asbestos tile, pipe wrap, or roofing materials that were already present before the water event. In commercial buildings, the stakes rise because multiple occupants may re-enter the space.
The best hazmat closeout starts early. Screening should happen during the initial assessment, not after demolition begins. If a licensed environmental testing firm is needed, the final inspection file should hold the testing record, removal or encapsulation notes, and the clearance documentation in a separate folder from the standard restoration paperwork.
Hazard documentation protects both the owner and the contractor when a later question comes up about what was disturbed and who handled it.
What to separate in the hazmat file
- Pre-disturbance photos of suspect materials.
- Testing and clearance records from the licensed firm.
- Removal or encapsulation notes tied to the exact location.
- Staff awareness logs showing the hazard was flagged correctly.
- Owner communication explaining the risk and the action taken.
This checklist is not about fear. It is about precision. Water damage can expose a material that was already there but hidden, and the final inspection has to account for that reality before anyone signs the property back over. If a room was repaired correctly but the underlying material was never addressed, the job is still open.
6. Insurance Adjuster and Claims Coordinator Final Inspection Verification Template
The insurer's version of the final inspection checklist is about proof, scope, and payment control. Adjusters and claims coordinators want to see that the work matched the estimate, that the property is safe for occupancy, and that any changes were documented before the invoice is finalized. For Austin and Georgetown claims, this file often becomes the last checkpoint before payment authorization.
That makes communication part of the inspection. If the scope changed because hidden damage appeared, the file should show why. If a line item increased, the supporting note should already be attached. A clean packet keeps the conversation professional and reduces back-and-forth at the end of the claim.
For a practical example, a carrier may ask whether the rebuilt flooring matches the approved scope or whether a change order was pre-approved. If the contractor can answer with photos, permits, work orders, and a clear summary, the closeout moves faster. If not, the claim stalls.
What adjusters usually need in one packet
Provide the documentation before the final meeting if possible. Have permits, inspection sign-offs, work orders, and test results ready to review. If an adjuster needs to understand a scope change, show the original estimate and the reason for the revision instead of arguing it verbally.
For RestoTek TX home insurance water damage claim, the value of this template is straightforward, it organizes the closeout around what claims teams need. That includes written approval for changes, not just a finished room. The best handoffs are the ones where nobody has to chase missing evidence.
7. Homeowner Communication and Satisfaction Final Inspection Checklist
Of the various checklists, the homeowner checklist is frequently underestimated. A room can pass every technical test and still leave the owner confused, anxious, or unconvinced that the job is finished. In a family home in Georgetown or an occupied rental in Austin, that matters because trust is part of the final deliverable.
The strongest communication checklist is plain, specific, and calm. It should explain what was done, what was left in place, what still needs attention, and what the owner should watch for after the crew leaves. It also helps to show the homeowner the moisture meter so “dry” has a real meaning instead of sounding like a sales phrase.
What to cover in the final conversation
- Work completed in simple language, without trade jargon.
- Any remaining limitations that were discovered during the job.
- Warranty or maintenance notes the owner should keep.
- Insurance next steps if additional paperwork is still pending.
- Prevention advice for future leaks, backups, or storm intrusion.
A calm walk-through does more than close the job. It reduces the chance that the owner calls back later because they did not understand why a baseboard was replaced or why a room needs continued monitoring. The best closeout happens when the homeowner knows what was fixed, what was documented, and who to call if something changes.
A follow-up message within a week is still useful even after the paperwork is signed. That small step often surfaces questions before they become complaints, and it shows the owner that the job was managed like a project, not a transaction.
7-Point Final Inspection Checklist Comparison
| Checklist | Implementation complexity | Resource requirements | Expected outcomes | Ideal use cases | Key advantages |
|---|---|---|---|---|---|
| IICRC Water Damage Final Inspection Checklist | High, requires IICRC‑certified technicians and calibrated meters | Calibrated moisture meters, trained techs, photo & documentation time | Moisture benchmarks met (≤17%), ANSI/IICRC‑compliant closure, defensible records | Insurance-supported water‑damage drying completion | Industry‑recognized, legally defensible, speeds claims |
| Xactimate Digital Final Inspection Template | Medium, software setup and staff training required | Subscription, mobile devices, internet, templates & training | Real‑time reports, cost reconciliation, GPS/timestamp audit trail | Multi‑phase projects, adjuster collaboration, claims workflows | Streamlines paperwork, integrates estimates, improves visibility |
| EPA & State Microbial Remediation Checklist | High, specialized mold assessment and lab coordination | Air/surface sampling kits, HEPA/negative air, lab services, trained remediators | Post‑remediation clearance, documented IAQ, occupant safety assurance | Mold contamination, health/safety re‑occupancy, commercial units | Health‑focused clearance, regulatory compliance, liability protection |
| Structural & Contents Final Inspection (Reconstruction) | High, coordinates multiple trades and licensed inspections | Multiple trades, permits, licensed inspectors, materials, documentation | Restored structure & contents, code compliance, punch‑list resolution | Full reconstruction after mitigation; major repair projects | Ensures structural safety, prevents rework, supports final payment |
| Safety & Hazmat Final Inspection (Asbestos/Environmental) | High, strict regulatory procedures and licensed contractors | Specialized testing, licensed abatement crews, disposal manifests, PPE | Hazard removal/encapsulation and regulatory clearance for occupancy | Pre‑1980s properties or suspected asbestos/lead disturbance | Regulatory compliance, occupant protection, clear liability trail |
| Insurance Adjuster & Claims Coordinator Verification Template | Medium, requires multi‑party coordination and reconciliation | Complete claims docs, estimates/invoices, test results, adjuster time | Verified completion for claim payment, reduced disputes, audit‑ready file | Final verification for insurer close‑out and payment authorization | Speeds payment, reduces disputes, supports fraud prevention |
| Homeowner Communication & Satisfaction Checklist | Low–Medium, communication‑focused, time intensive walk‑throughs | Staff time, plain‑language summaries, survey forms, follow‑up | Higher homeowner satisfaction, fewer complaints, homeowner sign‑off | Residential projects prioritizing customer experience and referrals | Builds trust, reduces complaints, generates referrals |
Securing Your Restoration Success
A good final inspection checklist does more than mark tasks complete. It protects the restoration record, reduces claim friction, and gives the homeowner a clear answer to the question that matters most, is the property ready to live or work in again. In water-damage projects, that answer has to come from evidence, not optimism.
The seven checklists above cover different failure points. The IICRC-style checklist anchors drying and closeout. The digital template keeps the project organized. The microbial checklist protects health and occupancy decisions. The structural and contents checklist makes sure the rebuild really matches the scope. The hazmat checklist addresses older or higher-risk properties. The insurance verification template helps the claim move forward. The homeowner communication checklist closes the loop with plain language and clear expectations.
For Austin and Georgetown projects, that mix is practical, not theoretical. Central Texas jobs often move from mitigation into reconstruction quickly, and each stage can create its own blind spots. A room may look finished while still missing code-ready details, complete documentation, or a homeowner explanation that keeps everyone aligned.
RestoTek TX fits naturally into this process because the company's service model spans inspection, drying, microbial prevention, and reconstruction in Georgetown and Austin. That kind of end-to-end workflow is easier to close out when the final inspection is treated as a control point, not a formality.
If you're wrapping up a water-loss project now, use the checklist that matches the risk, then walk the property with a camera, a meter, and a clean paper trail. And if you need help with drying, remediation, or rebuild closeout in Georgetown or Austin, contact RestoTek TX to request service and move the project to a documented finish.