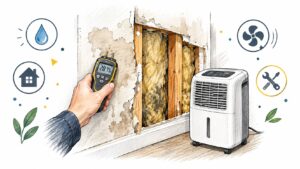
Water on the floor changes the pace of everything. One minute you're starting your day. The next, you're standing in socks near a leaking supply line, a soaked basement wall, or a ceiling stain that wasn't there last night, trying to decide what matters first.
If you're dealing with water damage in Fairfax, the right first moves can save materials, shorten the drying job, and make a major difference when the insurance claim starts. That matters because water damage and freezing claims are the second leading cause of property damage claims in the United States, accounting for nearly 24% of all insurance claims, and the average payout is $13,954. Even one inch of water can cause around $25,000 in damage according to these water damage statistics.
The hard part is that homeowners usually have to manage two emergencies at once. One is physical. Stop the water, protect the house, dry the structure. The other is administrative. Document the loss in a way that shows what happened, when it happened, and why it should be treated as a covered event instead of a maintenance problem. In older Fairfax homes, that second part gets overlooked far too often.
Your First 30 Minutes After Discovering Water Damage
The first half hour is about control, not cleanup. Don't start ripping out drywall or running box fans everywhere. First make the property safe, then preserve the evidence, then reduce the spread.

What to do before the restoration crew arrives
Shut off the water source
If the leak is coming from a supply line, appliance connection, toilet stop, or broken pipe, close the nearest shutoff valve first. If you can't isolate it fast, shut off the home's main water supply. Every minute of active flow pushes water deeper into baseboards, subfloors, insulation, and framing.Treat electricity as a separate hazard
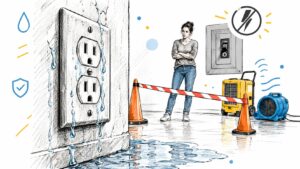
If water is near outlets, appliances, or your electrical panel, don't step into standing water to investigate. If you can safely reach the breaker from a dry area, shut power to the affected zone. If you can't, wait for qualified help. A wet floor is a slip problem. A live wet floor is something else entirely.Document before you disturb the scene
Take wide photos first, then close-ups. Capture the source, the path of travel, the floor, baseboards, walls, ceilings below, and any damaged belongings. Record a short video while describing what you found and when you found it. For a practical homeowner checklist, this guide on what to do immediately after water damage is useful.Move what you can without spreading damage
Pick up rugs, paper items, electronics, shoes, storage boxes, and small furniture if the area is safe. Put aluminum foil, blocks, or plastic barriers under furniture legs if items must stay in place. Don't drag soaked furniture across hardwood or carpet. That usually turns one damaged area into three.
Practical rule: Save the house first, but preserve the claim file while you're doing it.
What not to do
A few common reactions make the job harder:
- Don't wait to “see if it dries.” Water keeps moving after the leak stops.
- Don't paint over a stain or close the wall back up. Hidden moisture doesn't care what the surface looks like.
- Don't throw away damaged materials too early. Your carrier may want to inspect them.
- Don't assume clear water stays clean. Once water passes through building materials, the risk profile can change.
The right emergency response isn't dramatic. It's deliberate. Safe shutdown, careful documentation, and limited mitigation beat frantic cleanup every time.
The Professional Restoration Process Step by Step
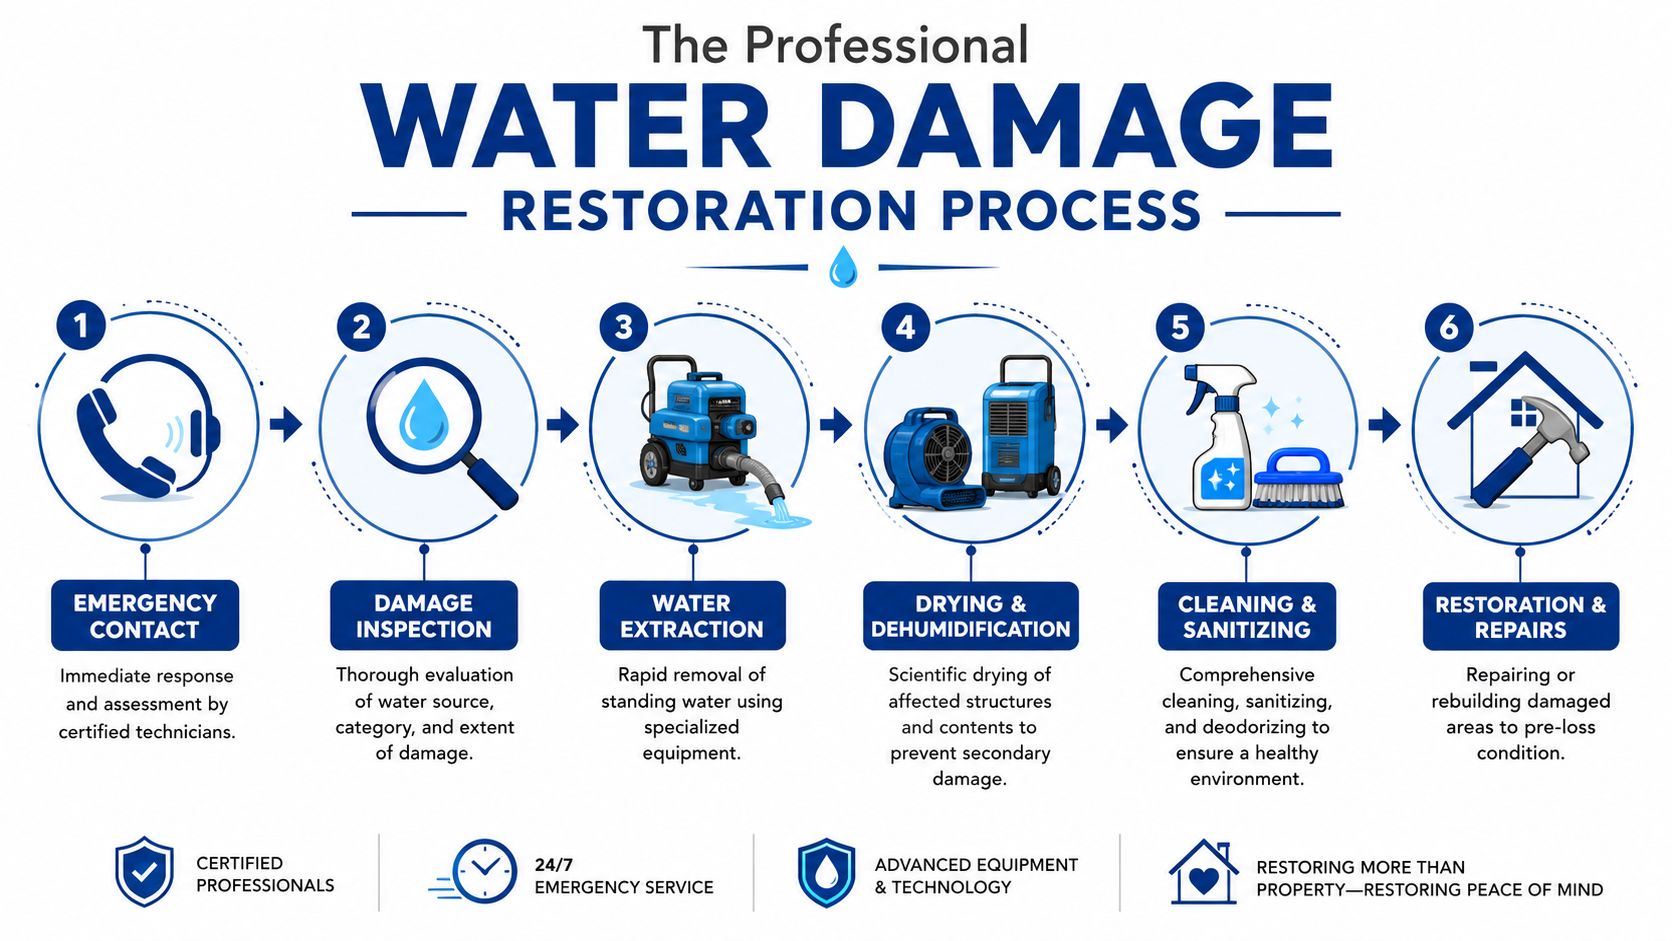
The first full visit should answer three questions fast. Where did the water start. How far did it travel. What has to happen today to keep a drying job from turning into a reconstruction job and an insurance dispute.
Inspection and classification
A competent crew starts with the source and the building assembly, not with fans. In Fairfax, that matters because older homes often have plaster, layered flooring, retrofitted plumbing lines, and previous repairs that hide the true path of travel.
The inspection should identify the water source, affected materials, and the depth of involvement inside floors, wall cavities, and trim details. Structural drying classes still matter because wet hardwood over wood subfloor requires a different plan than water on tile over slab. The crew should also determine whether the loss still looks like a sudden plumbing event or whether conditions suggest a long-term issue that an insurer may try to frame as deferred maintenance.
That last point affects more than scope. It affects your claim file.
If I am managing a loss in an older Fairfax house, I want photographs of the failed supply line, drain connection, or appliance hose before cleanup removes the evidence. I also want notes on corrosion patterns, break location, and whether surrounding materials show fresh saturation versus old staining. That documentation helps counter the common carrier argument that a plumbing failure was gradual and therefore excluded.
Moisture mapping and baseline readings
Good drying plans come from measurements, not assumptions.
The crew should create a moisture map with meter readings, affected-room diagrams, and humidity conditions before placing equipment. The Environmental Protection Agency explains that hidden moisture can remain inside walls and other cavities even when surfaces appear dry, which is why inspection has to go beyond what you can see at a glance in its guidance on flooded homes and cleanup. Baseline readings also give you a record to compare against daily progress notes and final dry verification.
That record matters on older-house claims. If a carrier later questions whether cupped flooring, swollen trim, or cracked plaster came from this event, the initial readings and room-by-room map help tie the damage to a defined date of loss. Homeowners trying to understand the repair side of that equation can review these home water damage repair cost factors alongside the drying documentation.
Extraction and controlled demolition
Extraction is the fastest way to reduce damage, but the true skill is deciding what to open and what to leave in place.
Standing water comes out first. After that, the crew makes targeted removal cuts where readings show trapped moisture or where materials will not dry reliably in place. In a Fairfax split-level or colonial with older finishes, that may mean removing wet pad, pulling toe-kicks, opening a small drywall section behind baseboard heat, or detaching base trim to release moisture from the wall base.
The trade-off is straightforward. Too little demolition traps moisture and extends the job. Too much demolition inflates rebuild cost and can create claim friction if the insurer believes the tear-out exceeded what was needed.
The Institute of Inspection Cleaning and Restoration Certification states in its ANSI/IICRC S500 standard overview that restoration decisions should be based on actual conditions and drying goals, not a one-size-fits-all teardown approach. That is the standard I would want a contractor to follow and document.
Drying and dehumidification
Drying takes longer than many homeowners expect because visible improvement happens before the structure reaches acceptable moisture levels.
Air movers increase evaporation. Dehumidifiers remove the moisture load from the air. Containment may be added to focus drying or protect unaffected areas. Crews should check readings at scheduled intervals, adjust equipment as conditions change, and document the result each time.
Daily logs matter for more than project control. They show the insurer that the mitigation company responded appropriately, adjusted the plan based on readings, and did not drop equipment and disappear. On disputed plumbing claims, that paper trail often becomes part of the argument over whether all claimed repairs were tied to the original event.
Cleaning, microbial control, and rebuild
Once materials test dry, the job shifts to cleaning, odor control, and reconstruction. Porous materials that could not be saved are replaced. Salvageable surfaces and contents are cleaned based on the type of water involved and how long the materials stayed wet.
Rebuild should start after dry verification is documented. Closing a wall because it looks fine is how moisture gets trapped inside older assemblies, especially where plaster repairs, wood trim, and multiple paint layers slow drying and hide staining.
A professional process is not just about getting the house back together. It is about leaving a clear record of what was wet, what was removed, what was dried, and why. In Fairfax homes with aging plumbing and mixed old-new construction, that record protects both the building and the claim.
Understanding Timelines and Costs in Fairfax VA
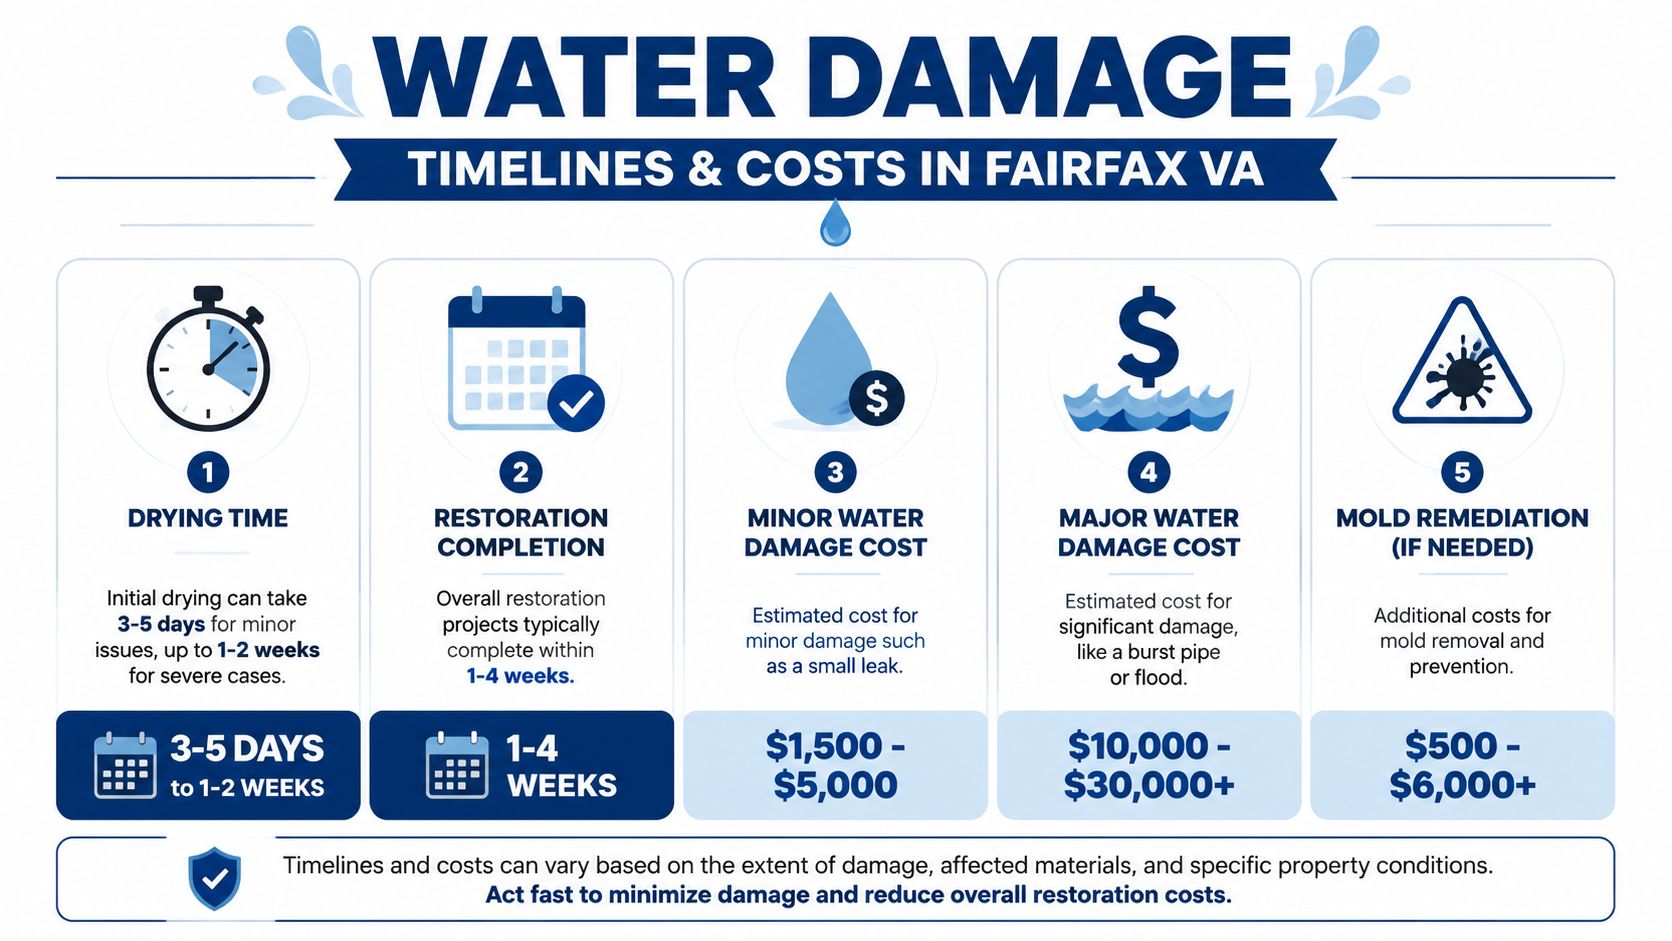
At 9 p.m., a supply line lets go behind a vanity in a Fairfax split-level. By the time the water is shut off, the bathroom floor is wet, the ceiling below is stained, and the first question is not technical. It is practical. How many days will this disrupt the house, and what is this likely to cost?
There is no honest flat answer. A proper range comes from site conditions, moisture readings, what materials got wet, and whether the carrier later accepts the loss as a sudden plumbing event instead of a long-term maintenance problem. In older Fairfax homes, that distinction affects the claim almost as much as the drying plan.
The factors that change both schedule and price
Jobs speed up or slow down based on a few repeat variables. Each one affects labor hours, equipment runtime, demolition, cleaning, and the amount of documentation needed for the file.
| Factor | Lower-impact scenario | Higher-impact scenario |
|---|---|---|
| Water category | Clean water with limited spread | Contaminated water needing containment and added cleaning steps |
| Material type | Tile, vinyl, painted drywall | Hardwood, insulation, plaster, layered assemblies, specialty finishes |
| Area affected | One room, visible path of travel | Multiple rooms, lower levels, hidden migration into cavities |
| Access difficulty | Open surfaces, clear source | Behind cabinets, under flooring, inside finished basement walls |
| Rebuild scope | Minor drywall and paint repair | Flooring, trim, cabinetry, plaster repair, contents work |
Contamination changes the job fast.
The IICRC S500 framework separates losses by water category, and industry guidance summarized by Cleanfax in this explanation of water damage categories under S500 shows why Category 2 and 3 losses require tighter controls. Once a project needs containment, added PPE, and more controlled cleaning, the schedule gets longer and the estimate rises for legitimate reasons.
What usually dries quickly, and what usually does not
An accessible clean-water leak in a laundry room can move through mitigation fairly quickly if the response is prompt and the wet area is small. A finished basement in Fairfax is a different story. Water often runs under laminate or engineered flooring, behind baseboards, into insulation, and along framing bays before anyone sees a stain.
Older housing stock adds another layer. Plaster walls, multiple finish layers, patched renovations, and aging plumbing all make source confirmation and dry-down less predictable. I have seen the visible damage stay limited to one ceiling stain while the actual moisture path extended through a chase into two adjoining rooms.
The assembly that stayed wet the longest usually controls the schedule.
Where homeowners get surprised on price
The first surprise is that mitigation and rebuild are separate cost buckets. Extraction, demolition, equipment, monitoring, cleaning, and moisture documentation belong to mitigation. Drywall replacement, trim carpentry, painting, flooring repair, and cabinet work belong to reconstruction. If an estimate blends those together without detail, it becomes harder to compare bids and harder to defend charges to an adjuster.
The second surprise is hidden access. Removing a few inches of drywall to release moisture is cheaper than replacing a wall full of moldy insulation later. Pulling a vanity toe-kick or drilling inspection points may look invasive on day one, but it can reduce unnecessary demolition if the crew is following meter readings instead of guessing.
For a plain-language overview, this guide to home water damage repair cost factors gives a useful baseline. Then compare that framework to your house, especially floor type, wall construction, basement finish level, and how long the leak ran before it was found.
The insurance angle Fairfax owners should keep in mind
In older Fairfax homes, cost is tied to documentation quality more often than homeowners expect. A carrier may agree to pay for drying but push back on tear-out, insulation removal, or finish repairs by arguing the damage reflects wear, seepage, or deferred maintenance. That is common with angle-stop failures, supply-line breaks, and slow drain leaks that only become visible after water has already moved through older assemblies.
That is why timeline and cost records need to do two jobs at once. They need to manage the project, and they need to show why the work was reasonable for this specific loss. Daily moisture logs, photos of staining patterns, pictures of failed plumbing parts before disposal, and notes showing where water migrated can make the difference between a supported repair scope and a partially denied claim.
Cheap bids often leave out that recordkeeping. They may also assume less demolition, fewer monitoring visits, or a shorter equipment run. The low number looks good at the start. The file gets harder to defend later, and the final cost often catches up.
Navigating Your Insurance Claim for Water Damage
Many Fairfax homeowners lose money they should have had a fair shot at recovering. Not because the damage wasn't real, but because the file didn't tell the story clearly enough.
In older homes, insurers often focus on one question. Was this sudden and accidental, or was it a long-term maintenance problem? In Northern Virginia, that distinction matters a lot because 40% of Fairfax homes were built before 1980, and insurers often deny plumbing-failure claims in older properties as maintenance-related, according to this Fairfax-specific discussion of water damage claim friction in older homes. The same source notes that strong documentation, including timestamped moisture mapping, can help establish that the event was sudden.
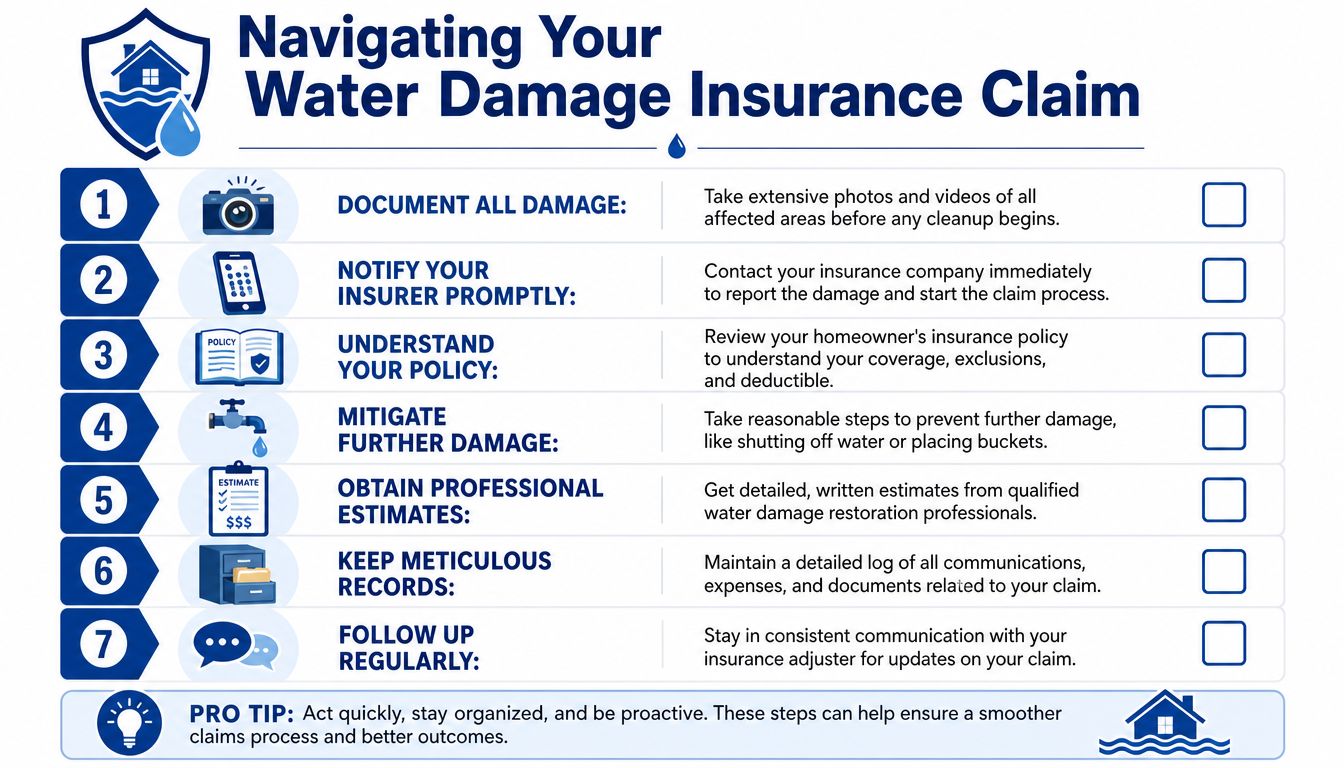
What adjusters often push on older Fairfax homes
The pattern is familiar. A homeowner reports a burst angle stop, failed supply line, or hidden drain leak discovered after visible damage appears. The carrier looks at age, corrosion, repeated moisture staining, or previous repairs and argues that the loss reflects neglect rather than a sudden event.
That's why generic photos of a wet floor aren't enough. If your home has older plumbing, your documentation has to answer these questions:
- When was the issue discovered
- What active conditions were present at discovery
- How far did the water migrate
- What readings showed the extent of fresh saturation
- What emergency steps were taken to mitigate further damage
If those answers are vague, the claim gets easier to minimize.
The documentation strategy that gives you leverage
Start building the claim file the same day.
Create a discovery timeline
Write down when you first noticed the problem, who found it, what was running or leaking, and what was done immediately after discovery.Photograph in layers
Take overview shots, then mid-range shots, then close-ups of the source, staining, flooring edges, swollen trim, ceiling effects below, and any damaged contents.Keep damaged parts when practical
If a plumber removes a failed supply line, valve, or connector, ask whether it can be retained and photographed before disposal.Request moisture mapping records
Ask the restoration company for timestamped readings, meter logs, diagrams, and thermal images when used. This is often the strongest technical support in the file.Track every conversation
Maintain a simple communication log with dates, names, and summary notes from calls with the carrier, adjuster, plumber, and restoration firm.
Claim mindset: If it's not photographed, logged, measured, or written down, expect to defend it later.
How a professional team helps without taking over your role
The best restoration companies don't just dry the structure. They produce records that hold up under scrutiny. That includes scope notes, equipment logs, moisture readings, demolition rationale, and photos tied to location and date.
A good contractor can explain why wet drywall was cut to a specific height, why hardwood required specialty drying instead of immediate removal, or why hidden moisture behind a finished basement wall changed the scope. If you need an example of how restoration firms talk about full-service support, this page on water damage restoration in Georgetown shows the kind of end-to-end process homeowners should expect.
Your role is different. Stay organized, respond quickly, and don't rely on memory. Insurance disputes often turn on sequence and documentation, not just damage severity.
The sentence I tell homeowners most often
Don't let the claim file tell a maintenance story if the loss was sudden.
Older homes naturally have older materials. That alone doesn't prove neglect. What proves your case is a clear record of discovery, emergency mitigation, fresh saturation, and a professional drying plan tied to actual readings.
How to Choose a Reputable Fairfax Restoration Company
At 9:30 p.m., a pipe lets go behind a plaster wall in a 1960s Fairfax ranch. By morning, you may have a wet floor, a swollen baseboard, and a carrier already looking for a reason to call it long-term seepage instead of a sudden loss. The company you hire in that first round of calls can either help protect your position or make the claim harder to prove.
In Fairfax, that matters more than homeowners expect. Older housing stock often has aging supply lines, mixed-material repairs, and prior remodels that confuse the cause-and-origin story. A good restoration firm knows how to dry the structure and document the loss so a plumbing failure does not get reframed as deferred maintenance.
What a solid company looks like
Start with how they inspect and how they write. Drying equipment matters, but the paper trail matters too.
A reputable firm should explain its inspection sequence in plain language. They should be able to tell you where they will check for migration, how they establish affected versus unaffected areas, what supports selective demolition, and how they separate emergency mitigation from later rebuild work. If they get vague here, expect trouble later when scope, cause, and coverage are questioned.
Use this quick comparison:
| Ask this question | Strong answer | Red flag |
|---|---|---|
| How do you inspect? | They describe meters, thermal imaging when useful, and a room-by-room assessment | They rely on visual inspection alone |
| Do you document starting moisture conditions? | Yes, with moisture mapping, readings by material, and notes tied to location | “We'll see how it dries first” |
| Can you separate mitigation from reconstruction? | Yes, with line items and written scope changes | Vague bundled pricing |
| How do you support the insurance file? | Photos, daily logs, readings, demolition notes, and communication records | “Your adjuster will figure it out” |
| What determines demolition? | Material condition, contamination level, and measured moisture | “We usually tear out everything” |
That second question carries a lot of weight in older Fairfax homes. If a carrier argues the drywall staining or pipe condition shows age, your contractor needs records that show fresh wetting, current moisture spread, and why the removal line was set where it was. “Trust us” is not documentation.
Questions worth asking on the first call
Ask practical questions. Listen for specific answers.
- What happens before equipment is placed? You want inspection, measurements, and source review before fans start moving air.
- How do you document hidden moisture in wall cavities, under floors, or above ceilings? Good answers mention moisture meters, humidity readings, diagrams, and labeled photos.
- Who writes the scope and who updates it if conditions change? The person pricing the job should understand the field conditions.
- How do you handle a plumbing loss in an older home if the insurer raises maintenance concerns? A capable firm should talk about source evidence, fresh damage indicators, and clear cause-and-origin notes.
- How often do you recheck drying progress? Drying should be verified with follow-up readings, not guessed at from appearance.
One more question helps separate disciplined firms from sales-heavy ones. Ask whether they will note pre-existing conditions separately from current water damage. That protects you. It also makes the file more credible, because honest documentation is easier to defend than a scope that tries to bill every old issue to one new leak.
Red flags that deserve a hard no
Some warning signs show up immediately.
- Large upfront payment demands before a clear inspection and written scope
- Pressure to sign work authorization on the spot without time to review terms
- Verbal pricing only
- No discussion of measurements or recordkeeping
- Promises of full insurance coverage
- A default plan to remove everything, even before material condition is checked
I would also be cautious with any company that talks more about “working with all insurance” than about documenting the loss. Insurance friendliness is not the same as technical discipline. In disputed plumbing claims, especially in older Fairfax homes, the firms that help most are the ones that can show what was wet, when it was wet, how far it traveled, and why each mitigation step was reasonable.
Choose the company that can defend its decisions in writing. That is the standard that holds up after the equipment is gone and the claim review starts.
Your Next Steps Toward a Fully Restored Home
If you're dealing with an active loss right now, keep the priorities in order.
First, stop the source and make the area safe. Second, document before you disturb more than necessary. Third, get a professional inspection that starts with measurement, not guesswork. Those three decisions drive almost everything that follows.
For Fairfax homeowners, especially in older houses, the insurance side deserves as much attention as the drying side. A technically sound restoration job can still become a frustrating claim if nobody captures the timeline, moisture map, and source evidence in a usable way. That's why the most valuable restoration partner is usually the one who combines field discipline with clean documentation.
If the water entered a finished basement, spread under flooring, moved through a ceiling cavity, or came from aging plumbing, don't assume the visible damage tells the whole story. Hidden moisture is what changes a manageable repair into a drawn-out rebuild.
Act quickly, but don't act blindly. A careful inspection, a written scope, and a strong claim file give you the best chance of restoring the home properly and protecting your position with the insurer.
If you're in Texas and need a team that handles inspection, mitigation, structural drying, microbial prevention, and reconstruction under one roof, RestoTek TX is a practical place to start. They provide emergency response for water-loss events in Georgetown, Austin, and surrounding Central Texas communities, with a focus on clear communication and full-cycle restoration support.