Water on the floor changes the mood of a house fast. One minute you're dealing with a normal day in Georgetown. The next, you're standing in socks on wet tile, hearing a water heater hiss, seeing a ceiling stain spread, or watching stormwater push where it doesn't belong.
Most property owners feel the same things in that moment. Confusion first. Then urgency. Then the big questions. Is this dangerous? How bad is it behind the walls? Who do I call? What's this going to cost?
The good news is that water damage follows a process, and good restoration does too. If you know what to do in the first hour, how to judge severity, and what a proper dry-out should look like, you can protect the property and make smarter decisions under pressure.
Confronting Water Damage in Your Georgetown Property
A lot of water losses start small. A supply line lets go under a sink. A washing machine overflows. A pipe bursts in a wall after a cold snap. A roof leak from a storm drips longer than anyone realizes. What feels “contained” at first often isn't. Water moves under baseboards, into pad and subfloor, behind cabinets, and into wall cavities where you can't see it.
That's why panic doesn't help, but a plan does.
Across the U.S. property-damage market, water and freezing accounted for 23% of all property damage claims between 2017 and 2021, and industry reporting says water-damage claims over $500,000 have doubled in recent years, according to property damage industry statistics compiled for the restoration field. The point for Georgetown homeowners isn't to dwell on worst-case scenarios. It's to recognize that water losses are common, expensive when mishandled, and very manageable when addressed quickly.
What makes Georgetown losses feel different
In Central Texas, timing matters because the event itself is only part of the problem. Storm intrusion, plumbing failures, and indoor humidity can keep materials wet longer than people expect. A floor can look mostly dry while the pad underneath is still saturated. Drywall can feel normal at shoulder height while the bottom plate is still taking on moisture.
That's where many bad outcomes start. People clean the visible water, set a box fan in the room, and assume the problem is under control.
Fast cleanup helps. Measured drying is what protects the structure.
What usually works and what usually fails
A practical response starts with containment and information. Stop the source if you can. Keep people safe. Take photos. Move vulnerable contents. Then get the wet materials assessed with the right tools.
What doesn't work is guessing.
A mop, shop vacuum, and open windows might improve the room, but they don't tell you whether moisture has migrated under flooring, inside insulation, or behind trim. In a Georgetown home, especially after a storm or a plumbing overflow, hidden moisture is often the deciding factor between a straightforward mitigation job and a much larger repair.
Use this rule of thumb:
- Visible water is only the first layer. The more porous the material, the less your eyes can tell you.
- Time changes the job. A manageable leak can become a demolition job if wet materials sit.
- Documentation matters early. Photos and notes taken before cleanup often help later when questions come up about scope.
If you're dealing with water right now, focus on the next hour. That's where you regain control.
Your First Hour Emergency Actions to Limit Damage
The first hour is about two things. Safety and damage control. You do not need to solve the whole loss in that hour. You need to stop conditions from getting worse.

Start with the hazards
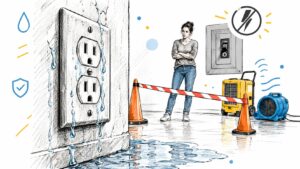
If water is near outlets, appliances, power cords, or electrical panels, treat the area carefully.
Critical warning: Don't step into standing water to reach a breaker or unplug equipment if there's any chance the area is energized.
If you can safely cut power to the affected area from a dry location, do it. If you can't, leave it alone and wait for qualified help. The same goes for water coming through a ceiling. Sagging drywall can fail without much warning, and water above a light fixture is not a DIY inspection moment.
The first-hour checklist
Stop the water source
Shut off the local fixture valve if a sink, toilet, dishwasher, refrigerator line, or washing machine is the problem. If the leak is active and you can't isolate it quickly, shut off the main water supply.Secure the electrical risk
Turn off power to the wet area only if you can do it safely from a dry location.Identify the kind of water
Clean water from a supply line is one thing. Water from a drain backup, toilet overflow involving waste, or storm intrusion carries a different safety profile. If the source is questionable, avoid contact.Move what can be saved
Pick up rugs, electronics, paper files, small furniture, and anything with legs sitting in water. Use foil, blocks, or clean barriers under furniture legs if you can't move larger pieces.Document before you disturb too much
Take wide photos, close-up photos, and short videos. Capture the source, the affected rooms, damaged contents, and any obvious staining or swelling.Remove surface water if it's safe
Towels and a wet vac can help with immediate surface water. They are not a substitute for structural drying, but they can reduce spread while you wait.Call a restoration company
The sooner a crew can inspect and map moisture, the fewer surprises you usually have later.
For a simple homeowner action list, RestoTek TX has a practical guide on what to do if your house sustained water damage.
What not to do
A lot of secondary damage comes from well-meant shortcuts.
- Don't use household fans blindly. They can push contaminated water aerosols around if the source isn't clean.
- Don't lift flooring unless you know the scope. Premature tear-out can complicate drying decisions and insurance documentation.
- Don't assume the smell tells you everything. Some wet wall cavities won't smell right away.
- Don't wait overnight to “see if it dries.” Delay is one of the most expensive choices in water damage restoration Georgetown jobs.
If water came from sewage, outside flooding, or any source you can't confidently identify as clean, keep people and pets out of the area.
Assessing Severity and When to Call a Professional
Not every water incident turns into a major restoration project. A small clean-water spill that's contained to a hard surface is different from a leak that ran under plank flooring for hours. The skill is knowing when the loss is larger than it looks.

A simple way to think about water categories
Professionals often sort water into three practical buckets:
| Water type | Common example | Main concern |
|---|---|---|
| Clean water | Broken supply line, sink supply leak | Structural wetting if it isn't dried quickly |
| Gray water | Appliance discharge, some overflows | Increased contamination risk |
| Black water | Sewage backup, stormwater intrusion with heavy contamination | Health risk and more controlled cleanup requirements |
For a homeowner, the exact label matters less than the decision it drives. If the water is dirty, came from a drain or sewer, or entered from outside during a flood event, that's professional territory.
Why Georgetown conditions change the decision
Central Texas weather raises the stakes on any wet building. NOAA reports that 2024 was the warmest year on record globally and notes that atmospheric warming increases how much moisture air can hold, which raises the potential for heavier downpours. The U.S. Climate Assessment also identifies the southern Great Plains and Texas as highly exposed to flash-flood risk and intense precipitation events, as summarized in this Georgetown-focused discussion of storm-related water damage and mold risk in Central Texas.
That matters indoors. Even after standing water is removed, humidity and trapped moisture keep working on drywall, insulation, framing, and flooring. In Georgetown, a storm loss or plumbing leak often needs a more careful moisture check than people expect.
Signs the problem is bigger than it looks
Call for a professional inspection if you notice any of the following:
- Water reached walls or cabinets because those assemblies can trap moisture behind finished surfaces.
- Flooring changed shape such as cupping, buckling, soft spots, or loose seams.
- A ceiling stain is growing or the drywall feels soft.
- The leak may have lasted a while and you don't know when it started.
- The source involved sewage or exterior floodwater.
- There's a lingering odor after visible water is removed.
- Multiple rooms are involved or water moved from one level to another.
The moment moisture gets into concealed spaces, the job stops being about cleanup and starts being about verification.
A professional moisture assessment becomes non-negotiable when the source is uncertain, materials are porous, or weather conditions slow natural drying. That's especially true after Georgetown storms, where what looks like a small intrusion at the surface may have traveled well beyond the visible line.
Choosing a Reputable Georgetown Restoration Company
The company you hire affects more than cleanup. It affects documentation, demolition decisions, how the drying plan is set up, and whether the final repair feels organized or chaotic.
In a water loss, speed matters. So does discipline. You want a team that arrives ready to inspect, explain, document, and dry correctly. You don't want a call center that books the job fast but hands it to whoever is available.
What to ask before you authorize work
Start with direct questions. A good restoration company should be able to answer them plainly.
- Are you local to Georgetown or Central Texas? Local crews usually understand storm patterns, common slab and plumbing issues, and local rebuild logistics better than a distant dispatcher.
- Do you provide emergency response after hours? Water losses don't wait for business hours.
- Can you handle both mitigation and rebuild? It's easier for the property owner when one company can manage the job from dry-out through repairs.
- How do you document the loss for insurance? You want photos, moisture readings, notes on affected materials, and a clear record of what was removed and why.
- What equipment and testing do you use to track drying? If the answer is vague, that's a problem.
Green flags and red flags
A solid company usually sounds calm, not theatrical. They'll talk about source control, safety, moisture mapping, equipment placement, daily monitoring, and realistic expectations for demolition and repair.
Red flags tend to show up in the first conversation.
| Green flags | Red flags |
|---|---|
| Explains the drying process clearly | Jumps straight to tear-out without much inspection |
| Discusses documentation and readings | Talks mostly in vague promises |
| Can coordinate reconstruction | Leaves you to find separate trades for every phase |
| Gives practical next steps | Pressures you to sign before questions are answered |
Why full-cycle service matters
Many homeowners underestimate how much friction happens between mitigation and rebuild. One vendor dries the structure. Another repairs drywall. Another handles flooring. Another paints. When handoffs go poorly, delays follow.
That's why some owners prefer a company that can inspect, extract, dry, treat affected areas, and rebuild under one roof. In Georgetown, providers such as RestoTek TX offer that full-cycle approach, which can reduce confusion when a job moves from emergency stabilization into repairs.
A reputable restorer should make the job more understandable, not less.
Also ask who will communicate with you day to day. Water losses are stressful enough. You need someone who can tell you what's wet, what's salvageable, what's being monitored, and what the next decision is.
The Professional Restoration Process From Extraction to Rebuild
Most homeowners see fans and dehumidifiers and assume that's the whole job. It isn't. Proper restoration starts before equipment is placed and continues after the room looks dry.

What happens first on site
A technically sound workflow starts by stopping the source, extracting standing water, documenting safety hazards, mapping moisture migration, and then running controlled structural drying with monitored temperature, humidity, and moisture-content readings throughout the job, according to the water damage guideline used for measured dry-out practice.
That sequence matters. If a crew starts tearing out materials before understanding how far water moved, they can miss wet areas or remove more than necessary.
The actual timeline on a typical job
Emergency stabilization
The first phase is control. Water source stopped. Wet area secured. Obvious hazards noted. Standing water extracted with pumps or portable extraction units depending on the loss.
If contents are at risk, the crew may move or block furniture, separate salvageable items, and protect unaffected rooms from further spread.
Moisture mapping and scope definition
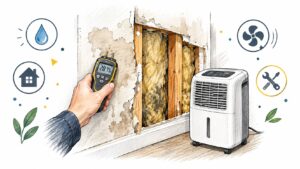
Professional water damage restoration differs from simple cleanup in its approach. Moisture meters and other detection tools are used to identify how far water migrated into flooring, drywall, trim, cabinets, and structural cavities.
The purpose isn't to make the job look bigger. It's to define the actual wet boundary before demolition decisions are made.
Drying should be measurable, not based on appearance alone.
Controlled drying
After extraction, crews place air movers and dehumidifiers to create a controlled drying environment. Good drying isn't just “more equipment.” It's the right equipment in the right places, adjusted as readings change.
Technicians monitor:
- Temperature in the affected environment
- Humidity so moisture is being removed from the air
- Moisture content in affected materials to confirm progress
This monitoring phase is where patience helps. Surfaces often look better before assemblies are dry.
Selective demolition when needed
Not all wet materials can or should stay in place. Some drywall, insulation, pad, engineered materials, or built-ins may need removal if they can't be dried effectively or safely.
The key word is selective. Good crews remove what's necessary and justify it with the source type, material condition, and moisture readings.
Cleaning, odor control, and rebuild
Once the structure reaches dry standards, the work shifts. Salvageable surfaces are cleaned. Affected areas may be treated for microbial prevention and odor control. Then the repair side begins.
That might include replacing drywall, reinstalling trim, rebuilding cabinets, painting, or coordinating flooring replacement. If you want to understand what that handoff looks like, RestoTek TX outlines the rebuild side of the process in its reconstruction and rebuild service overview.
What a good final walkthrough includes
Before a job closes, the property owner should understand:
- What was affected
- What was dried in place
- What was removed
- What repairs remain or were completed
- What documentation exists for the file
A calm, organized process doesn't erase the disruption of a water loss. It does prevent the property from getting stuck in that half-dry, half-repaired limbo that causes so much frustration.
Navigating Insurance Claims and Understanding Costs
After the immediate emergency, the next pressure point is usually money. Property owners want to know what insurance will ask for, what the restoration company needs to document, and whether the final bill is likely to stay manageable.
The first practical step is simple. Build the file early.

What to document for the claim
Before disposal or demolition changes the scene too much, gather:
- Photos of the source if visible
- Photos and video of all affected rooms
- Images of damaged contents such as furniture, rugs, electronics, or stored items
- Notes on timing including when you discovered the loss and what steps you took
- Invoices or emergency service records from plumbers or mitigation teams
If a restoration company is handling the mitigation properly, they should also be generating job documentation that supports the scope. That usually includes moisture readings, equipment logs, photos, and notes on materials removed or dried in place.
What drives the final cost
For Georgetown projects, industry reporting says standard water-damage restoration typically costs $1,200 to $5,000, with pricing often around $3 to $7.50 per square foot, according to this overview of Georgetown restoration and remediation cost ranges.
That range exists because no two losses are identical. Final cost usually turns on a few practical variables:
| Cost driver | Why it changes the job |
|---|---|
| Size of affected area | More materials and more equipment time |
| Water source | Dirtier water usually means stricter handling and more removal |
| Material type | Carpet, hardwood, drywall, insulation, and cabinets all behave differently |
| How long it sat | Longer exposure usually means more secondary damage |
| Access difficulty | Tight cavities, built-ins, and multi-room spread add labor |
One mistake homeowners make is comparing a simple extraction bill to a full restoration bill as if they're the same thing. They aren't. A quick clean-water incident on a hard floor may remain limited. A slower leak under finishes can require mitigation, material removal, drying, cleaning, and reconstruction.
Why timing affects the price
The same Georgetown cost source notes that mold can begin growing within 24 to 48 hours, which is why emergency structural drying is treated as time-sensitive rather than optional in local reporting on water damage response timing and pricing.
That's the money connection homeowners need to understand. Waiting doesn't just leave things wet. It can expand the scope from extraction and drying into contamination concerns, odor treatment, and broader reconstruction.
Practical rule: Early mitigation usually protects both the building and the claim.
How to make the process less painful
A few habits help keep the claim cleaner and the conversation easier:
- Be consistent with dates. Write down when you found the damage, who you called, and when service started.
- Keep damaged items until told otherwise. If disposal is necessary for safety, photograph thoroughly first.
- Ask for plain-language updates. You should know what has been confirmed wet versus what is only being evaluated.
- Separate mitigation from upgrades in your own mind. Restoration brings the property back from damage. It doesn't automatically cover elective improvements.
A good restoration company can't make every claim decision for the carrier. They can make the loss easier to understand by documenting the job carefully and explaining why each step was necessary.
If you're dealing with a leak, overflow, storm intrusion, or backup in Georgetown or the Austin area, RestoTek TX handles inspection, mitigation, structural drying, microbial prevention, and rebuild work with practical guidance through the whole process. When the situation is moving fast, getting a clear plan in place early is usually the best way to protect both the property and your sanity.