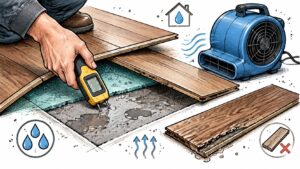
You've mopped the kitchen, the planks look fine, and the floor feels dry under your socks. Then you step near the dishwasher and hear a faint squelch, or a seam catches your foot where it was flat yesterday. That's the trap with water under laminate flooring. The surface can recover its looks while the underlayment and subfloor underneath stay wet, sealed in by the floating floor itself.
Sort the Water Source and Start the Clock
You find the puddle at 7 a.m. By 7:15 the towels have done their work and the room looks normal again. Underneath, nothing has been solved yet. Water that reached a plank joint, a perimeter gap at the wall, or a transition strip can travel sideways under a floating floor far beyond the spot you saw.
Most losses arrive three ways. A supply line, dishwasher hose or refrigerator line leaks clean water under pressure. A toilet, sink or tub overflows, or a drain backs up. Or storm water pushes in at doors, slab edges and transitions. Sorting which one you're dealing with decides everything that follows, because water category matters more than water volume. A small amount of drain backup is a bigger problem than a larger clean supply leak you caught fast.
| Source | Water category | First action | Drying target |
|---|---|---|---|
| Supply line or dishwasher leak | Category 1 (clean) | Shut off supply, extract standing water | 24-48 hours |
| Toilet or sink overflow | Category 1 if fresh, Category 2 if it sat | Extract, then lift edge planks to check | 24-48 hours |
| Drain or sewer backup | Category 3 (black) | Stop use and call a professional | Professional scope required |
| Storm or flood entry | Category 3 (black) | Keep out until assessed, document the event | Professional scope required |
Why the clock runs on the assembly, not the surface
The U.S. Environmental Protection Agency response guidance states that the subfloor beneath carpet or other flooring must also be cleaned and dried after water damage, and it uses a 24-48-hour window for drying wet or damp materials to reduce the likelihood of mold growth. The same guidance warns mold may still have developed even when drying occurs within 48 hours. It also advises that a moisture meter can be used to measure moisture content in materials and monitor drying progress.
Read that window correctly. It isn't a countdown for the top of the plank, which a fan can dry in an afternoon. It's the target for getting the whole assembly, plank, underlayment and subfloor, fully dry. A prompt visual cleanup isn't verified structural drying.
First fifteen minutes: Note the time you found the water, photograph the area before you touch anything, stop the flow at the fixture valve or main, and confirm which of the three sources you're looking at.
If you can't find where the water is coming from, don't guess and don't start pulling rows at random. A slow supply leak behind a cabinet can feed a floor for weeks before a seam lifts. Our guide to what leak detection involves explains how hidden sources are pinpointed before anyone opens the floor. The source gets corrected before flooring closes back in. Every time.
Decide Whether to Call a Restoration Crew Today
Handle it yourself only when all four of these hold. The water was clean supply water. The wet area covers a few planks, not a room. You can start drying within the first day or two. And the subfloor reads dry, on a meter, when you finish. Miss one and the job has outgrown towels and a box fan.
The call a professional triggers
Any single item on this list moves the loss out of DIY territory.
- Contaminated water: The water came from a drain backup, floodwater, or a toilet overflow that sat before you found it.
- Spread under the floor: Water reached the underlayment across more than a few planks, or you find dampness at a wall far from the source.
- Readings that won't move: The subfloor or wall base still reads wet after two days of drying equipment running.
- Odor that returns: A musty smell comes back after cleaning, which tells you something underneath is still producing it.
- Storm losses: The water arrived with a Georgetown or Austin storm, where heavy rain, flash flooding and lingering humidity keep materials wet longer and push water in at slab edges.
That storm trigger deserves emphasis in Central Texas. A floor that might dry in a mild week stays damp when outdoor humidity stays high and rain keeps rewetting the slab perimeter. You're fighting the weather as well as the leak.
Fix the source before you dry anything
Drying a floor while the supply line still weeps is wasted rent on equipment. A licensed plumber repairs the leak first, and drying starts as soon as the water is shut off and the repair is complete. We coordinate plumbing repairs with licensed plumbers, ensure the source of water damage is resolved, and begin drying and restoration immediately after repairs. All plumbing work for RestoTek TX is completed by licensed and insured plumbing professionals, ensuring code compliance and quality workmanship.
Treat this decision as a gate. If you call a crew, the extraction and drying steps later in this article become their scope, and your job shifts to documentation. If you proceed yourself, you're accepting the meter readings as your proof.
A dry-looking floor is not a dry floor.
Your next step today is simple. Photograph the damage, take moisture readings at the wettest edges, and request an assessment with a written scope if any trigger above applies. Mold testing after water damage also helps document conditions for insurance purposes when the extent is disputed. Decide on evidence, not on how the surface feels.
Document the Water Loss for Your Insurance Claim
Adjusters pay for what you can prove, and with laminate most of the damage hides under the planks where a standing-height photo shows nothing. Build the file before cleanup erases the evidence. The checklist below is what gets asked for, in roughly the order it gets asked.
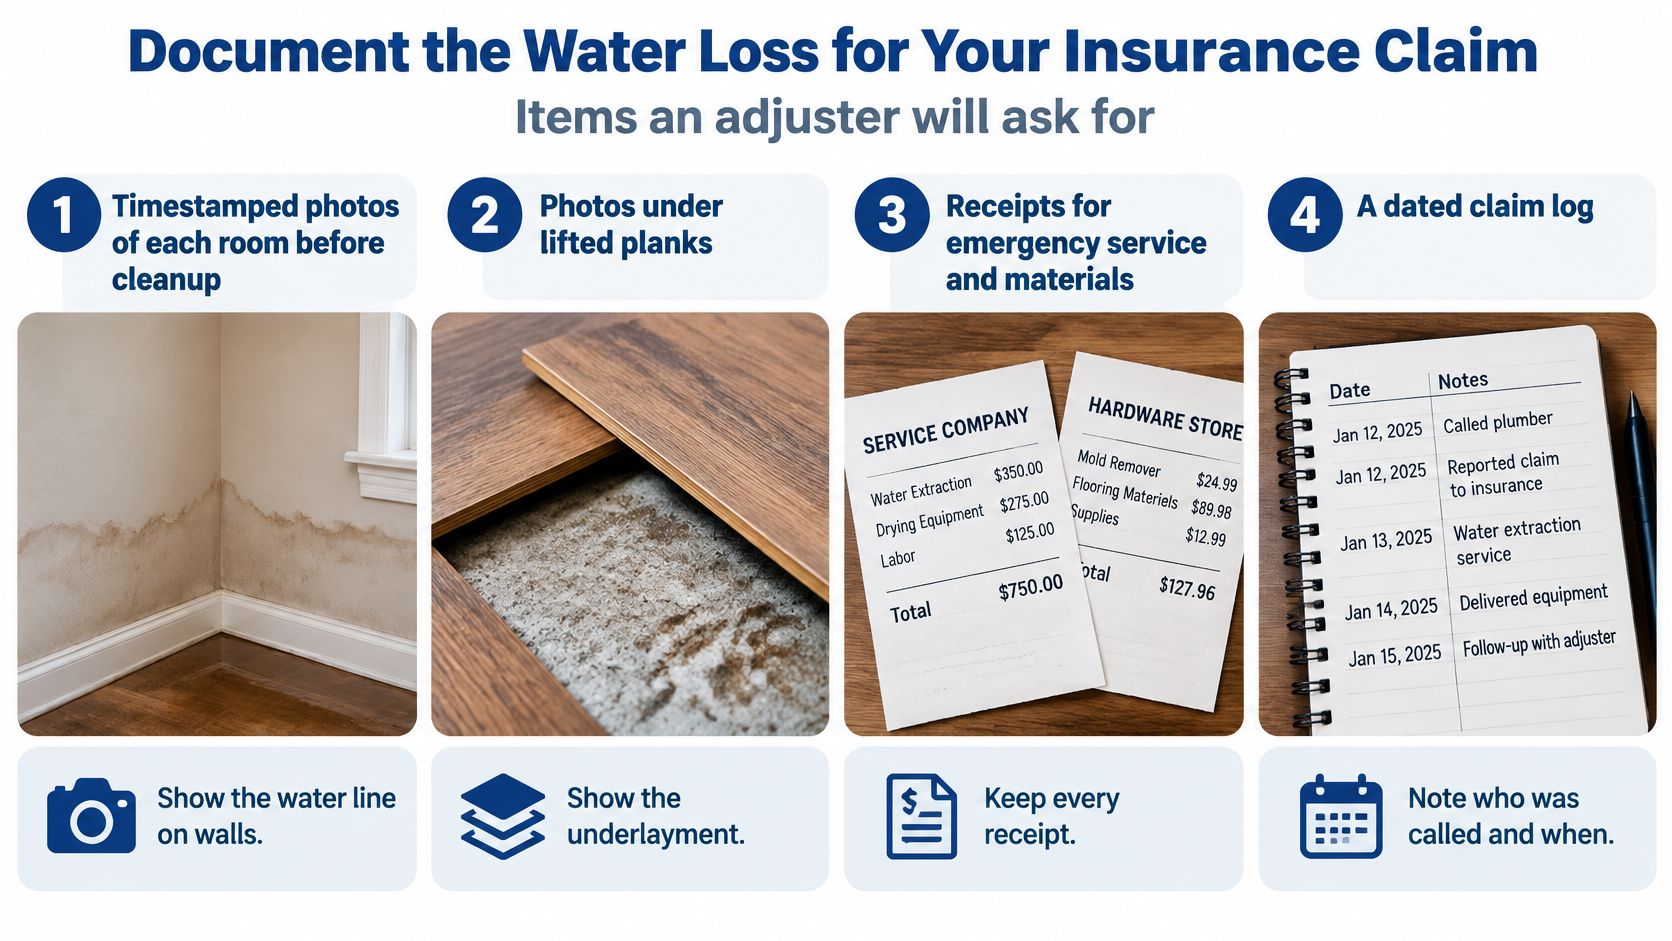
What to collect, item by item
- Timestamped photos of each room before cleanup, wide enough to show the water line on walls and which plank rows were wet.
- Photos under lifted planks showing the underlayment and subfloor. These carry the most weight, because they show the concealed damage.
- Source photos of the failed supply line, the overflowed fixture, or the exact entry point where storm water came in.
- A moisture reading log with date, time, location and meter reading, repeated at each visit until the assembly reads dry.
- The laminate product name, model and moisture-resistance classification from packaging or the original invoice, so replacement can be matched to what was installed.
- Receipts for extraction, drying equipment rental and any temporary repairs you made to stop the flow.
- A run log for dehumidifiers and air movers, noting when each unit was placed and removed.
- Written estimates from each contractor plus all correspondence with the insurer, kept in one folder.
- The removed planks themselves, retained until the adjuster has seen them.
Sketch the room on paper and number the plank rows before removal. When an adjuster questions how many boards were affected, the sketch plus the dated readings settle it.
Notify your insurer promptly, ideally the same day you find the loss. Our walkthrough of the home insurance water damage claim process covers what happens after that first call. The dated moisture readings are what separate boards the insurer accepts as damaged from boards that turn into an argument, because they show a wet subfloor under planks that looked fine.
The mistake that costs homeowners money is enthusiasm. They tear out the floor on Saturday, haul the planks to the curb on Sunday, and meet the adjuster on Tuesday with a bare subfloor and no proof of what was there. Bag the worst planks, keep them in the garage, and throw nothing away until you've been told to.
How to Extract Water and Dry the Subfloor
This routine assumes clean water and a contained area. It also assumes you're willing to lift planks, because there's no version of this job where fans blowing across the top dry the underside. The floating floor acts as a lid, and lids come off.
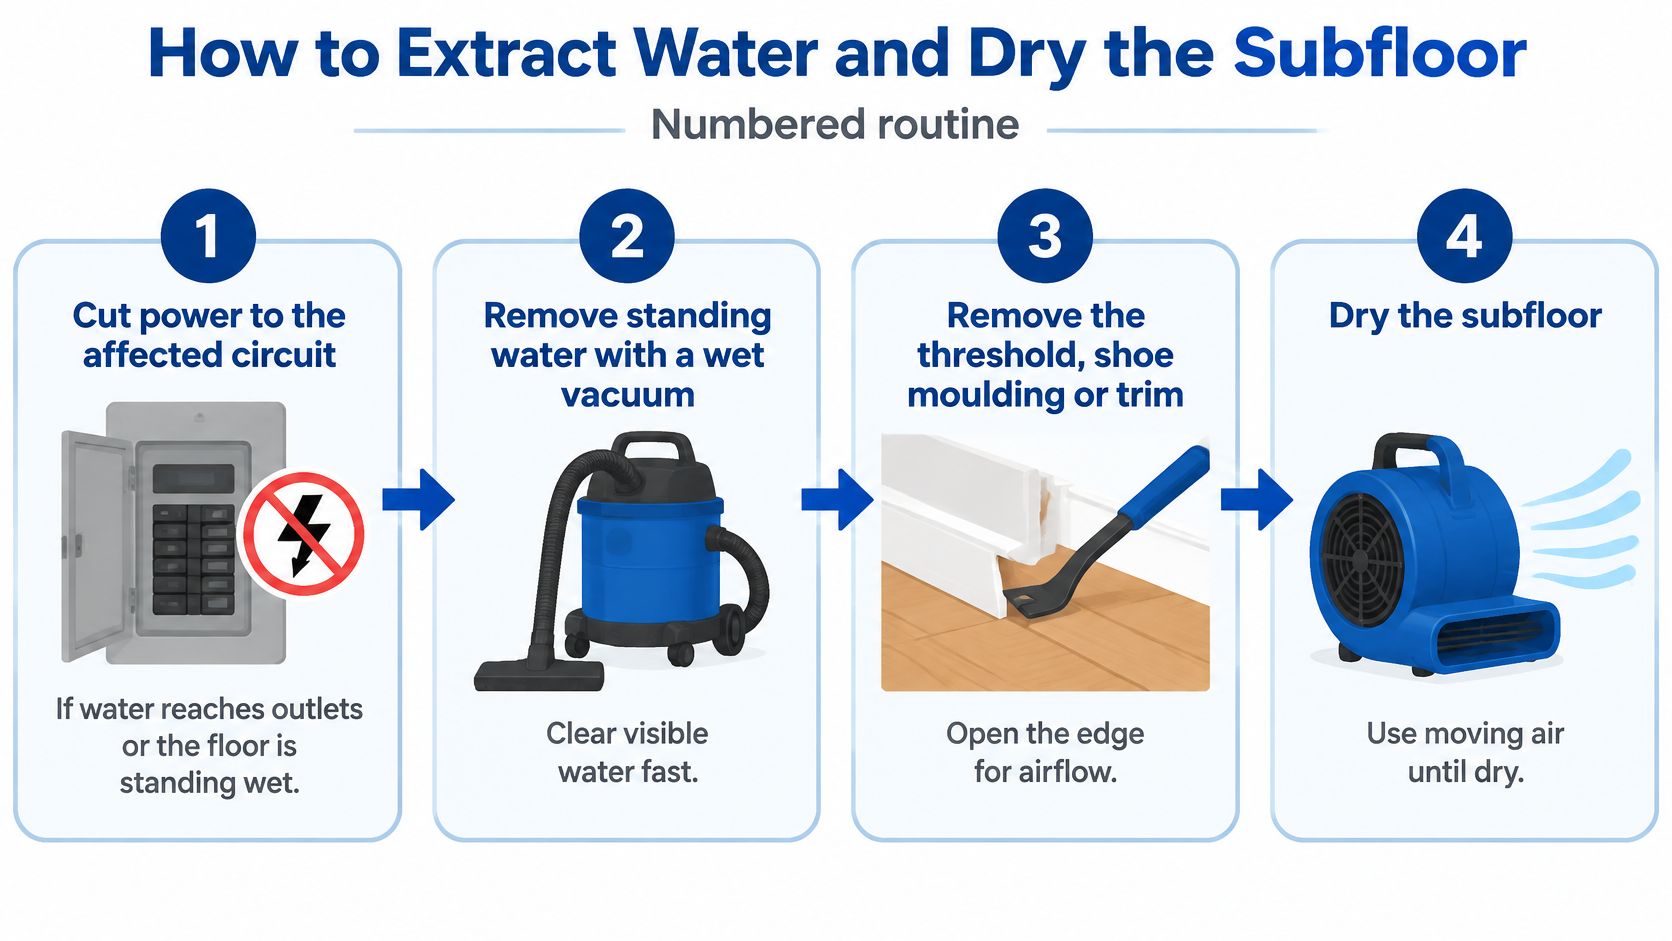
The numbered routine
- Cut power if water reaches outlets or the floor is standing wet, then remove standing water with a wet vacuum. Every minute water sits on the surface, it keeps feeding the seams. Towels alone leave plenty behind.
- Remove the threshold, shoe moulding or baseboard to expose the plank edges, then take apart planks over the wet area one at a time. A floating floor disassembles from the edge. Forcing a plank up mid-room usually breaks the locking profile you were hoping to reuse.
- Pull swollen, buckled or delaminated planks and soaked underlayment, numbering each plank's position with painter's tape as it comes up. The EPA brief guide to mold, moisture and your home supports removing visibly swollen, delaminated, buckled or persistently damp planks and saturated underlayment, then inspecting the subfloor for staining, edge swelling, fastener corrosion and moisture migration at walls and penetrations. Lifting planks but leaving wet underlayment in place is the most common half-measure.
- Map moisture readings on the subfloor at several points, plus the wall base, cabinet toe-kicks and transitions. Record a dry baseline from the same material in an unaffected room. Without a baseline, a number on the meter means very little.
- Set air movers across the bare subfloor and run a dehumidifier, aiming for indoor relative humidity in the 30-60% range the EPA identifies as a useful control range, and below 60% during stabilization. Air movement without dehumidification just redistributes moisture into the room air.
- Clean hard, non-porous surfaces with detergent and water, and skip the bleach. EPA recommends detergent-and-water cleaning for hard surfaces and emphasizes moisture control as the central mold-prevention measure. Bleach on a damp subfloor adds fumes and doesn't substitute for removing wet material.
- Re-read the meter daily at the same marked points until wet spots match your dry baseline. Log each reading with the date. A floor that plateaus above baseline still has a moisture source or a trapped pocket.
- Close the floor only after the source is fixed and no wet material remains. Reinstalling apparently sound boards over damp underlayment is the classic failure. The new seams peak again within weeks and you repeat the whole job.
Drying on a concrete slab
Slab-on-grade construction is common across Central Texas, and concrete changes the timeline. Check slab edges and the perimeter with a meter, because water can wick beneath floating laminate from the edge inward. Concrete releases moisture slowly, so the early drying target may not be reachable, and that's a reason to leave the floor open longer, not a reason to close it on schedule. Before reinstalling, confirm the replacement underlayment includes a vapor barrier.
A dry assembly looks specific. The subfloor reads at baseline at every marked point, including within a few inches of walls. The wall base and cabinet bottoms read dry. No odor greets you when the room has been closed overnight. Anything less is a floor that's dry on top only.
Salvage or Replace the Laminate Planks
Start with the rule. A few isolated planks over a sound, verified-dry subfloor can often be saved. Any plank that's swollen, delaminated, cupped, or loose at the locking profile gets replaced, because a fiberboard core that has swelled doesn't shrink back to its original thickness. The seam will peak forever.
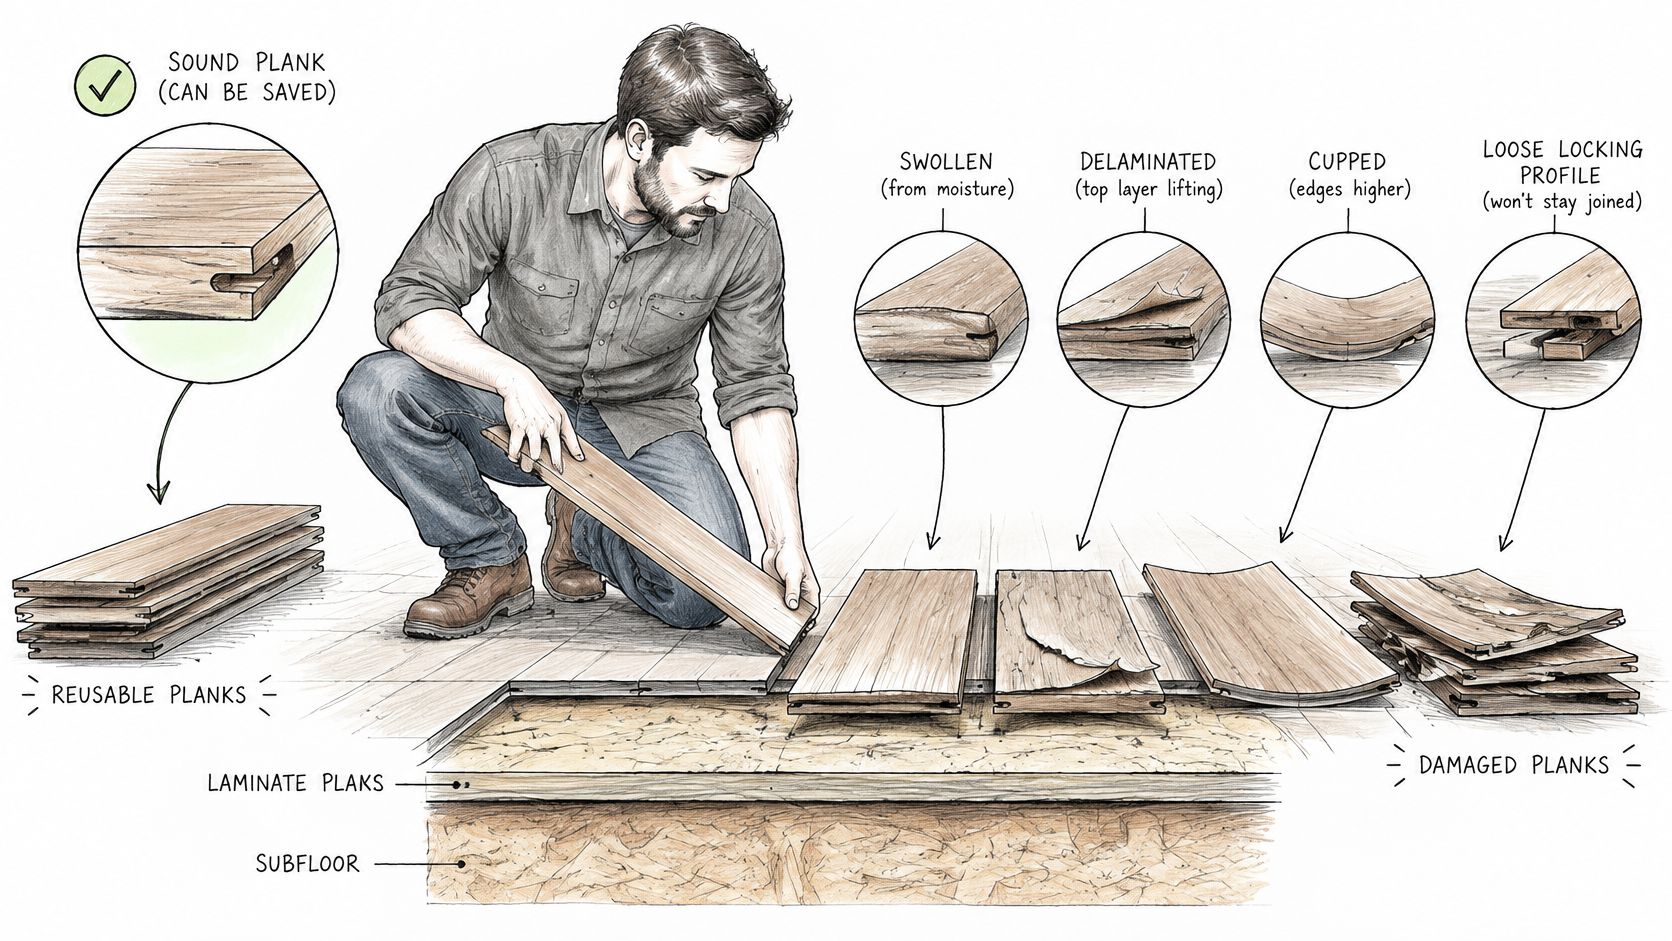
The lift test and the label check
Pull one loose plank at the edge of the wet area and turn it over. Check the underside for darkening, the long edges for raised or crumbly core, and the click joint for swelling that stops it seating flat against its neighbor. If that plank fails, assume its neighbors in the wettest zone fail too, and verify plank by plank as you work outward.
Then check what the product claims. A moisture-resistant label is a tested claim, not a description of all laminate. As a reference point, America's Best Flooring on the NALFA LF-01 test reports the thickness-swell test submerges a 6-inch laminate sample for 24 hours and requires residential laminate to swell by less than 18%. Manufacturer protection ratings also vary by product. Flooring FX's Aquastop range states its 8 mm and 12 mm products provide 48 hours of water protection, while its 14 mm product provides 72 hours.
Treat those stated hours as a controlled-test claim, not a promise about your dishwasher leak that ran all weekend. If you can't find any moisture rating in the product documentation, assume the planks are vulnerable and don't reuse boards you can't verify.
What each scope costs
| Repair scope | Typical cost | When it applies |
|---|---|---|
| A few water-damaged planks | $150-$1,500 installed | Swelling limited to isolated planks over a sound subfloor |
| Full room with subfloor drying or repair | $1,500-$8,000 or more | Water reached the underlayment or subfloor across the room |
| Per-square-foot replacement | $3-$11 per sq ft plus $1-$3 per sq ft removal | Quoting a larger area or a whole room |
The table reflects reported ranges. In 2026, RestoreAdvisor reported replacing a few professionally installed water-damaged laminate planks typically costs $150-$1,500, while a full-room replacement involving subfloor drying or repair typically costs $1,500-$8,000 or more. For per-square-foot quoting, in 2026 LegalClarity reported replacing water-damaged laminate planks costs approximately $3-$11 per square foot, with removal adding another $1-$3 per square foot.
Notice where the money sits. The gap between the first row and the second isn't plank price, it's subfloor drying and repair. That's why I would let the subfloor reading make this decision rather than counting damaged boards from above. A cheap patch over a damp subfloor is the most expensive option on the table once you pay to redo it.
Decision rule: If more than a few planks are affected, or the subfloor or wall base reads wet, budget for full replacement and quote the room, not the planks.
Spotting Mold Risk and When to Test
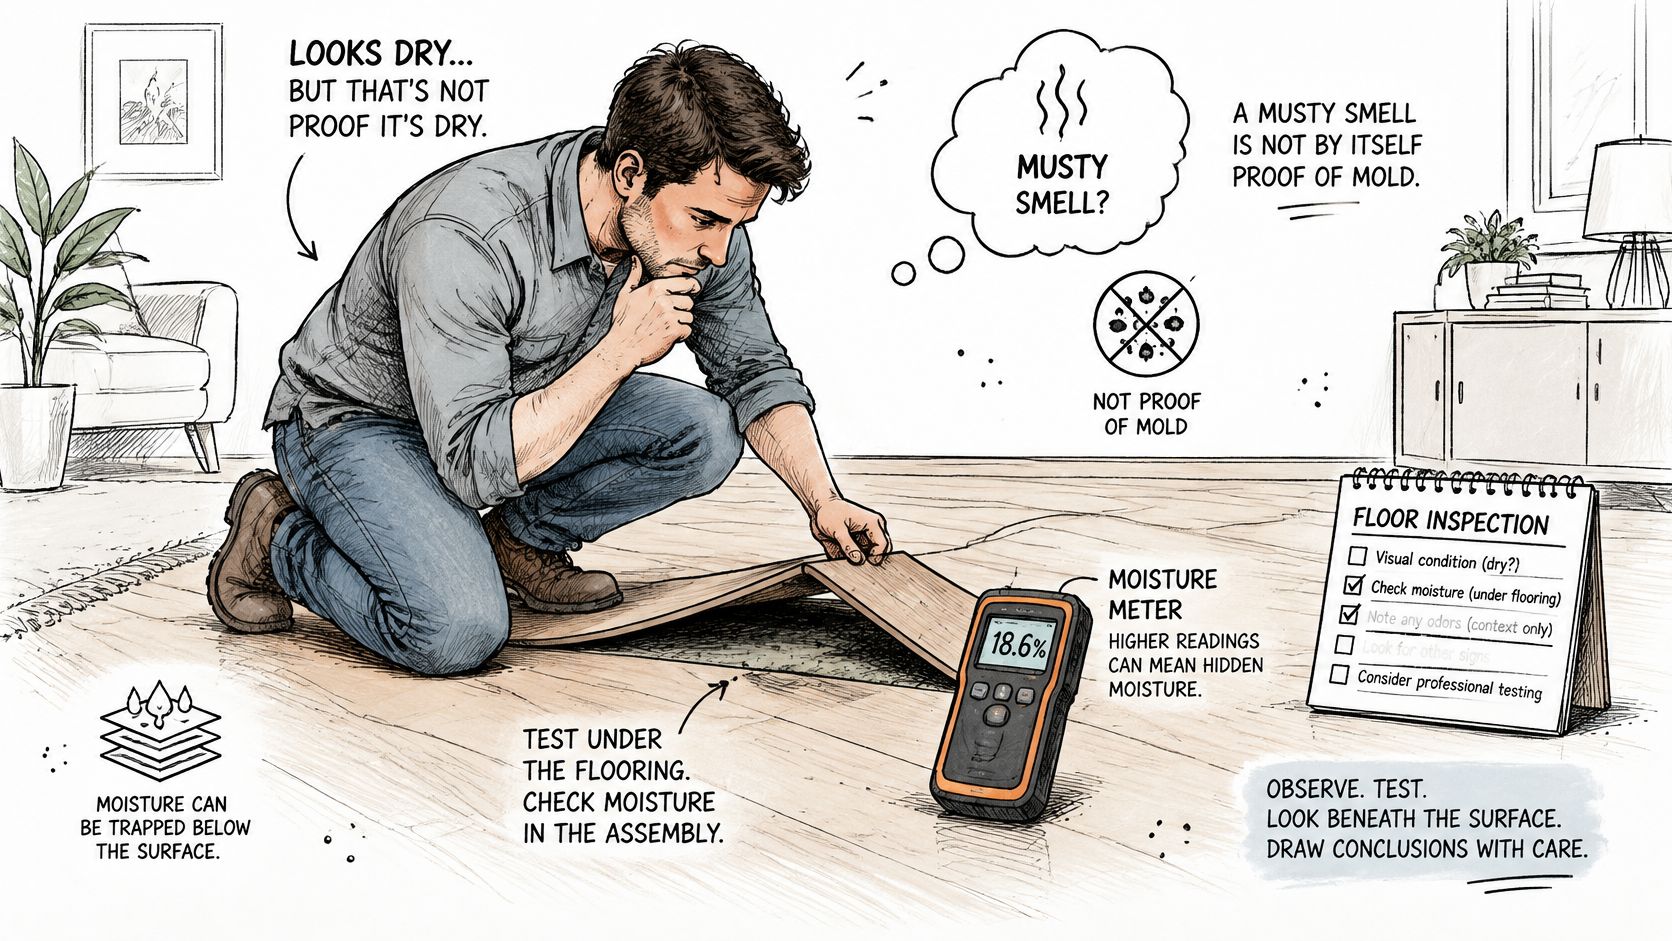
Two myths cause most of the bad decisions here. First, a visually dry floor is proof the assembly is dry. It isn't. Second, a musty smell is by itself proof of mold. It isn't either. The smell tells you something biological or damp is producing odor under the floor. It doesn't identify what, and it doesn't measure how much.
What the evidence can and cannot say
The EPA overview of mold notes there are no federal limits for mold or mold spores, which means odor alone cannot prove contamination and an air sample cannot establish compliance with a federal standard. The EPA also states excessive indoor moisture commonly leads to mold when the problem remains undiscovered or unaddressed. Put together, moisture readings are your hard evidence, and odor is a prompt to go looking for that evidence.
Signs that justify a documented inspection
- Odor returning after drying and cleaning, especially when the room has been closed up.
- Cupping or swollen joints coming back on planks that had flattened out.
- Recurring dampness at seams, transitions or baseboards with no new spill to explain it.
- Higher readings in the subfloor or wall base compared with your dry baseline.
- Water from a backup or flood, where the category alone justifies professional eyes.
- Visible discoloration on walls or ceilings near the affected floor.
Add one more that's easy to dismiss. Respiratory symptoms that ease when the person leaves the home are a reason to act quickly rather than wait and see. We recommend mold testing when there are persistent musty or earthy odors, recent water damage or leaks, past flooding or plumbing failures, visible discoloration on walls or ceilings, respiratory symptoms that improve outside the home, or when buying or selling a home.
A test should answer one defined question. Is the subfloor cavity still wet? Did growth establish behind this wall base? A general check with no question attached produces a number nobody can act on, particularly with no federal limit to compare it against. If you're weighing whether your situation fits, our page on mold spore testing describes what testing can resolve. Either way, drying and fixing the source come first. Testing a floor that's still wet just documents a problem you haven't stopped.
In Georgetown and Austin, finish any storm loss with a perimeter check. Read the slab edges, cabinet bases, baseboards and transitions after heavy rain, when humidity lingers and water finds those exact entry points. That's where the next problem announces itself first.
If readings under your laminate won't come down, the water came from a backup or storm, or you're not sure the source is fixed, RestoTek TX can inspect the assembly, extract the water, dry the structure to a documented standard and handle the rebuild for homes and properties across Georgetown and Austin. Visit RestoTek TX to request an assessment and get a written scope based on what's under your floor, not just what shows on top.