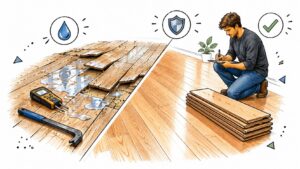
You pulled back a rug or stepped into a room that had started to smell a little off, and the floor looked wrong. A board has cupped, a tile edge feels loose, or there's a chalky white line near the baseboard that keeps coming back after you wipe it away. That's usually the moment people blame the flooring, but the floor is often just where the problem finally showed itself.
Concrete slab moisture is a diagnosis problem first. The slab may be telling you that water is moving up from below, slipping in at the edges, or returning after a leak that never fully dried. If you treat it like a flooring-only issue, you can replace the finish and miss the source that caused the damage in the first place.
When a Dry-Looking Floor Tells a Wet Story
A Georgetown homeowner once calls after noticing a faint musty smell in a hallway. The hardwood still looks mostly fine at a glance, but a rug has hidden a soft spot, and the trim near one wall shows a white, powdery line. By the time someone notices the floor, the slab underneath has usually been sending signals for a while.
That's the trap with concrete slab moisture. The top can look dry while the slab is still holding water below the surface, moving vapor upward, or wicking moisture in from the edge. Industry guidance on slab testing exists because surface appearance alone can mislead you, and a slab can still be wet enough to damage adhesive, coatings, or flooring even when it looks ready to go NRMCA guidance on slab moisture and testing.
The floor is usually the messenger
Practical rule: if the finish failed, ask what made the slab wet enough to stress it.
That change in focus matters. A floor can cup, buckle, blister, or delaminate because the slab below it is still releasing moisture, not because the flooring product was automatically defective. Concrete can also look stable while moisture is moving through it slowly, which is why contractors test the slab itself instead of guessing from the room conditions.
A good mental model is this. The floor is the paper, the slab is the blotter, and the moisture source is what keeps the stain spreading. Once you think in those terms, the next questions become clearer, where is the water coming from, how is it moving, and what needs to be fixed before anything new goes down?
What Concrete Slab Moisture Actually Is
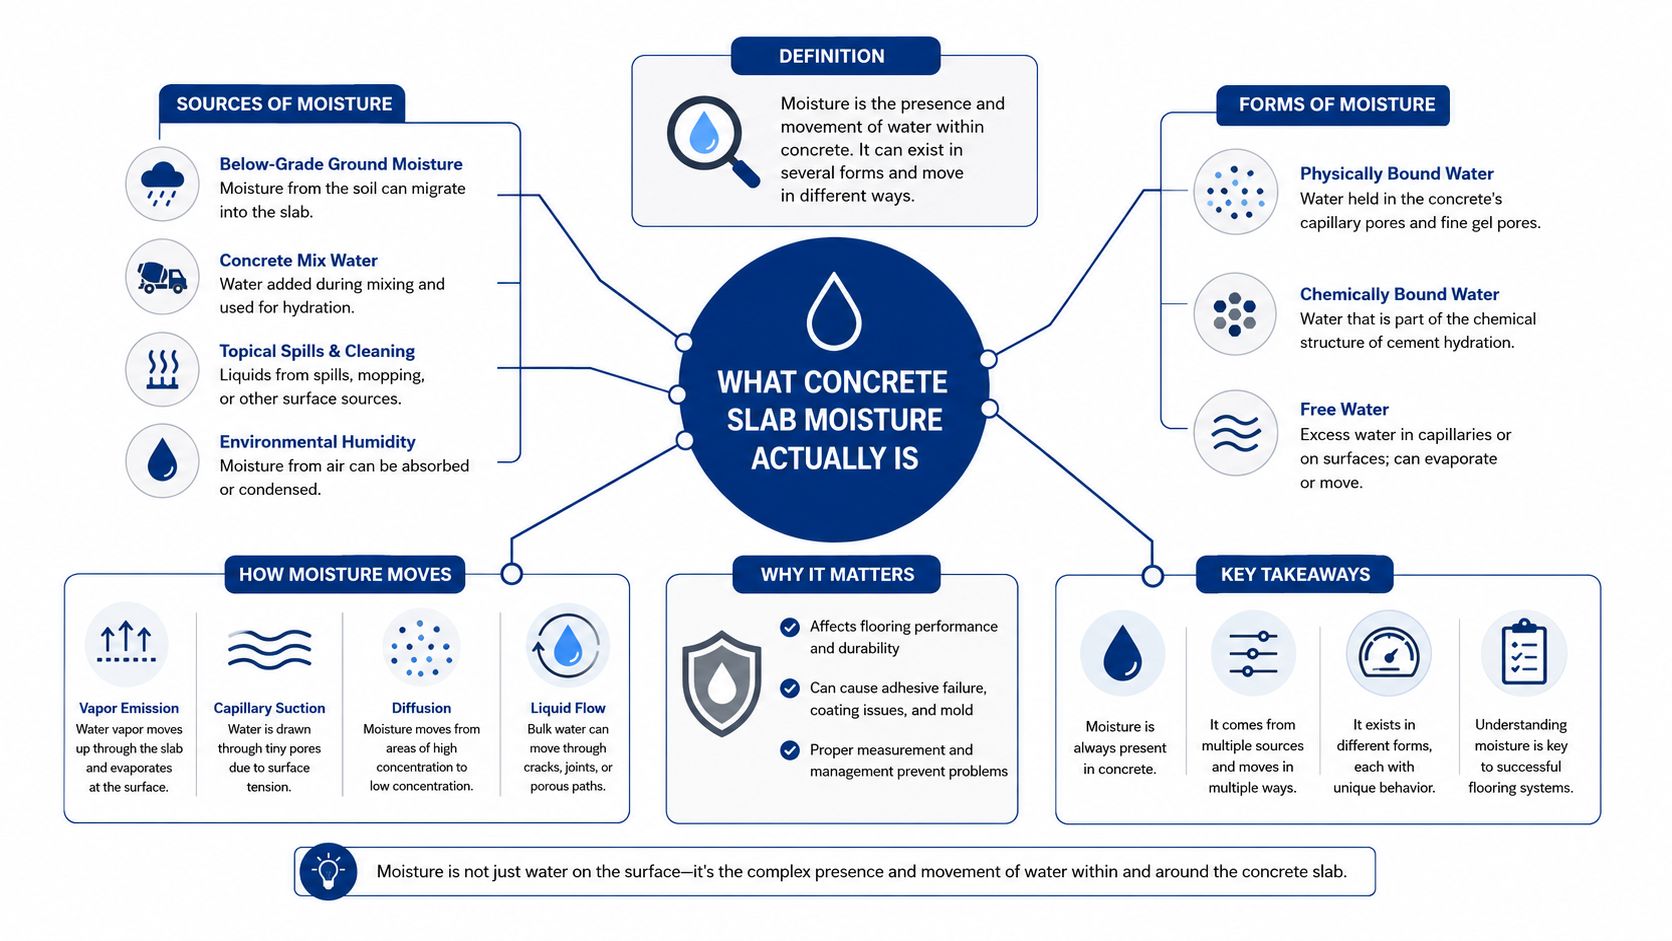
Think of concrete like a dense sponge with tiny straws running through it. The sponge part holds water in its pores, and the straws let moisture move from wetter areas toward drier ones. That's why a slab can feel fine on top and still be carrying moisture deeper inside.
Three ways water behaves in a slab
Vapor drive is the slow movement of water vapor through the slab's pore structure. It happens when conditions below the slab and above it are different enough to push moisture upward over time. This is the reason a slab can keep feeding a flooring problem long after the obvious wet spot is gone.
Capillary rise is more like a paper towel pulling liquid water upward. Concrete's tiny channels can wick moisture from wetter soil or a wet area beneath the slab into the concrete itself. That can leave the top layer looking much drier than the body of the slab is.
Groundwater and hydrostatic pressure are the more forceful version of the same story. If the slab sits in saturated soil, water doesn't just drift, it can be pushed into the concrete by pressure from below. That's when a floor can stay damp, smell musty, or keep showing edge staining even after cleaning.
Why surface dryness can fool you
The part people can see dries first. The deeper part can stay wet longer, especially if the slab is thick, recently re-wetted, or still tied to a moisture source below it. That's why surface-only checks can miss the true condition inside the slab, and why in-situ testing matters when a floor system is sensitive to moisture.
A slab that looks dry is not the same thing as a slab that's ready for a moisture-sensitive finish.
Once you see the slab as a moving moisture reservoir instead of a solid block, the rest of the problem starts to make sense. The floor didn't create the moisture, it just reacted to what the slab was already doing.
How Moisture Gets Into a Slab in the First Place
A wet slab usually has a backstory. In Central Texas, that story often starts before the house was finished, or it comes back later through the site, the edges, or the plumbing.
The usual pathways
Residual mix water is one common source. Concrete needs water to be placed and cured, but some of that water remains in the slab long after the pour. If the slab is covered too early, the moisture has nowhere to go.
Poor curing can make that worse. If the surface dries too quickly or the slab was sealed in a way that traps moisture, you can end up with uneven drying and moisture concentrated where the flooring will later sit.
A missing or weak vapor retarder under the slab is another big factor. Moisture from the ground then has a much easier path into the concrete. NRMCA and related slab guidance treat vapor control, drainage, granular capillary breaks, and curing as part of the moisture-control strategy, not as afterthoughts Granite Rock vapor barrier guidance.
Then there's the site itself. In the Austin and Georgetown area, clay soils hold water against slab edges after storms, so moisture can linger even when the rain stopped hours ago. Poor grading, clogged drainage, and splashback at the perimeter can all keep the slab edge damp.
Plumbing leaks are the other curveball. A slab that had been stable can get re-wetted by a supply line, drain issue, appliance overflow, or fixture leak. In those cases, the floor failure is often the last symptom, not the first event.
What the warning signs tend to point to
- Efflorescence near the perimeter usually points to water moving through concrete and leaving mineral residue behind.
- Musty odors often suggest moisture has been present long enough for microbial activity to matter.
- Cupping or buckling flooring usually means the slab or subfloor environment is still delivering moisture to the finish.
- Visible dampness after rain often points to drainage or edge intrusion rather than a simple indoor humidity issue.
If you're not sure whether the problem is below the slab, around it, or inside the building, thermal and leak tracing can help isolate the source, and a focused inspection is often faster than guessing. Leak detection and thermal imaging is one way to separate a true plumbing issue from a broader moisture pattern.
Warning Signs You Should Not Ignore
Some slab moisture problems announce themselves loudly. Others show up as small annoyances that keep repeating, which is usually why people wait too long.
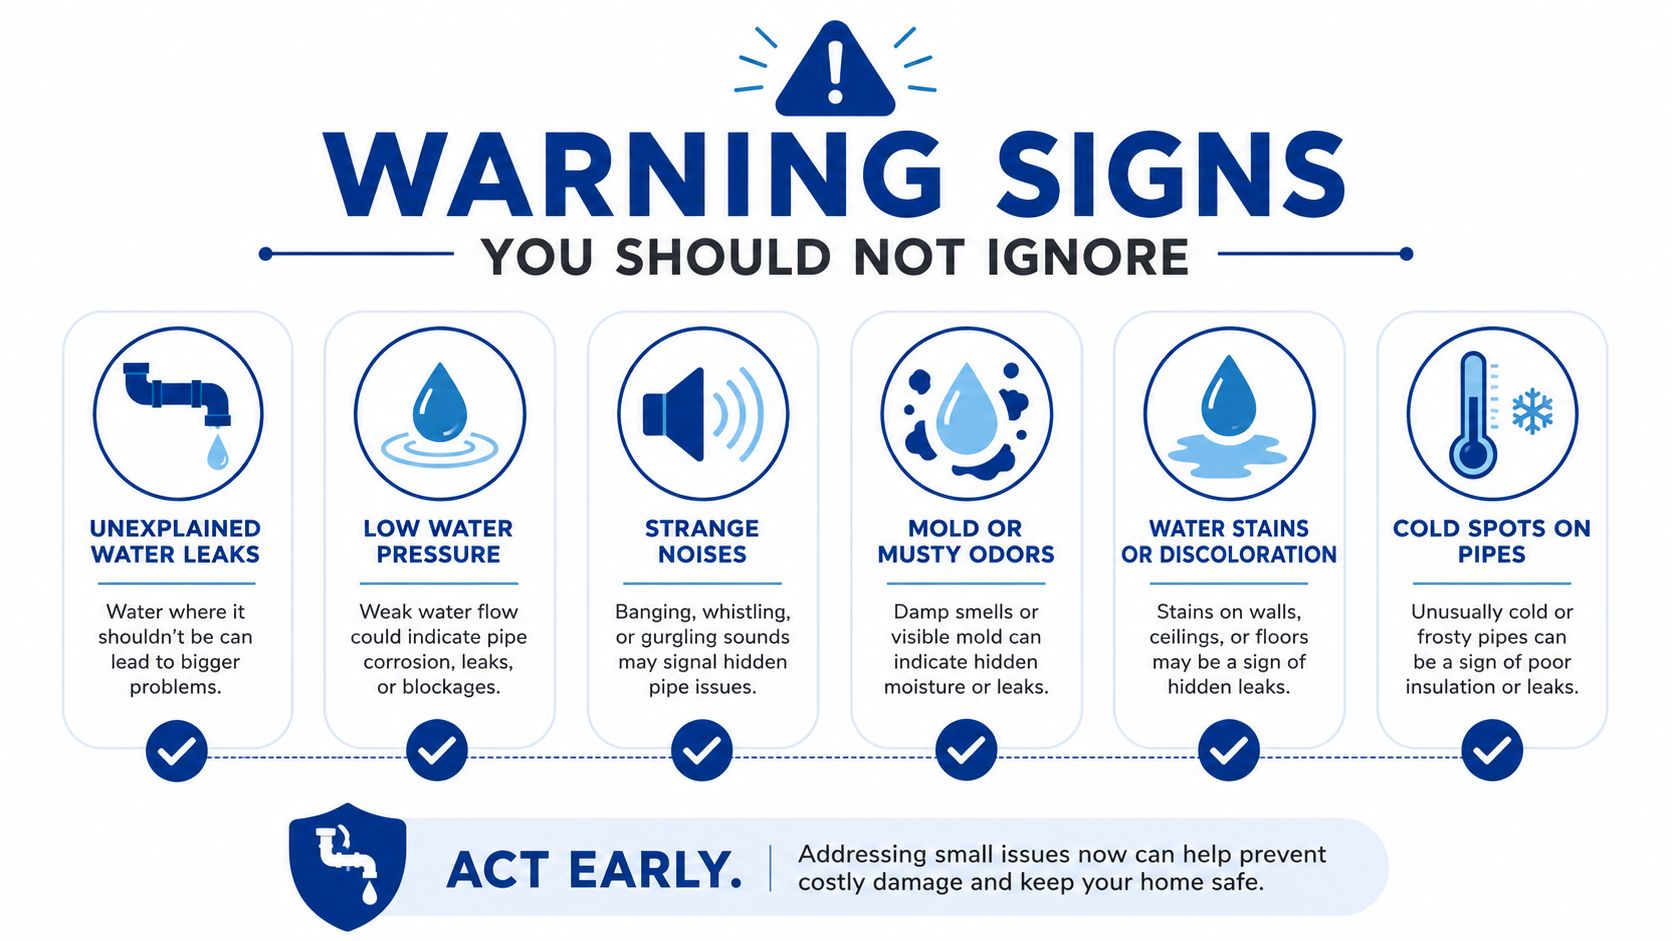
What to notice first
White powder at the baseboard or grout line is efflorescence, and it's a strong clue that moisture is migrating through the slab or masonry and evaporating at the surface.
A persistent earthy smell can show up before visible mold does, especially if moisture is staying in a hidden cavity or under flooring.
Hardwood that cups or laminate that starts to lift often means moisture is being pushed up from below or in from the edges.
Vinyl plank gaps, discoloration, or loose tile with tacky adhesive usually point to a moisture problem at the substrate level rather than a finish problem alone.
Carpet that never feels fully dry can mean the slab beneath it is still holding moisture or was re-wetted.
Indoor humidity that climbs with rainy weather can reveal a moisture source tied to the building envelope or slab edge.
How the tests can mislead people
The confusing part is that different moisture tests measure different things. Calcium chloride testing tracks how much moisture leaves the slab over time, while in-situ relative humidity testing reads moisture conditions inside the slab itself. A plastic sheet test only gives a rough visual clue, and pinless surface meters are useful for screening but can miss deeper moisture patterns. The slab can look better under one method and still be too wet for a moisture-sensitive flooring system.
NRMCA notes that calcium-chloride limits are often around 3 to 5 lb of moisture per 1,000 ft² per 24 hours, while depth-specific in-situ RH testing is commonly used because it looks inside the slab, not just at the surface NRMCA guidance on moisture limits and testing. That's why a contractor should explain what the test means before anyone treats the number as a final answer.
Testing Methods and What the Numbers Really Mean
A moisture report should answer two basic questions, what was tested, and what that test shows. Without both, the number can look precise while still pointing you in the wrong direction.
A slab is a little like a sponge with layers. The surface may feel one way, while the deeper concrete still holds moisture that has not reached the top yet. That is why the method matters as much as the reading itself.
The four common approaches
Calcium chloride, ASTM F1869. This method measures how much moisture leaves the slab over a set period. It gives a useful surface emission number, but it does not directly show what is happening deeper inside the concrete.
In-situ relative humidity, ASTM F2170. This test places probes inside the slab, typically at about 40% of slab depth for one-sided drying or 20% for slabs drying from both sides, because moisture inside concrete is not uniform NRMCA guidance on F2170-style testing. This method gets closer to the slab's internal moisture condition, which is why many contractors rely on it when they need more than a surface check.
Plastic sheet testing. This is a simple visual check, but it is qualitative. It can show obvious condensation issues, yet it does not give the product-specific answer a flooring installer usually needs.
Pinless meters. These are fast screening tools. They are useful for scanning a room and spotting areas that deserve a closer look, but they are surface-oriented, so they can understate deeper moisture or miss a localized problem under a finish. For a plain-language example of how a meter reading can be misread, see moisture meter reading basics.
What “acceptable” really means
There is no single moisture number that fits every floor. Some flooring systems allow 95% RH or more, while many installations still need a slab closer to 75% to 80% RH before the finish goes down. That is why the flooring manufacturer's instructions matter as much as the test method itself.
Practical rule: if a report gives you a number without telling you the product limit, you still do not know whether the slab is ready.
For homeowners reading a report, the key is simple. Ask what the test measures, where the probes or checks were placed, and what flooring system requirement the result was compared against. That gives you a clearer read on the slab than hearing, “the slab tested dry enough.”
Mitigation Strategies That Work
A Georgetown homeowner after a heavy spring rain may see a floor that seemed stable for years suddenly turn cloudy, tacky, or odorous near the edges. That kind of change usually means the slab is telling a moisture story, and the next question is whether the source is already gone or still feeding the problem from below.
Four honest options
Accelerated drying fits a recent water loss. Professional dehumidifiers and air movement can help pull moisture out of the space faster, but only if the slab is no longer being re-wetted by a leak or by moisture moving up from the ground. For a broader look at how controlled drying supports recovery after intrusion, see structural drying in Central Texas.
Vapor retarders and under-slab barriers address the source. They matter most during construction or a major rebuild, because once the slab is in place, you cannot add a new barrier underneath it and expect the problem to disappear.
Penetrating sealers and topical coatings can slow vapor movement on an existing slab. They can buy time, but real-world performance varies, and they are not the right answer when the slab is continuously releasing more moisture than the flooring can tolerate.
Full moisture mitigation systems are the heavy-duty option for slabs that will not dry enough on their own. These systems are usually used when the slab looks fine from above but still releases too much vapor for the floor covering planned for it.
A mitigation product only helps when it matches the moisture source, the slab condition, and the finish that will go over it.
RestoTek TX handles this kind of work through inspection, moisture mapping, structural drying, microbial prevention, and reconstruction, so the slab condition and the repair plan stay connected instead of being treated as separate jobs. That matters when you are trying to avoid a second floor failure after the first one already cost you time and frustration.
Why Central Texas Slabs Behave Differently
Central Texas weather and soil make moisture problems harder to dismiss. Heavy clay holds water near the slab edge, so a yard that looks okay in the morning can still be holding moisture against the house after a storm passes.
Why the local setting changes the diagnosis
Older homes and newer slab-on-grade construction don't always fail the same way. A pier-and-beam home may show floor symptoms differently than a post-tension slab, and a recent water loss can change the moisture profile of either one even if the room seemed dry within a week. That's why a “it dried out” story isn't always the whole story.
The right response starts with inspection and moisture mapping, then moves into instrumented drying, microbial prevention, and reconstruction if needed. That sequence is what keeps the problem from bouncing between trades with no one owning the source.
| Common Central Texas Moisture Pathway | What You Notice | Immediate Response |
|---|---|---|
| Clay soil against slab edges | Musty smell, edge staining, damp baseboards | Check grading, drainage, and perimeter moisture |
| Plumbing leak under or near the slab | Sudden odor, warped flooring, isolated wet zones | Isolate the source and document the affected area |
| Heavy rain or overflow | New discoloration after storms, soggy carpet edges | Dry the area fast and inspect for edge intrusion |
| Recent water loss | Flooring movement, lingering humidity, hidden moisture | Map moisture before any replacement starts |
A local restoration team can shorten the back-and-forth because the same crew can inspect, dry, and rebuild under one roof. That is usually easier on a homeowner than coordinating separate vendors while the slab is still changing.
When to Call a Restoration Pro and What to Expect
Call sooner if water is still entering, the smell won't leave, or you're about to replace flooring on a slab that hasn't been formally tested. A proper response should document the source, map the moisture, dry the structure, and keep microbial risk from spreading while the repair plan is being built.

A restoration crew should be able to explain what was measured, where it was measured, and what still needs drying before the finish goes back down. That documentation also helps if you need to support an insurance claim later, because the record shows more than a damaged floor, it shows the condition that caused it.
If you're dealing with floor movement, odors, or a slab that still won't dry the way it should, RestoTek TX can inspect the source, map the moisture, and handle drying and rebuild under one roof. Visit RestoTek TX to request help from a Georgetown and Austin team that works on water losses, slab moisture, and reconstruction for homes and properties across Central Texas.