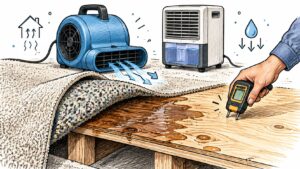
The water is already under the floor by the time you find it. Maybe a washing machine hose split, maybe the toilet supply let go while you were at work, and now the carpet squelches when you cross the room. You pull the pad back, mop what you can see, and point a box fan at the plywood. By morning the surface feels dry to your hand.
That feeling is worth almost nothing. Plywood, OSB, underlayment and pad hold water in the middle of the panel and along the seams, and a dry top face can sit over a wet core for days. Whether flooring can go back down depends on readings taken with an instrument, not on how the floor feels underfoot.
Drying Timeline and Moisture Targets at a Glance
At 2 a.m. the dishwasher supply line splits behind the cabinet. Water runs under the toe kick, across the vinyl and into the subfloor for hours before anyone stands in it. The drying clock starts when the line let go, not when you find the puddle, and that gap decides how the rest of the job goes.
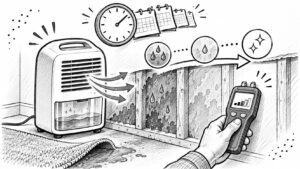
The EPA's guide to mold, moisture and your home sets the first 24 to 48 hours after a leak, spill or flood as the critical window for drying wet building materials, subfloors included. Its guidance says damp materials and areas dried inside that window will not grow mold in most cases. That is the benchmark the whole job is scheduled around.
It's a risk milestone, not a guarantee. Temperature, indoor humidity, the subfloor material, whether the water was clean or contaminated, and how deep it soaked all shift the result. Drying also fixes nothing while the source is still running: the EPA is direct that plumbing leaks, roof leaks, seepage and condensation have to be corrected first.
Write down two times: when the water started and when you shut it off. Everything after that gets measured against them, including your insurance claim.
The stage-by-stage timeline
| Stage | Timeframe | What to do | Target |
|---|---|---|---|
| Water removal | Immediately | Extract standing water and pull wet pad and carpet | No standing water left on the subfloor |
| Early airflow and dehumidification | First 24 hours | Run air movers into cavities and dehumidifiers in the room | Readings falling day over day |
| EPA drying window | 24 to 48 hours | Finish drying the subfloor and underlayment | Readings close to an unaffected reference area |
| Past the window | After 48 hours | Stop, test for hidden moisture and assess mold risk | Decide whether to bring in a professional |
| Pre-test conditions | Before any final test | Return the home to normal living conditions, no open windows or temporary heat | Readings describe the building, not a temporary condition |
A subfloor still wet past the 48 hour mark moves into a different risk category. Hidden moisture keeps feeding microbial growth and keeps softening absorbent panels, so the work shifts from drying to testing and deciding what can be saved. If you want the fuller picture of how long this takes in a real house, this breakdown of structural drying timelines covers the variables.
- Stamp the start time. Note the hour the water began and the hour it stopped. Any adjuster will ask for both.
- Set a target for today. Standing water out, wet pad and carpet out, air movers and a dehumidifier running before the day ends.
- Check whether the clock is already against you. A leak that ran overnight, over a weekend or while the house was empty means you're starting behind, and the testing below matters more than the fan.
Moisture Readings That Prove the Subfloor Is Dry
Your palm can't tell you whether the middle of a plywood panel is wet, and the color of the surface can't either. Water sits in the core, along the seams and around fastener lines while the face reads dry and cool. The number that matters is moisture content, taken with a meter and compared against a part of the same floor that never got wet.
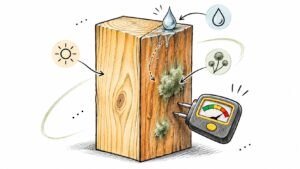
The National Wood Flooring Association's installation guidelines put the traditional threshold for protecting wood from rot or decay at below 19% moisture content. The same guidance reports studies that found mold growth on wood above 15% moisture content, and corrosion of metal fasteners once moisture passes 18%. Read those as warning levels that call for more investigation and more drying, not as automatic outcomes.
Read the whole floor, not the puddle
Moisture hides around walls, in seams and joints, at cabinet bases and toilet flanges, and along nail lines, so one reading at the visibly damaged spot proves nothing. Sweep with a pinless meter to find the wet boundary, then confirm with a pin meter at a set depth, say a quarter inch into the face, so every visit is comparable. Always finish on a dry, unaffected section of the same structure and treat that as your baseline.
What each reading tells you
| Wood moisture reading | What it signals | Next action |
|---|---|---|
| Below 15% | Lower mold concern on wood | Confirm the reading matches the dry reference area |
| 15% to 18% | Mold growth possible on wood | Keep drying and test more points |
| Above 18% | Metal fasteners may corrode | Keep drying and check nail lines and fasteners |
| Below 19% | Traditional threshold to protect wood from rot | Use as the benchmark for repair decisions |
Concrete slabs behave differently. Water wicks up through the slab after surface water is gone, so the top can read acceptable while the slab is still releasing vapor. Before you cover one, run the test your flooring manufacturer requires, usually an in-situ relative humidity probe or a calcium chloride test, and record it with the same care as the wood readings.
The NWFA guidance also asks that normal living conditions be held for 48 hours before testing, which means no propped-open windows and no space heater parked in the room. You want the building's stable state, not a temporary one. Put each location on a simple grid with the date and reading, keep drying until the numbers level off and stay flat across two visits, and check what a moisture meter reading actually means before you declare the floor done.
Step-by-Step Drying Procedure for a Wet Subfloor
Work the job in the same order every time and the failure points become obvious. Skip a step and you usually find out three days later, when the readings stop falling and the floor has to be opened again.
Here's the sequence laid out before the detail:
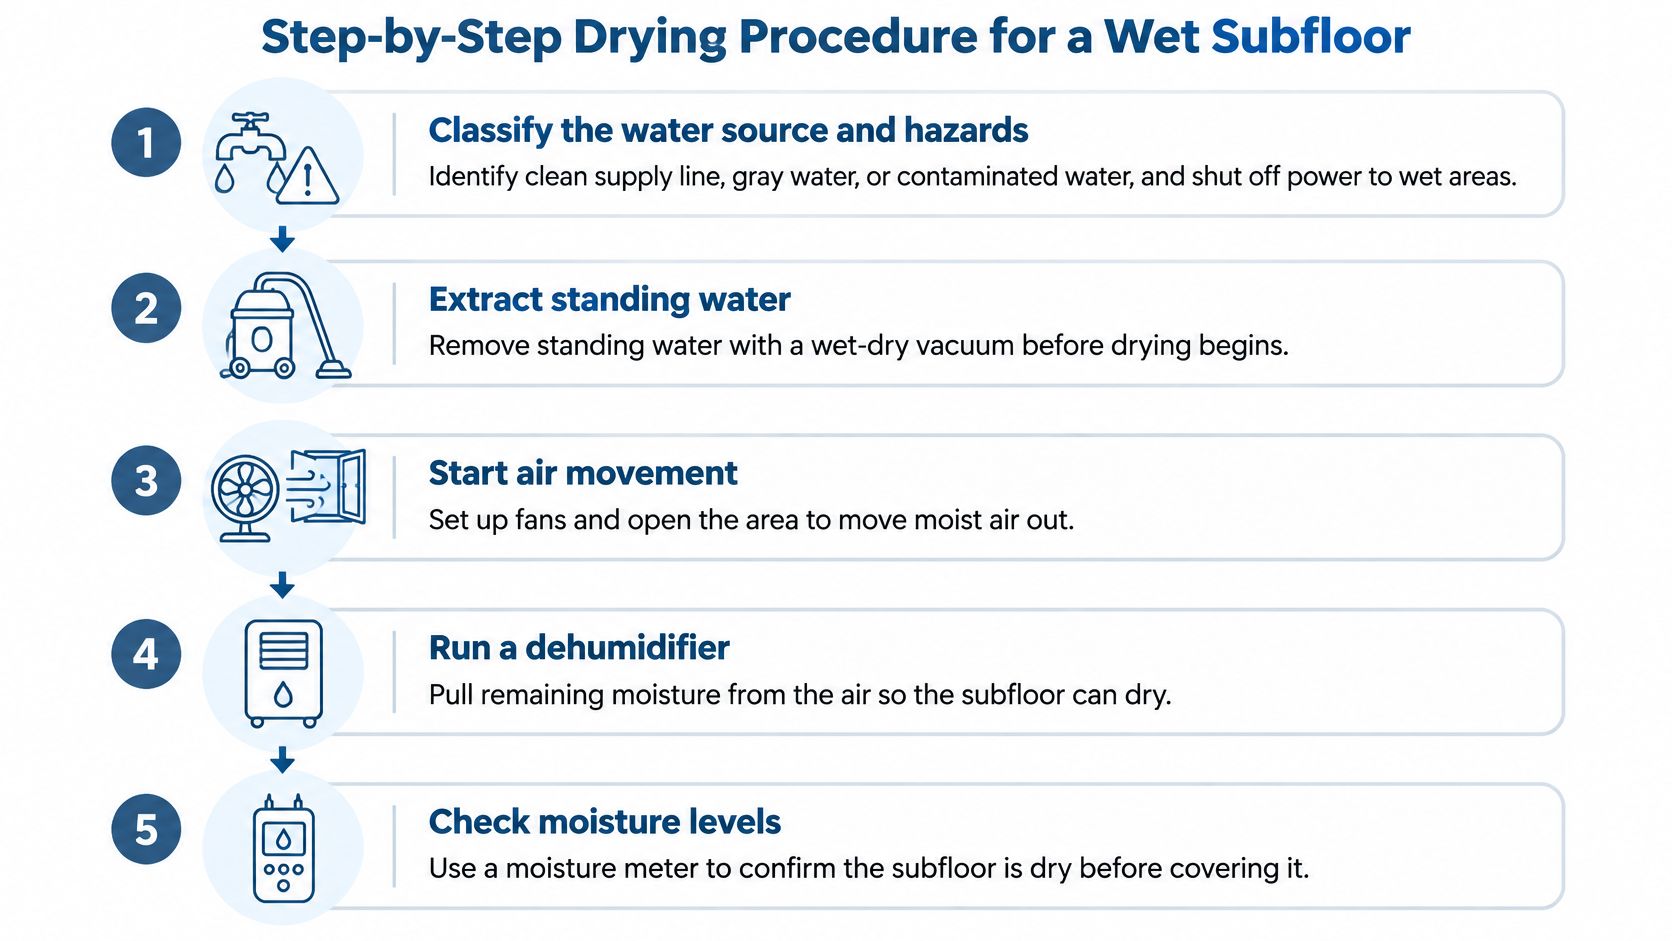
The sequence, in order
- Classify the water and cut the power. A clean supply line, gray water from a dishwasher or washing machine, and contaminated water from a toilet backup or storm intrusion are three different jobs. Shut off power to wet areas and stop the source itself before anything else happens.
- Extract bulk water first. A wet vacuum or pump takes out what's standing. Skipping extraction and going straight to air movers just pushes water deeper and raises the humidity you then have to fight.
- Open the assembly. Pull wet carpet, pad and underlayment, take off toe kicks, cut back edges at walls and expose seams and nail lines. For wood subfloors, inspect edges, joints, nail penetrations and the underside where you can reach it, because moisture stays trapped there long after the top face feels dry.
- Aim air into cavities, not across the room. Air movers belong along wall bases and into the space under the assembly. A fan pointed at open floor dries the air, not the plywood.
- Run dehumidification and hold the room steady. The EPA's mold remediation course puts the sequence the same way: classify the water and hazards, extract, open the assembly, establish airflow, control temperature and relative humidity, then verify with logged measurements. It notes that raising air circulation and temperature speeds drying, but balanced airflow plus dehumidification is the control, not fans alone. If you're weighing rental against purchase, this guide to dehumidifiers for flood damage covers how to size one for the room.
- Log everything, every day. Equipment placement, daily readings, temperature and relative humidity. The log exposes the area that has stalled and it's the documentation an insurance claim runs on.
- Stop on stable numbers, not on touch. The success criterion isn't a universal percentage. It's a return toward the dry baseline of the same material in an unaffected area, held across successive checks.
The test that ends the job: two consecutive visits where every point on the grid has stopped moving and matches the reference area.
The same guidance warns that mold can still develop even when materials are dried inside the response period, which is why the log and a final inspection matter. Do not put back carpet, vinyl, laminate, adhesive or cabinets until both the subfloor and the material-specific installation limits are met. The common slips are always the same: no extraction, pad left in place, air pointed at the room instead of into the cavity, and a stop called because the surface felt dry.
A healthy drying day looks boring. Fans running, the dehumidifier collecting water, the drain line draining, and every reading on the grid lower than yesterday. When a number stalls for a day, that's your signal, not a reason to wait another week.
Which Floor Coverings Can Go Back Down and When
A room can feel cool and dry while moisture remains inside the subfloor. If wet wood or concrete is covered too soon, the new flooring can trap that moisture. A sealed finish such as vinyl can also limit evaporation from below, so a dry-feeling surface is not proof that the floor assembly is ready.
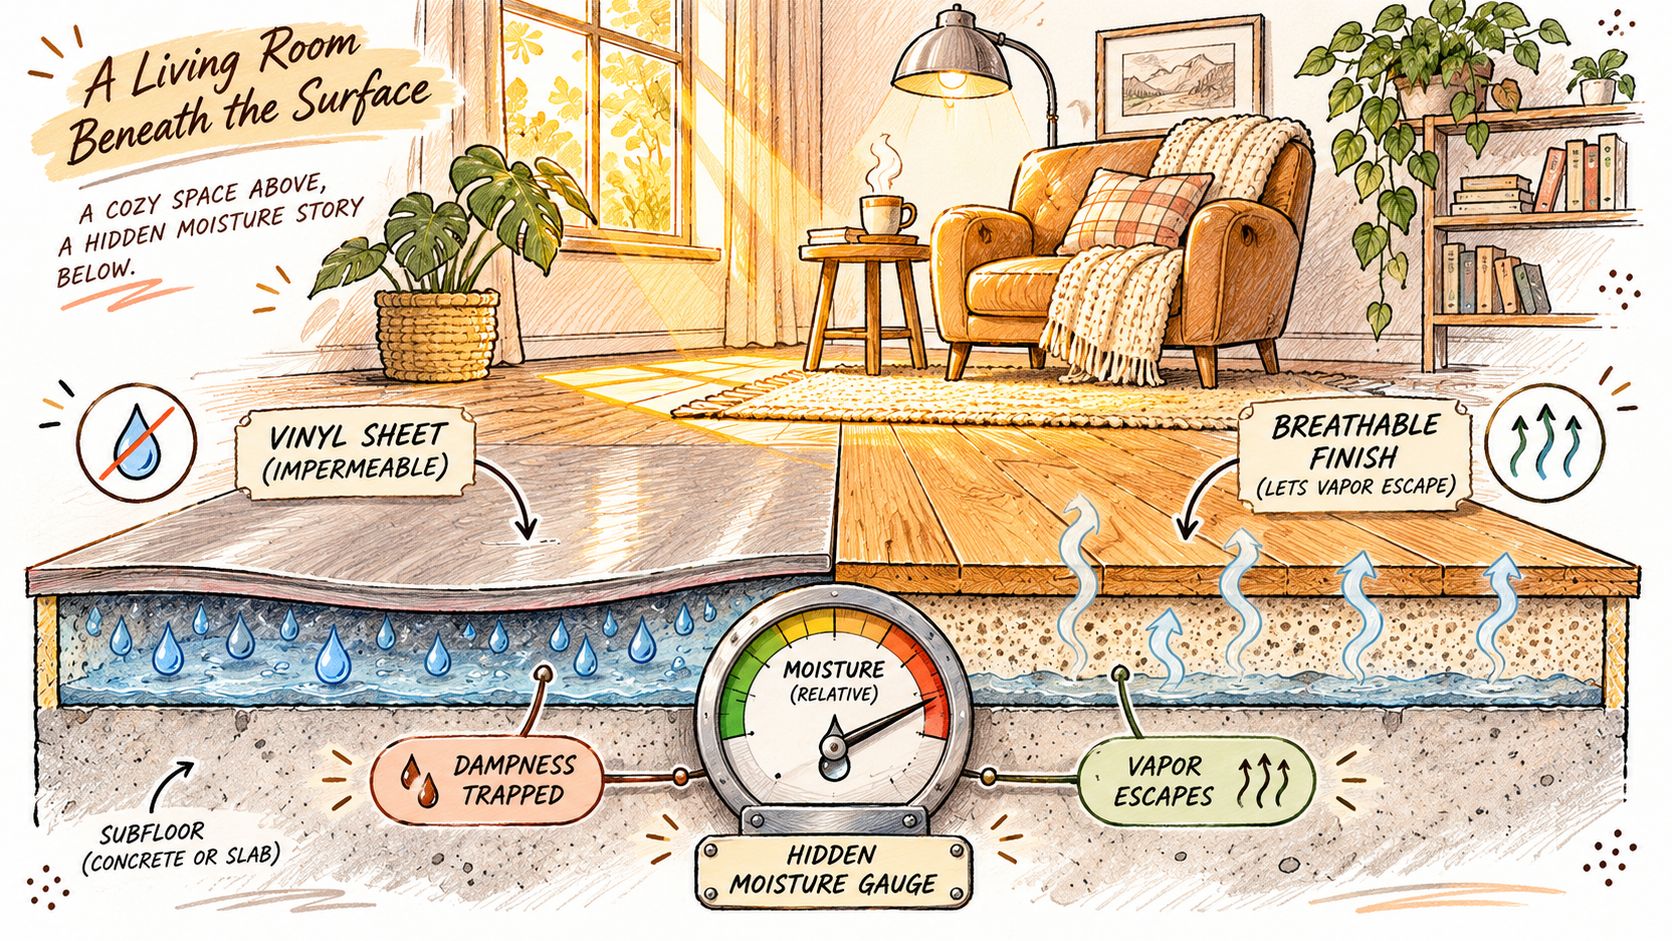
The subfloor and the floor covering each need to meet their own drying and installation requirements. Keep coverings off until moisture readings are stable and meet the applicable manufacturer limits.
| Floor covering | Replace or wait | Clear to install when |
|---|---|---|
| Carpet and pad | Replace pad after a wet event | Subfloor readings are stable at the dry baseline |
| Vinyl and laminate | Wait | Subfloor meets the manufacturer moisture limit and the dry baseline |
| Hardwood | Wait | Wood readings fall below the manufacturer limit |
| Tile on mortar or cement board | Wait | Concrete-based layers pass separate testing |
| Any covering after gray or contaminated water | Replace porous materials | Remaining porous materials can be cleaned and dried |
Carpet pad usually warrants replacement after it gets wet. It holds water against the subfloor, where moisture can remain hidden beneath carpet that appears dry. Before reinstalling any covering, check below-floor ventilation and confirm readings at several subfloor points are stable and within the limits for the flooring being installed.
Material matters. Vinyl and laminate need readings that meet both the subfloor's dry baseline and the product's moisture limit. Hardwood has its own moisture limit, while tile requires separate testing of concrete-based layers. A single reading from the surface cannot establish that every layer is ready.
After gray or contaminated water, porous materials that cannot be cleaned and dried should be replaced. Do not reinstall flooring over a damp pad or subfloor just because the room feels comfortable. Let the core of the assembly dry, and account for the floor covering's ability to restrict moisture movement before closing it up.
Problems That Stall Drying and How to Fix Them
The symptom that ends most drying jobs isn't a wet floor. It's a floor that stopped drying. Readings that sit flat for a day after the window has closed mean something is still feeding moisture or something is still trapping it.
| Symptom | Likely cause | Fix |
|---|---|---|
| Readings flat after 48 hours | Moisture source still active or trapped under the finish | Stop the source, expose the edges and add dehumidification |
| Room feels dry but subfloor reads wet | Impermeable finish or cool indoor air trapping moisture from below | Remove the covering, check below-floor ventilation and keep flooring off |
| Musty or earthy odor | Mold growth in damp wood or underlayment | Test for mold before reinstalling any flooring |
| Soft or spongy spots | Rot or delamination from prolonged wetness | Probe the area and cut out and replace the damaged section |
| Discoloration on walls near the floor | Moisture wicking into the wall cavity | Open the cavity and dry it from inside |
| Gray or contaminated water | Bacteria and contaminants from the water source | Remove porous materials that cannot be cleaned and dried |
Flat numbers come first because they're the most common and the most misread. A floor that reads the same on Tuesday and Thursday is telling you the drying setup isn't reaching the water, or that a slow supply line, a roof detail or ground seepage is still adding moisture faster than the equipment removes it. Expose the perimeter, open the cavity and add dehumidification before you add more fans.
Discoloration climbing the drywall near the baseboard is a wall problem, not a floor problem, and it won't resolve while the wall cavity stays closed. Soft or spongy spots are a structural question. Probe them with an awl; if the panel gives or the layers separate, that section gets cut out and replaced rather than dried.
We recommend mold testing when there are persistent musty or earthy odors, recent water damage or leaks, past flooding or plumbing failures, visible discoloration on walls or ceilings, respiratory symptoms that improve outside the home, or a home purchase or sale in progress.
Sort what you're seeing into two piles: symptoms you can keep drying through, and symptoms that need a test before a single board goes back down.
An odor, a soft spot or a reading that won't move belongs in the second pile.
Decide Whether to Dry It Yourself or Call a Pro
There's a version of this job a careful homeowner can finish, and there's a version that gets more expensive every day it's handled alone. The difference isn't courage or equipment. It's the water category, the size of the affected area, and whether the numbers are moving.
Keep drying it yourself only when all of these are true:
- The water was clean. A supply line, a tub overflow, rain through a closed window.
- The source is fixed. Not taped, not valved off and forgotten. Repaired.
- The area is small. One room, one assembly, no wicking into adjacent walls.
- Readings reached the dry baseline inside the response window.
- Several points hold stable across repeat visits.
Call a water damage professional when any of these is true:
- Gray or contaminated water. Dishwasher discharge, a toilet backup or anything with sewage in it.
- Multiple rooms or a cabinet run involved.
- Readings still high after the window closed.
- The subfloor feels soft underfoot.
- A musty odor persists after drying.
- An insurance claim needs documented drying logs.
Where plumbing caused the loss, we coordinate the repair with licensed plumbers and start drying and restoration as soon as the source is resolved, rather than drying around a joint that's still weeping. We provide structural drying in Austin and the surrounding communities, and our mold testing runs four steps, from initial inspection and sampling through analysis and a results review that explains what the findings mean for the rebuild. A professional brings moisture mapping, structural drying equipment and a written log you can hand to an adjuster.
Confirm the source is fixed, look at the clock, and call for help the moment one stop criterion applies.
RestoTek TX handles structural drying for wet subfloors across Austin and Georgetown, from extraction and moisture mapping through documented daily readings and reconstruction once the floor is dry. We also coordinate the plumbing repair that started the loss, so the source is closed before drying begins. If your floor still reads wet or you've passed the point where doing it yourself makes sense, RestoTek TX can inspect it and tell you what can be saved.