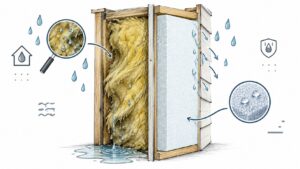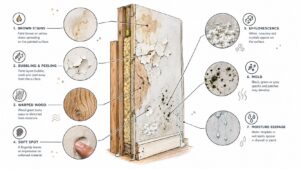
A damp bath mat can be the first sign that something is wrong. A ceiling stain in the room below can be the second. By the time either symptom appears, water may already have traveled behind the tile, through the grout joints, and into the wall or floor assembly.
The important distinction is that tile itself usually isn't the waterproofing system. A shower depends on several layers working together, including the tile surface, grout, backer material, sloped receptor, drain connection, and waterproof membrane. A targeted repair can make sense when one accessible detail has failed. It won't solve a compromised membrane or rotting substrate.
Why Shower Tiles Leak and What It Really Means
A shower used by two people for ten minutes each day can place about 50 gallons of water on the shower floor daily when the showerhead flows at 2.5 gallons per minute. In a typical 3-foot by 4-foot shower, that source equates to nearly 7 inches of water, and more than 2,500 inches over a year. The tile-industry waterproofing document uses that exposure to explain why ceramic tile surfaces shouldn't be treated as waterproof barriers.
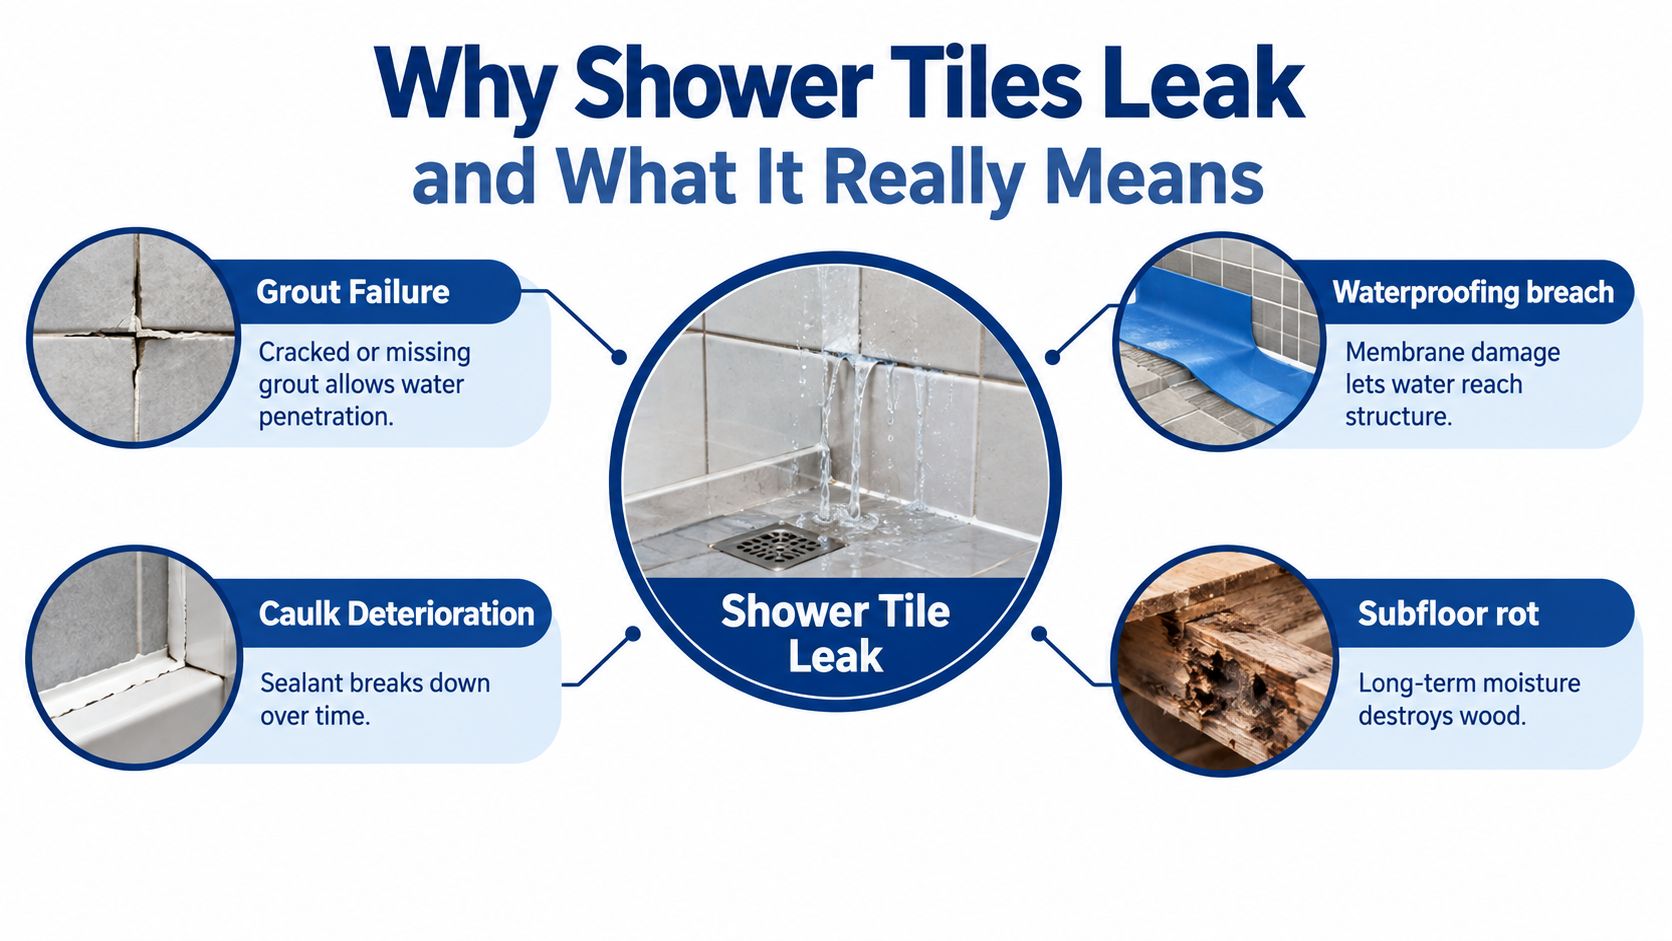
Cement grout allows moisture to move through microscopic capillaries. Some tile bodies are porous as well, and movement can open a gap where tile meets grout. Water then migrates toward the wall cavity, floor, or framing instead of remaining on the visible surface.
Practical rule: Treat a leaking shower as a building-system problem first and a tile problem second.
A homeowner may see one cracked joint and assume the repair is simple. Sometimes it is. A failed bead of sealant at a corner or a loose drain flange can create a localized path, while a missing or damaged membrane can allow water to spread throughout the assembly. The tile may still look clean and firmly attached even while the backer board, insulation, framing, or subfloor is absorbing moisture.
That distinction changes the repair. Regrouting can address failed grout. It can't replace a waterproofing layer hidden behind tile. If the substrate has become soft or the waterproofing has failed across a broad area, sealing the surface only delays the more disruptive work.
Diagnosing the Leak Source Step by Step
A good inspection follows a sequence. Randomly spraying walls, removing tiles, or sealing every visible crack creates confusion and can destroy useful evidence.
Start with the visible assembly
Inspect the grout joints, inside corners, curb, threshold, shower floor, and drain flange. Look for missing material, repeated cracking, darkened joints, efflorescence, gaps in caulk, loose trim, and water that remains around the drain after use.
Tap the tile gently with a rubber mallet or the handle of a tool. A solid installation generally produces a consistent sound. Hollow areas don't prove a leak by themselves, but a hollow or moving tile combined with moisture readings, recurring cracks, or staining deserves closer inspection.
Check the rooms beside and below the shower. A moisture meter can compare readings in apparently dry areas with readings near stained drywall, baseboards, flooring, or ceiling penetrations. Water often travels laterally, so the wettest visible area isn't necessarily the point where water entered.
Isolate the shower receptor
A proper pan test separates a drain, pan, or liner problem from a wall, valve, or supply-line problem. Plug the drain with a watertight test plug, flood the receptor to about 1 to 2 inches below the threshold or curb top, mark the starting waterline, photograph it, and hold the test for 24 hours. Independent tiled-shower inspection guidance describes this sequence and emphasizes documenting the starting level and checking for a measurable drop.
The plug must seal the drain correctly. Testing too high, or using a poor plug, can send water into places that aren't part of the normal shower load and produce a false result.
Test the walls separately
A passing pan test doesn't clear the shower. Run controlled spray tests on individual wall sections, corners, the valve trim, niche, curb, and door area. Keep the test organized so a moisture change can be connected to one location rather than to the entire enclosure.
Some technical guidance distinguishes between field flood tests and pre-tile liner inspections. Code summaries may cite a 15-minute liner test and a 2-inch water depth at the threshold, while finished-shower inspection guidance can use longer holds and additional spray or thermal testing. The IRC-based testing summary explains why the applicable benchmark depends on the stage and type of inspection.
The purpose isn't merely to prove that water escapes. That part is already suspected. The purpose is to identify whether the failed layer is grout, caulk, drain hardware, plumbing, substrate, or waterproofing.
The Four Common Failure Points Behind Tile
The fastest way to avoid an unnecessary tear-out is to match the symptom to the likely failure point. The table below is a starting framework, not a substitute for opening a concealed assembly when the evidence points behind the tile.
Four Failure Points Behind Leaking Shower Tiles
| Failure Point | Typical Evidence | Common Cause | Repair Scope |
|---|---|---|---|
| Grout and caulk deterioration | Isolated cracked or missing joints, failed corner sealant, surface efflorescence, no spread into adjacent materials | Aging grout, movement at changes of plane, poor caulk bond, or neglected maintenance | Remove failed material, clean and dry the joint, then replace it with compatible grout or flexible sealant |
| Substrate failure | Soft or spongy areas, loose tile, hollow sounds across a related area, recurring cracks | Backer board, mortar bed, or subfloor has absorbed water and lost strength | Remove affected tile and substrate, identify the moisture source, dry or replace damaged material, then rebuild |
| Waterproof membrane breach | Moisture appears beyond the visible joint, pan test fails, damage continues after surface repairs, or concealed materials are wet | Missing, torn, poorly joined, or punctured membrane | Usually requires access to the membrane and a correctly integrated repair, often involving substantial tile removal |
| Plumbing leak behind the wall | Moisture persists without shower use, staining follows a valve or supply line, or hot-side components affect the reading | Failed connection, valve, pipe, or fitting | Stop the plumbing leak first, then assess and repair the wall and shower finishes |
A small crack in one grout joint is not equivalent to a shower floor that flexes. Likewise, one failed corner bead isn't equivalent to moisture mapped across the wall cavity. The wider and deeper the evidence, the less credible a surface-only repair becomes.
For additional background on how moisture can travel beneath finishes, see this discussion of water under tile. The practical question is always the same: can the failed material be reached, removed, and replaced without leaving a damaged waterproofing system behind?
Containment and Temporary Fixes in the First 24 Hours
Stop adding water before you decide how to repair the shower. If a plumbing leak is possible, close the local supply valves or the main water supply when necessary. Don't keep using the shower just because the visible floor looks dry.
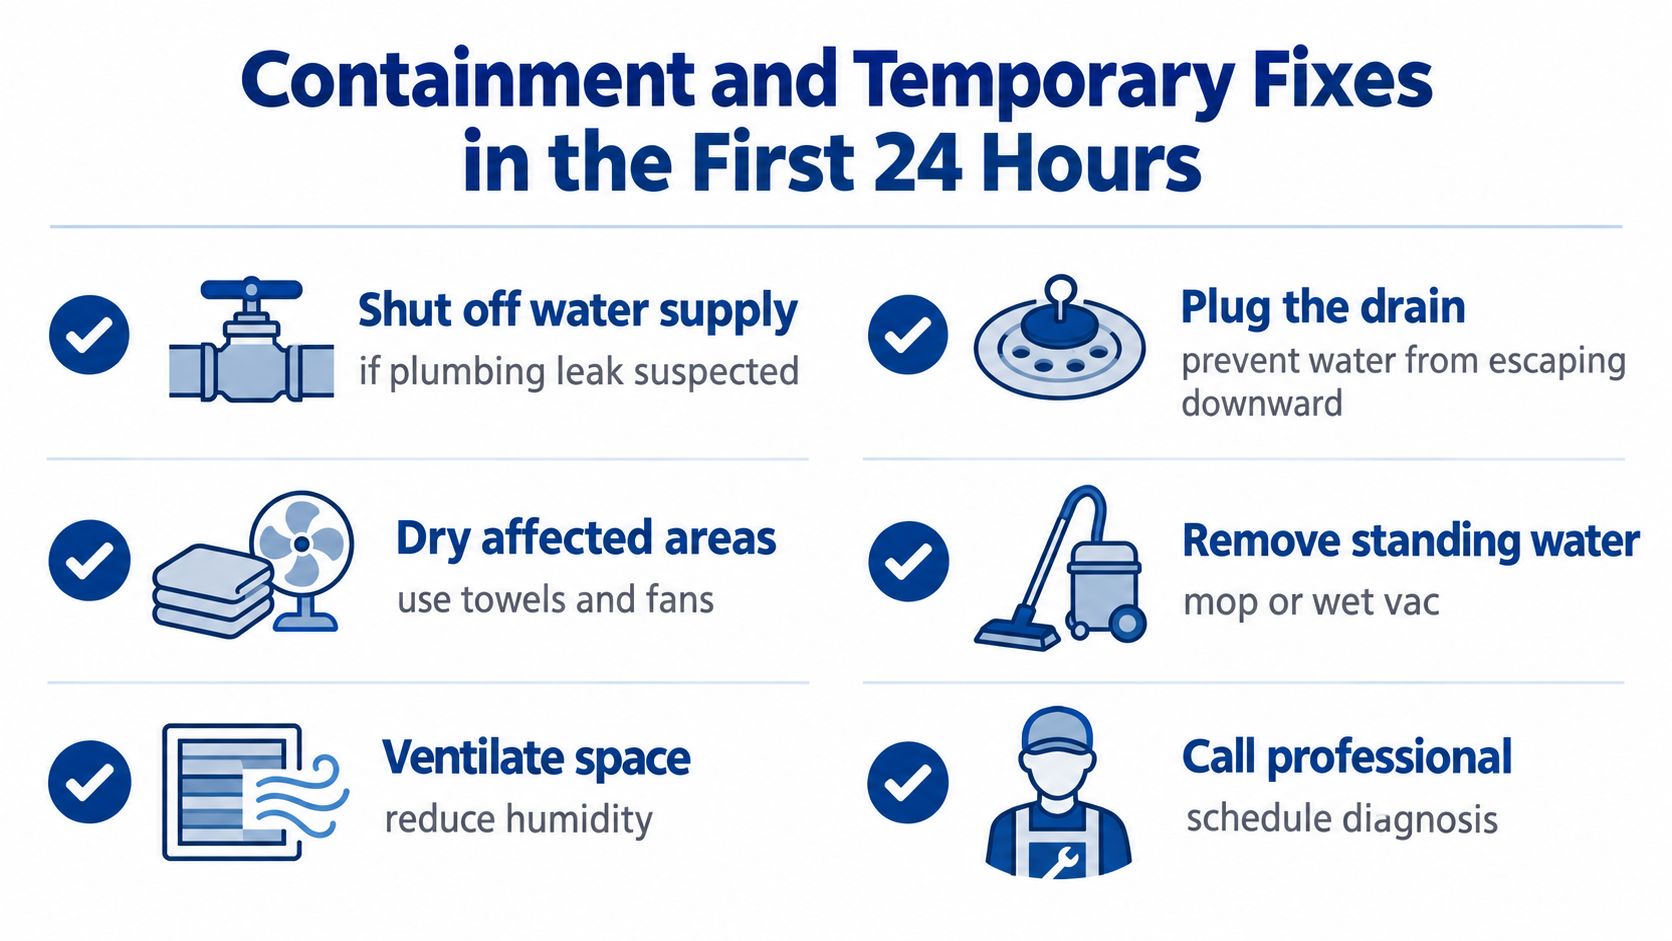
Use a watertight drain plug if you need to isolate the receptor for testing. Remove standing water with towels, a mop, or a wet vacuum rated for water. Run the bathroom exhaust fan and use a dehumidifier if the room is humid, but keep electrical equipment away from wet surfaces and use protected outlets.
If the shower must be used briefly before inspection, keep splash away from the door and damaged joint with a plastic shower curtain. Painter's tape can cover a visible grout crack temporarily. A small bead of 100% silicone caulk can reduce surface entry at a hairline gap, but it should be treated as containment, not proof that the underlying problem is solved.
Don't smear new grout over loose, damp, or moldy material. Don't paint over a ceiling stain, seal a wet wall, or apply an impermeable coating that traps moisture inside the assembly. Those actions can hide the evidence and slow drying.
For a practical first response to a water-loss event, follow this first-day water damage checklist. Document the condition before cleaning: photograph the shower, drain, grout, adjacent walls, ceiling below, and any visible staining. Record when the shower was last used, note whether the leak continues with the shower off, and save meter readings with their location clearly identified.
Targeted DIY Repairs for Localized Damage
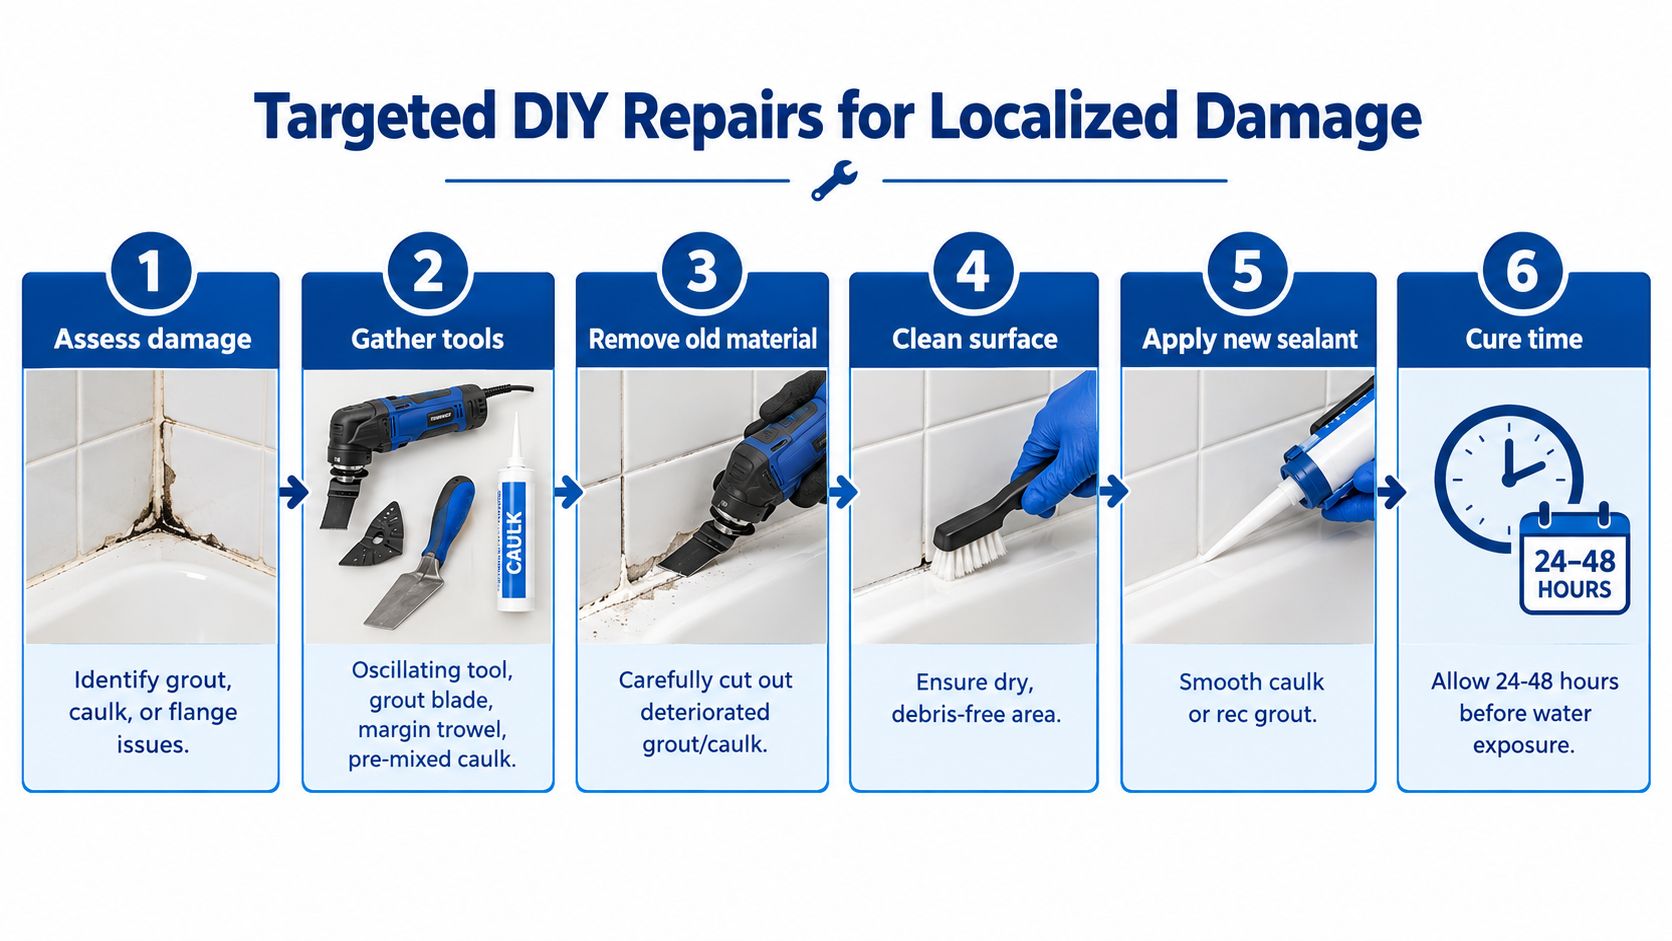
DIY work is reasonable when the evidence stays local, the substrate feels firm, and testing doesn't show moisture spreading beyond the failed detail. It becomes a poor bargain when the repair is being used to avoid investigating a soft wall, failed pan, or damaged membrane.
Repairing grout joints
Gather an oscillating multi-tool with a grout blade, a margin trowel, compatible urethane grout, painter's tape, a sponge, and a vacuum. Remove the failed grout carefully to a depth of at least 1/8 inch, keeping the blade centered so you don't chip the tile edges.
Vacuum the joint, wipe away residue, and allow the area to dry. Pack the replacement grout firmly into the joint, strike it clean, and follow the product's curing instructions before exposing it to water. Pre-mixed urethane grout can be convenient for a localized repair, but the replacement material still has to match the existing joint and installation conditions.
A beginner who has isolated damage can often complete a small grout repair in one work session. The important test is what happens afterward. If the same joint opens again, if nearby joints begin cracking, or if moisture appears on the other side of the wall, stop repeating the patch.
Replacing failed caulk
Use a utility knife or scraper to remove moldy, detached, or shrunken caulk from vertical corners, the curb, and the tile-to-floor transition. Pull out the old bead completely. New silicone won't bond reliably to a contaminated strip of old sealant.
Clean the joint with a compatible cleaner, wipe it with rubbing alcohol if the product instructions allow it, and let it dry fully. Apply painter's tape to create clean edges, run a continuous bead of color-matched silicone, and tool it smoothly with a suitable solution. A mild solution containing 5% ammonia is sometimes used for tooling, but follow the sealant manufacturer's safety and compatibility directions, and never mix ammonia with bleach or other cleaners.
Inspecting the drain flange
A loose drain flange can create a localized leak that looks like a general shower failure. Drain work is more demanding than regrouting because it may require a plumber's wrench, access to the drain body, removal of old putty or sealant, and correct placement of a new rubber gasket and silicone ring.
Don't force the flange or damage the drain body below it. If the assembly is inaccessible, corroded, or connected to movement in the pan, bring in a plumber. A replacement flange won't correct a failed liner around the drain.
A targeted repair isn't appropriate when the tile moves, the plywood or floor feels spongy, efflorescence is widespread, mold returns after cleaning, or a pan test shows a drop. It also isn't appropriate when you can't explain where the replacement sealant will connect to an intact waterproofing layer.
Drying Out the Cavity and Preventing Mold
The drip you can see is often less important than the moisture you can't see. Water trapped behind tile can leave backer board, framing, insulation, and subfloor damp even after the bathroom floor looks clean.
Start by removing surface water and opening any safe access points, such as an existing panel or affected baseboard area. Place a low-grain refrigerant dehumidifier in the room and direct air movement across exposed wet surfaces with oscillating fans. Keep the room controlled rather than blowing humid air into a closed cavity.
Surface grout may dry relatively quickly, but substrate and framing take substantially longer. The drying period depends on material, temperature, airflow, humidity, and how much water entered the assembly. Don't close the wall merely because the surface feels dry. Use a pin meter where the material permits, compare readings with an unaffected reference area, and keep monitoring until readings show that the material has returned to an appropriate dry condition.
Drying Timelines by Material
| Material | Drying Time | Target Moisture Reading |
|---|---|---|
| Surface grout and caulk edges | Shorter than concealed building materials when airflow reaches both sides | Compare with a dry control area before sealing |
| Cement backer board or mortar bed | Longer, especially when covered by tile or membrane | Confirm with repeated meter readings and visual inspection |
| Wood framing and plywood | Often the slowest part of the assembly | Use a pin meter and document a stable reading consistent with nearby dry material |
| Insulation and enclosed cavities | Depends on access and air exchange | Open or remove affected material when it can't be dried effectively |
Don't use bleach as a default treatment on porous building materials. It doesn't remove moisture from the cavity and can damage some surfaces. After materials are exposed and cleaned appropriately, antimicrobial treatment, HEPA vacuuming of settled dust, and controlled drying can help with restoration planning. Persistent odor or visible growth calls for a qualified assessment, not a surface spray alone.
Keep a simple log of daily readings during active drying, then continue periodic checks after the area appears stable. The guidance in this mold-prevention resource supports treating moisture control as the first priority rather than masking odor.
When to Call a Restoration Professional
Call for professional help when the evidence no longer fits a local surface defect. The strongest warning signs include water staining on a ceiling or wall below the shower, loose or hollow-sounding tiles across more than a small area, visible black mold, a musty odor that returns after cleaning, a shower base that flexes underfoot, or a leak that continues after the grout and caulk have been properly repaired.
A professional can map moisture with meters, compare affected and unaffected materials, use thermal imaging as a supporting tool, and isolate the shower with a controlled flood test. If access is required, careful demolition can expose the damaged assembly without unnecessarily destroying sound areas. A qualified contractor can then determine whether the repair needs drying only, localized substrate replacement, plumbing work, or a complete waterproofing rebuild.
Be cautious with anyone who recommends “just resealing” before identifying the leak path. A surface repair may be appropriate for a failed joint, but it isn't a substitute for membrane work when the pan or wall assembly is compromised. Likewise, a full tear-out shouldn't be recommended solely because one grout line cracked. Ask the contractor to show you the evidence supporting the proposed scope.
Use this decision checklist
- Surface-only evidence: The damage is confined to a few joints, the substrate is firm, and adjacent areas remain dry.
- Moisture spread: Readings show dampness beyond the visible joint or in the ceiling, wall, or floor below.
- Structural concern: Tile moves, the base flexes, or the backer board and subfloor feel weak.
- Plumbing indication: Moisture continues when the shower isn't running or follows a valve, supply, or drain connection.
- Documentation: The contractor provides photos, test results, a drying plan, and a written explanation of what will be removed and rebuilt.
Repair costs and schedules vary widely because a local sealant repair, a partial tile opening, and a full substrate replacement involve very different labor and materials. Get the proposed scope in writing, including drying, disposal, plumbing coordination, waterproofing products, tile replacement, and final testing. The cheapest estimate isn't useful if it leaves wet framing or a failed membrane behind.
If shower tiles are leaking in your Georgetown or Austin home, RestoTek TX can inspect the source, map concealed moisture, manage extraction and structural drying, and help plan the required repair. Visit RestoTek TX to request an assessment and get a clear next step before a localized leak becomes a larger reconstruction project.