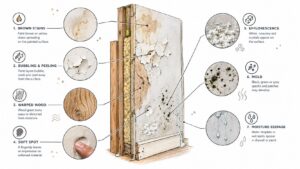
You're in Georgetown after a spring storm, wiping down the kitchen when you notice a faint brown mark near the ceiling corner. Or perhaps the painted wall beside a baseboard feels slightly soft, even though there's no puddle on the floor. Water damage in walls rarely announces itself loudly at first. The earliest wall water damage signs are often visual, tactile, or olfactory, and they can point to moisture behind paint, drywall, insulation, trim, or cabinets.
Central Texas homes face several pathways for intrusion, including heavy rain, roof and flashing failures, plumbing leaks, condensation, and water movement around foundations. The eight signs below are ranked from less urgent evidence to conditions that require immediate professional assessment. Each one ends with a practical first action, whether that means monitoring a stain, arranging moisture testing, or calling for emergency help.
1. Discoloration and Water Stains
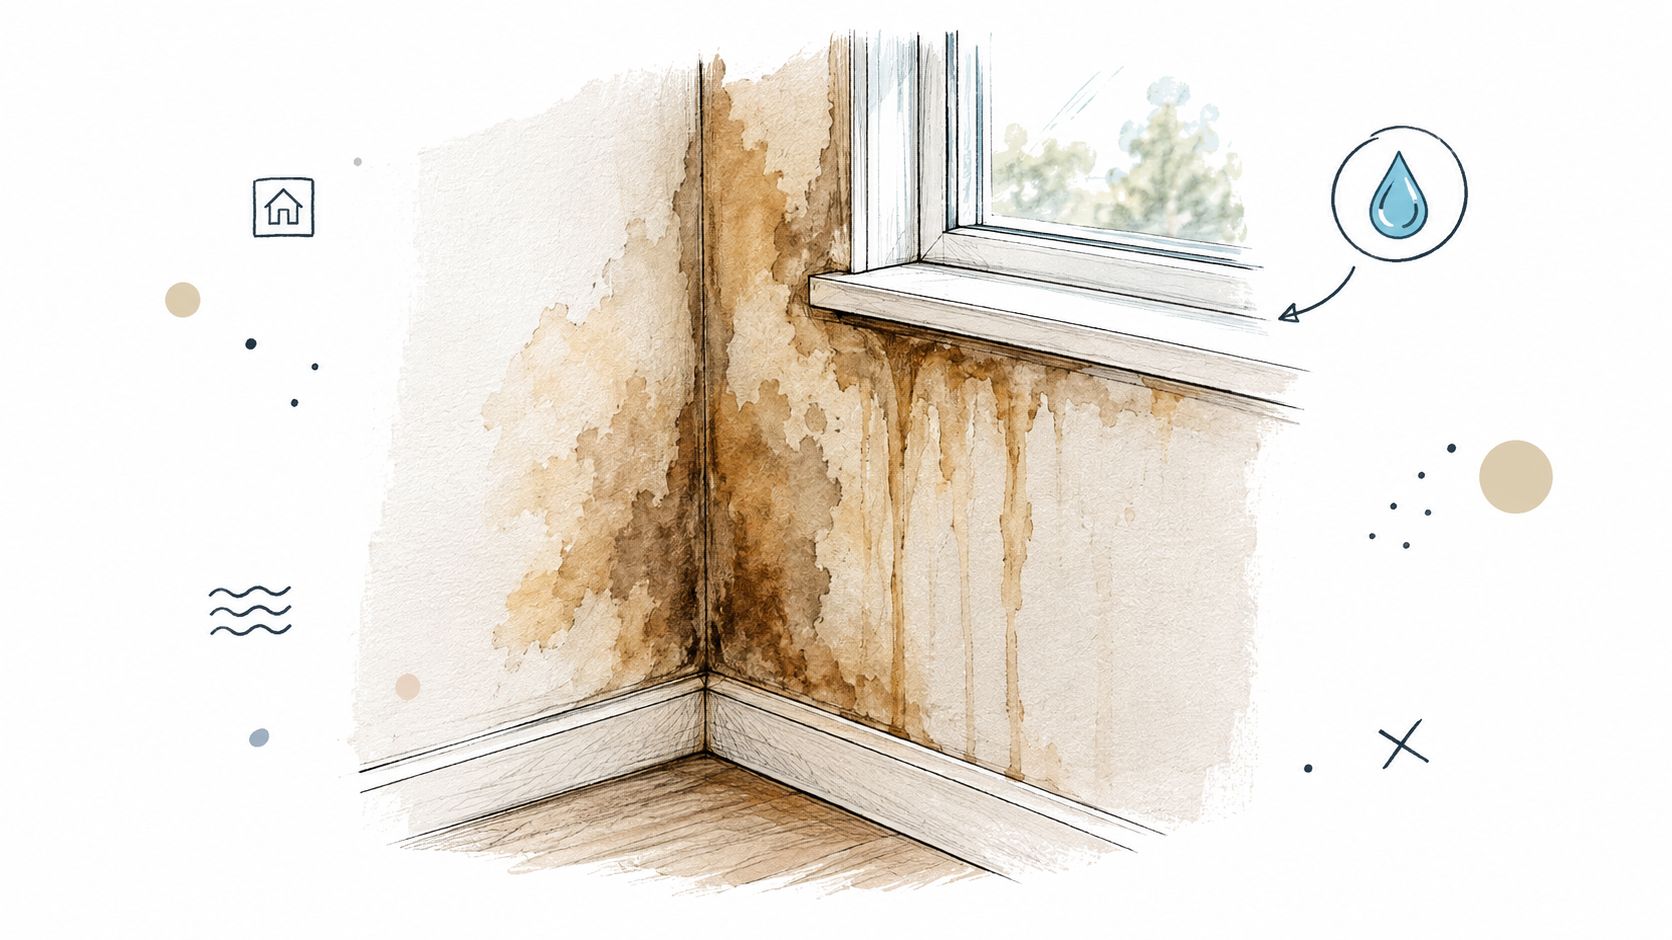
A yellow, brown, gray, or darkened patch is often the first visible clue. Stains may appear on a ceiling corner after a storm, below an upstairs bathroom, around a kitchen cabinet, or near a window. ASHRAE identifies wall discoloration and ceiling-tile staining as indicators of active or historical moisture intrusion, especially when they occur with peeling paint, bubbling finishes, warped materials, or a musty odor. ASHRAE's indoor-environment maintenance checklist also supports treating these observations as maintenance warnings rather than purely cosmetic defects.
A stain doesn't tell you by itself whether the leak is still active. It may be the residue of an old event, or it may be expanding because water is continuing to enter through a roof, plumbing connection, window, flashing detail, or adjacent room. A mark that darkens after rain or becomes more noticeable after someone uses a nearby fixture deserves more attention than a stable, documented mark that remains dry.
What to check first
Photograph the stain with the date visible, measure its widest points, and mark the edge lightly with removable tape. Return to it after rainfall and after nearby plumbing use. Don't paint over it before investigating, because a fresh coating can hide a continuing leak and make later assessment harder.
A safe inspection includes checking the wall surface, nearby baseboards, corners, penetrations, and the opposite side of the wall. Look for bubbling paint, softened trim, or odor. A moisture meter can help compare the marked area with an unaffected section, but one reading at the stain doesn't prove the cavity is dry. Moisture may be unevenly distributed behind finishes or concentrated around studs and penetrations.
First action: Document the stain and arrange moisture testing if it expands, recurs, feels damp, or appears near plumbing, a roofline, or an exterior opening.
For a practical visual reference, see what water damage can look like before deciding that repainting is enough.
2. Soft or Spongy Drywall
A soft patch at the bottom of an Austin laundry-room wall may follow a slow washer leak. Near a bathroom supply line, it can point to concealed plumbing failure. Along a lower wall beside a slab or foundation, moisture may be entering from below or through an adjoining assembly. The position narrows the search, but it does not identify the source.
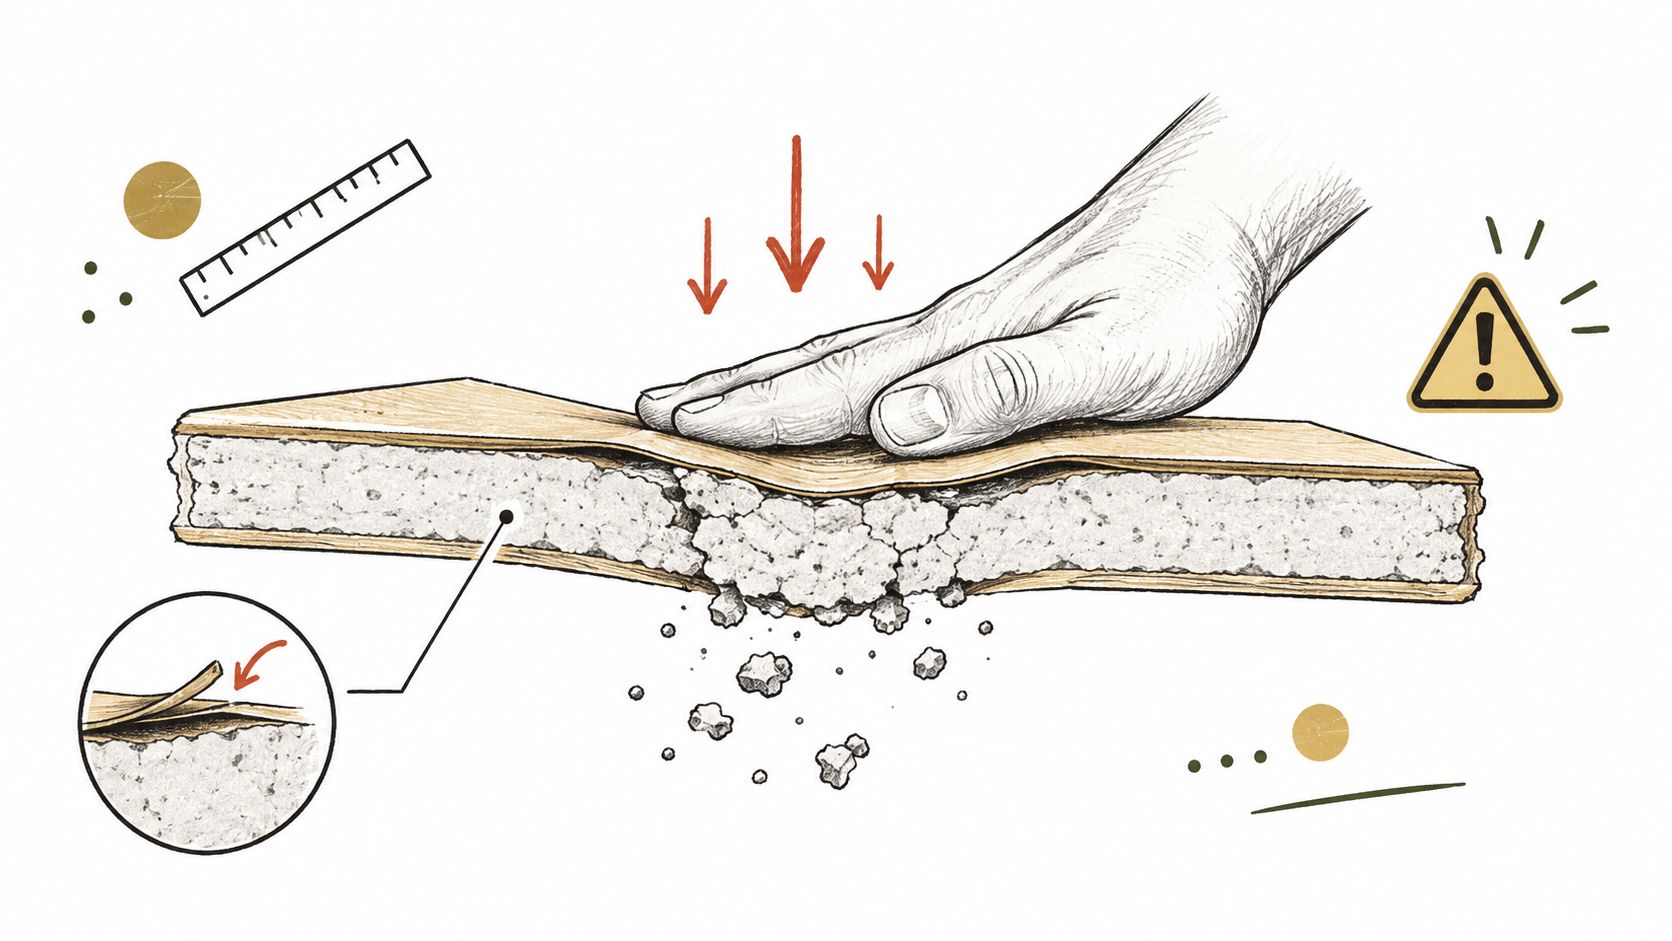
Drywall should resist light, even pressure. Soft, spongy, swollen, crumbly, or unusually flexible areas indicate that moisture has reached the gypsum core or paper facing. That makes this sign more serious than a surface stain because the board may have absorbed water and lost strength.
Press gently with one finger. Do not jab the surface, lean your weight against it, or remove a large section before considering electrical wiring, plumbing, insulation, and possible contamination. If the paper tears, the gypsum crumbles, the area gives way, or a musty odor is present, stop probing and keep people away from the damaged spot.
Why drying may not be enough
A painted face can feel dry while moisture remains in the cavity, insulation, framing, or trim. Fans may dry the surface without resolving trapped moisture. The correct response depends on the board's condition, the water source, how long it stayed wet, and whether contamination or mold is present.
The EPA's mold guidance recommends drying wet or damp materials within 24–48 hours to help prevent mold growth. Materials that remain wet for more than 48 hours may require mold-remediation procedures. Use this as a practical benchmark, not proof that the wall is safe. Mold can develop sooner, and rapid drying does not confirm that hidden spaces are clean or dry.
In Central Texas, heavy spring rain, humid summers, and moisture around limestone foundations can keep a wall cavity wet after the visible surface improves.
First action: Stop disturbing spongy drywall and arrange professional moisture testing and cavity assessment before attempting replacement or further opening.
3. Visible Mold or Mildew Growth
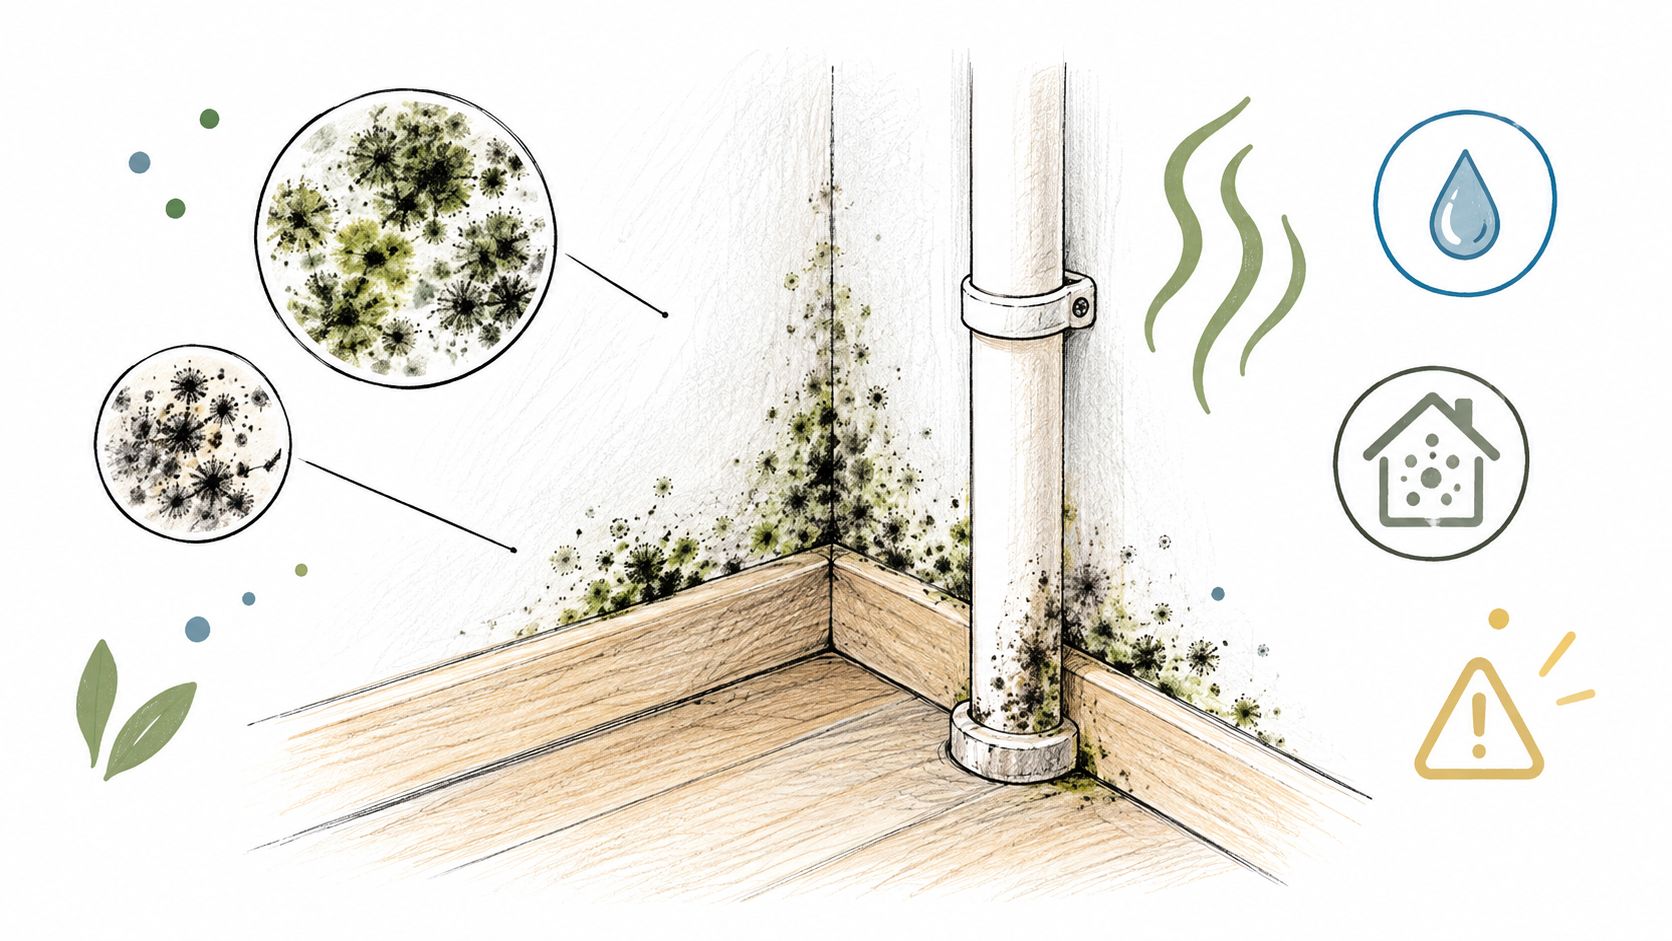
A dark patch in a Georgetown bathroom corner may be the first visible sign of a slow leak behind a vanity. In an Austin bedroom, roof failure can leave growth along the ceiling edge while moisture spreads through the hidden cavity. Treat visible mold as evidence of a moisture problem, not as an isolated surface mark.
Mold may look fuzzy, slimy, powdery, or irregular. It can appear black, green, white, or orange, but color does not reliably show severity. A small colony may extend behind drywall, trim, cabinets, or wallpaper. The CDC's mold-health guidance explains that mold grows where moisture is present, including near leaking roofs, windows, and pipes. People with weakened immune systems or chronic lung disease may require faster isolation and escalation.
Central Texas conditions can keep the problem active. Heavy spring rain can drive water through roof and wall openings, limestone foundations can transfer dampness into lower walls, and humid summers can slow drying after a leak or overflow. Water damage can create mold even when the wall looks clean but still smells damp.
Wiping the visible patch does not repair the source or confirm that the cavity is dry.
What not to do
Do not scrape, sand, brush, or aggressively wipe suspected mold. Do not paint or caulk over it. These actions can spread contamination or hide damaged material. Keep children, pets, and vulnerable occupants away while the source and affected area are assessed.
If growth is near an HVAC return or supply pathway, stop using the system until a professional determines whether airflow could distribute spores. Photograph the area before disturbing it. Record its location, related leaks, odors, and any recent flooding.
First action: Isolate the area and document the growth. Request professional mold and moisture assessment, especially if it is spreading, follows flooding, or sits near HVAC airflow.
4. Peeling Paint or Wallpaper
Paint that blisters, bubbles, cracks, or peels is often separating from the wall because moisture has reached the finish-to-substrate interface. Wallpaper may lift at seams, curl at corners, or develop loose pockets. These changes can appear before a large stain forms, which makes them useful early wall water damage signs.
In an Austin home, a roof leak may create ceiling bubbles before anyone sees active dripping. In a Georgetown bathroom, repeated humidity can damage paint near a poorly ventilated area, while a plumbing leak behind a fixture can create a more localized pattern. Wind-driven rain may produce a patch that aligns with an exterior wall or window opening.
The pattern matters. Bubbles clustered below a ceiling, pipe, fixture, or window suggest different investigation paths, although no surface pattern can confirm the source alone. A fresh layer of paint won't restore adhesion to a damp or weakened substrate.
A careful surface check
Look without cutting into the wall. If a bubbled area is already loose, don't pull it away aggressively. Check whether the exposed surface feels damp, soft, cool, or crumbly, and compare it with a nearby unaffected area. A professional can use moisture mapping and, where justified, limited exploratory opening to determine whether water is trapped behind the finish.
Humidity can complicate interpretation. A bathroom wall may have condensation-related paint failure, while a recurring patch after rainfall points more strongly toward exterior intrusion. The next step is to identify the moisture source and verify drying before refinishing.
First action: Leave the finish undisturbed, photograph the pattern, and arrange leak detection or moisture testing before repainting.
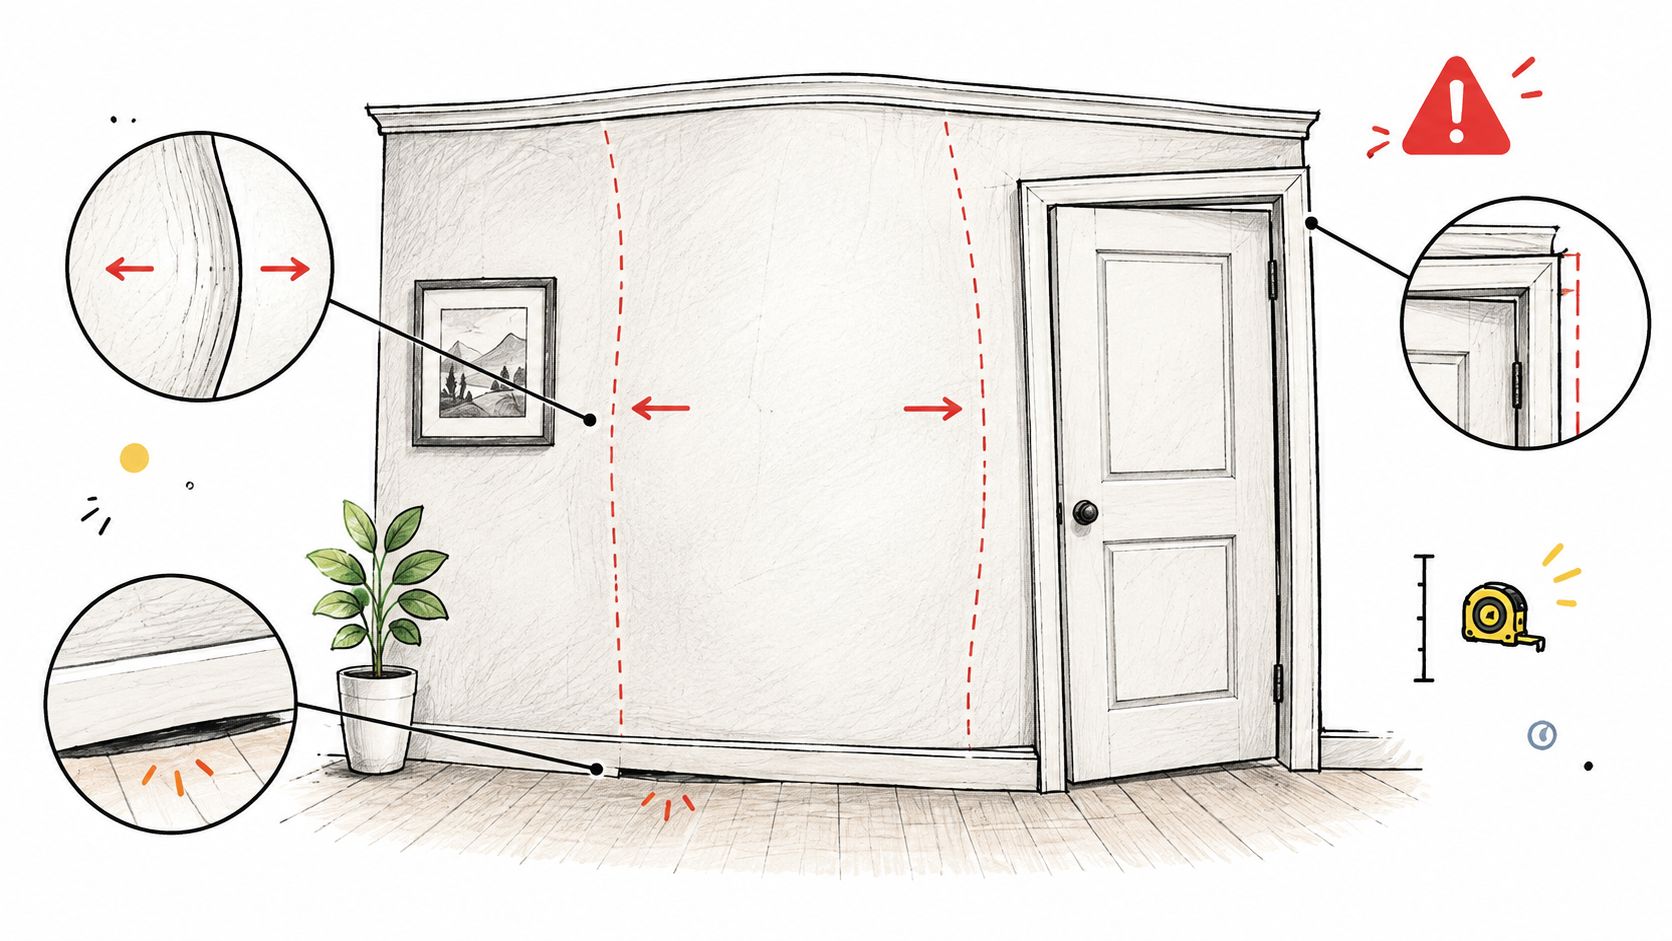
5. Warping, Buckling, or Bulging Walls
A wall that bows, bulges, buckles, or no longer lines up with adjacent surfaces deserves immediate attention. Water can swell wood components and weaken drywall, causing the wall plane to distort. The distortion may also involve framing, trim, fasteners, or materials behind the visible surface.
A bulge in an Austin second-floor bedroom after a roof leak could mean the framing and wallboard have stayed wet. A Georgetown lower-level wall may show movement where water pressure, foundation conditions, and saturated materials interact. A garage wall beside a concealed burst line can warp before anyone notices standing water.
Treat movement as a safety issue
Don't hang shelves, mirrors, televisions, or other loads on a distorted wall. Keep people away from areas with pronounced movement, falling finish, or cracking that appears to be worsening. Don't use a straightedge or level as a structural diagnosis. You can photograph the deviation from a consistent position, but a professional assessment is needed to determine whether the issue involves finishes, framing, foundation movement, or a combination.
The RestoTek TX guidance on water damage in walls describes the importance of assessing hidden moisture rather than limiting repairs to visible finishes. That distinction is critical here. A wall can look only moderately distorted while the cavity contains saturated insulation, weakened framing, or concealed microbial growth.
Insurance documentation should begin promptly. Photograph the full wall, close details, nearby ceilings and floors, and any visible source. If water is still entering, stop the source only when you can do so safely, and avoid electrical hazards around wet components.
First action: Treat a bulging or buckling wall as an urgent safety problem and call for professional assessment before opening, loading, or attempting cosmetic repair.
6. Efflorescence With White, Chalky Deposits
Efflorescence looks like a white, gray-white, or chalky crystalline deposit on masonry, concrete, brick, or stone. It forms when water moves through the material, carries dissolved minerals, and leaves those minerals behind as the water evaporates. The deposit itself isn't mold, but it signals moisture movement.
This sign is especially useful around lower walls, slab edges, foundation surfaces, and exterior masonry. A Georgetown lower-level wall may develop a recurring band after seasonal rain when drainage or grading directs water toward the foundation. An Austin masonry wall may show deposits where wind-driven rain repeatedly wets the same section. Limestone-based materials can make mineral residue more noticeable, but the underlying principle is the same across many masonry assemblies.
Why the deposit returns
Brushing away the powder may improve appearance temporarily, but it doesn't stop water migration. If the deposit returns, moisture is still traveling through the wall or evaporating from the same area. The pattern can help identify the direction of movement, but it can't distinguish reliably between foundation intrusion, plumbing leakage, condensation, or another source without additional inspection.
Check whether the area changes after rain, irrigation, plumbing use, or indoor humidity changes. Look at exterior grading, downspouts, window wells, wall penetrations, and nearby fixtures. Don't seal or coat the surface until the source and drying conditions have been evaluated, because a low-permeability coating may redirect moisture into another part of the assembly.
First action: Photograph the deposit before cleaning and arrange moisture investigation, with particular attention to drainage, foundation edges, and nearby plumbing.
7. Persistent Musty or Moldy Odor
A musty, earthy smell may be the first sign that moisture is trapped inside a wall. Odor that is strongest in a closet, beside a bathroom vanity, near a baseboard, or below a ceiling warrants investigation even if the paint looks normal. Wet insulation, damp wood, cabinets, trim, and low-permeability finishes can hold moisture out of sight.
In Georgetown, a bathroom odor near a toilet can point to a concealed leak in the floor or adjoining wall. In Austin, heavy spring rain may leave a roof or exterior-wall leak smelling stale after the visible surface dries. Humid summers can also support lingering dampness, especially where airflow is poor. If the smell intensifies when the HVAC system runs, inspect return cavities, ductwork, and other air pathways. Odor alone cannot identify the source or show how far moisture has spread.
As covered under Visible Mold or Mildew Growth, correcting the moisture source matters more than surface appearance or odor alone. A smell does not prove that mold is present. Damp insulation, stagnant cavities, wet framing, and other materials can produce similar conditions, so the inspection should locate moisture and identify affected materials.
Follow the smell, not the perfume
Close doors to compare rooms, note where the odor becomes stronger, and record changes after rain, showers, or HVAC operation. Avoid air fresheners, bleach sprays, and fragrance products that mask the evidence. Do not cut into a wall casually, particularly near outlets, switches, plumbing fixtures, or electrical equipment.
Ventilation may improve comfort, but moving air through a contaminated area can spread particles. The safer sequence is controlled investigation, source correction, drying, and material assessment.
First action: Document where and when the odor is strongest, then request moisture and microbial inspection instead of masking it.
8. Rust Stains or Corroded Metal Fixtures
Orange, reddish, or brown marks around screws, nails, pipes, metal trim, conduit, or other fixtures indicate that water has contacted metal and corrosion products have migrated into nearby materials. Rust may appear as a small halo around a fastener or as a vertical streak below a concealed entry point. On concrete or masonry, staining can correspond with embedded metal or reinforcement.
This sign ranks highest because it often indicates prolonged or repeated wetting, not merely a brief splash. An Austin lower wall may show rust near a floor-to-wall junction after recurring intrusion. A Georgetown wall with metal components may develop streaks where saturated materials remain wet. A concrete foundation can show rust-colored marks where water reaches corroded reinforcement, but the stain alone doesn't establish the condition of the embedded structure.
Inspect the cause, not just the color
Photograph the stain, measure its spread, and check whether it changes after rain or plumbing use. Look for softened drywall, swollen trim, efflorescence, peeling finish, odor, and movement nearby. Don't scrub away the evidence before documenting it, and don't assume a stain-blocking primer solves the problem.
A professional assessment should consider the water source, the condition of fasteners and framing, the material behind the finish, and whether structural evaluation is needed. Replace corroded components only after the wall is dried and the source is controlled. Otherwise, new hardware may be exposed to the same moisture and fail again.
First action: Treat rust staining as evidence of sustained moisture and arrange prompt inspection of the wall assembly, metal components, and possible source.
8-Sign Wall Water Damage Comparison
| Sign | Implementation complexity | Resource requirements | Expected outcomes | Ideal use cases | Key advantages |
|---|---|---|---|---|---|
| Discoloration and Water Stains | Low–Moderate (visual check; source tracing may be needed) | Photos, moisture meter, possible leak-detection tools | Confirms moisture presence; narrows probable source; documents for claims | Early detection after storms, visible staining around windows/penetrations | Easily visible; indicates flow direction; good for documentation |
| Soft or Spongy Drywall | High (invasive inspection and removal) | Drywall removal tools, moisture meters, mold testing, reconstruction resources | Requires drywall replacement; reveals hidden moisture/mold; defines rebuild scope | When wall compresses or gives under pressure; post-burst lines or prolonged leaks | Clear indicator of material failure; justifies replacement and insurance claims |
| Visible Mold or Mildew Growth | High (professional testing and remediation) | Mold testing, containment, remediation crew, structural drying equipment | Remediation and contaminated-material removal; improved indoor air quality | Active visible colonies or rapid spread in warm, humid areas | Direct evidence of contamination; compels immediate professional remediation |
| Peeling Paint or Wallpaper | Low–Moderate (probe and finish removal to assess substrate) | Moisture meter, minor finish removal, leak-detection tools | Exposes substrate condition; identifies moisture source; enables lasting repair | Early-stage intrusion or condensation issues affecting finishes | Highly visible early warning; often identifies accessible source |
| Warping, Buckling, or Bulging Walls | Very High (structural assessment and major repair) | Structural engineer, emergency mitigation, demolition/reconstruction teams | Structural stabilization and likely rebuild; insurance and engineering involvement | Emergency response for suspected structural compromise after flooding/settling | Unambiguous sign of severe structural damage; requires urgent action |
| Efflorescence (White, Chalky Deposits) | Low detection; Moderate remediation to stop source | Moisture testing, grading/drainage repair, masonry cleaning/sealing | Confirms active moisture migration; requires drainage or foundation fixes to stop recurrence | Masonry, basement, or exterior walls showing white crystalline deposits | Clear indicator of moisture movement through masonry; helps locate flow direction |
| Persistent Musty or Moldy Odor | Moderate–High (source tracking, possible invasive inspection) | Air/microbial testing, HVAC inspection, moisture meters, deodorization | Locates hidden microbial growth; leads to targeted remediation and deodorization | Odor present without visible signs; early detection of concealed contamination | Precedes visible mold; pinpoints hidden issues and motivates prompt response |
| Rust Stains or Corroded Metal Fixtures | Moderate (assess corrosion extent; replace components) | Inspection, corrosion repair or replacement, moisture testing | Identifies prolonged exposure and compromised fasteners/pipes; replacement of corroded parts | Stains around nails, screws, pipes, or concrete rebar after long-term wetting | Pinpoints exact intrusion points; indicates duration and severity of exposure |
Turning Wall Signs Into a Clear Action Plan
The least dramatic signs often deserve the fastest attention because they provide an opportunity to stop damage before materials weaken. A stain, peeling finish, or persistent odor may reflect an old event, but it may also indicate an active leak or hidden moisture. Documenting the pattern and checking it against rainfall, plumbing use, humidity, and nearby building components helps separate a stable cosmetic mark from a developing problem.
A soft wall changes the decision. Spongy drywall, swollen trim, recurring blistering, and rust around fixtures suggest that moisture has reached materials behind the finish. At that point, household fans or a coat of paint may dry or cover the surface without resolving the cavity. The EPA recommends drying wet or damp materials within 24–48 hours, but the benchmark doesn't confirm that a concealed wall is dry, and materials that remain wet longer require more careful handling.
Bulging walls, widespread mold, sewage-related water, wet electrical components, and damage affecting vulnerable occupants call for professional assessment without delay. Don't judge risk by mold color, stain size, or whether the surface feels dry. Source, contamination, material type, drying history, hidden moisture, and occupant health all matter.
Use this sequence today:
- Photograph and date the evidence: Include wide views, close details, measurements, and nearby fixtures or openings.
- Check safely for moisture: Compare affected areas with similar unaffected materials, and record readings, locations, and dates when using a meter.
- Look for the source: Check roof and window areas after rain, plumbing fixtures during use, HVAC condensation points, exterior drainage, and wall-floor junctions.
- Avoid cosmetic masking: Don't repaint stains, caulk over mold, perfume musty areas, or seal masonry before investigating moisture movement.
- Escalate the response: Arrange inspection for recurring stains, odors, or peeling paint, and call promptly for soft drywall, bulging walls, active leaks, contamination, or electrical concerns.
RestoTek TX provides inspection and assessment using moisture detectors, hygrometers, and infrared cameras, along with leak detection, structural drying, dehumidification, microbial prevention, and reconstruction services. The company serves Georgetown, Austin, and surrounding Central Texas communities, with emergency response for floods, overflows, backups, and storm-related incidents. Visit RestoTek TX for inspection, leak detection, mitigation, or restoration support when a wall shows more than a cosmetic defect.
RestoTek TX can inspect wall water damage with moisture detection and infrared tools, trace hidden leaks, dry affected materials, and coordinate mold-related assessment or reconstruction when needed. If you've found a recurring stain, soft drywall, musty odor, or active leak in Georgetown or Austin, visit RestoTek TX to request help.