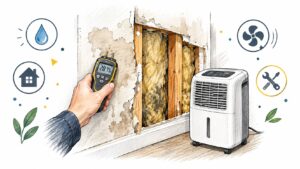
You notice a faint musty smell near the bedroom wall after a night of heavy rain. The paint has started to bubble beside the window, and the baseboard feels slightly swollen. Nothing is dripping, the floor looks dry, and the room seems usable. That combination is exactly why water damage in walls causes so much confusion. The visible evidence may be small while moisture has already moved behind the finish.
A wall behaves less like a hard, solid barrier and more like a layered sponge with hidden channels. Drywall can wick water away from the original entry point, insulation can hold moisture inside the cavity, and framing can stay damp after the surface feels dry. Research on Finnish public buildings found that many moisture and mold problems were identified only after assemblies were opened, with 357 acute instances documented in the study. Wall-in-soil-contact structures averaged 16.3% damage, while external walls averaged 2.6%. The same research reported moisture and mold damage across 2.5% to 26% of the Finnish building stock, including schools, day-care centers, and health-care facilities. The Finnish building study shows why a stain should be treated as evidence, not a complete map of the problem.
This guide will help you understand where moisture comes from, how far it can travel, which signs matter, how professionals measure a wall, and when drywall should be dried or removed. The same principles apply whether you live in Georgetown, Austin, or another Central Texas community exposed to heavy rain, wind-driven water, and flash flooding.
Introduction Why Water Damage in Walls Hides in Plain Sight
A homeowner often finds wall damage in an ordinary moment. You move a bookcase, notice a darker patch, and touch it with the back of your hand. Or you smell something earthy near a window after a storm, then discover that the paint has lifted at the corner. Because the wall isn't actively leaking, it feels reasonable to clean the area and wait.
That delay can make the inspection harder. Water may enter around a window, travel along framing, and appear lower or farther away than the original breach. A plumbing leak can follow the inside of a stud bay or collect near a baseboard. By the time drywall shows discoloration, the cavity may have been wet longer than the surface suggests.
Practical rule: A visible mark tells you where moisture became visible, not necessarily where it started or how far it traveled.
Why walls mislead homeowners
Floors usually reveal standing water, buckling, or a damp texture underfoot. Ceilings often show a recognizable ring beneath a roof or plumbing leak. Walls are more deceptive because they contain several layers, including paint, gypsum board, insulation, framing, sheathing, and exterior cladding. Each layer absorbs, redirects, or slows water differently.
The wall can also dry unevenly. A warm, air-conditioned room may make the face of the drywall feel normal while the back remains damp. A closed cavity has limited air exchange, so moisture trapped behind baseboards, trim, or wallboard may persist after the original leak stops.
A calm way to approach the problem
Don't start by painting over the stain or drilling random holes. Start by recording what changed and when it changed.
- Look closely: Photograph stains, bubbling paint, open seams, swollen trim, and any change after rain.
- Use your nose: Note whether the odor returns after cleaning or becomes stronger during humid weather.
- Check nearby areas: Examine the opposite side of the wall, adjoining rooms, window and door edges, flooring, and ceiling intersections.
- Ask what changed: Recent storms, plumbing work, appliance failures, drainage problems, or roof repairs can narrow the search.
The important question isn't only, “How do I remove this mark?” It's, “What source wet this assembly, and what evidence will prove the wall is dry?”
What Causes Water Damage in Walls and Why Envelopes Fail First
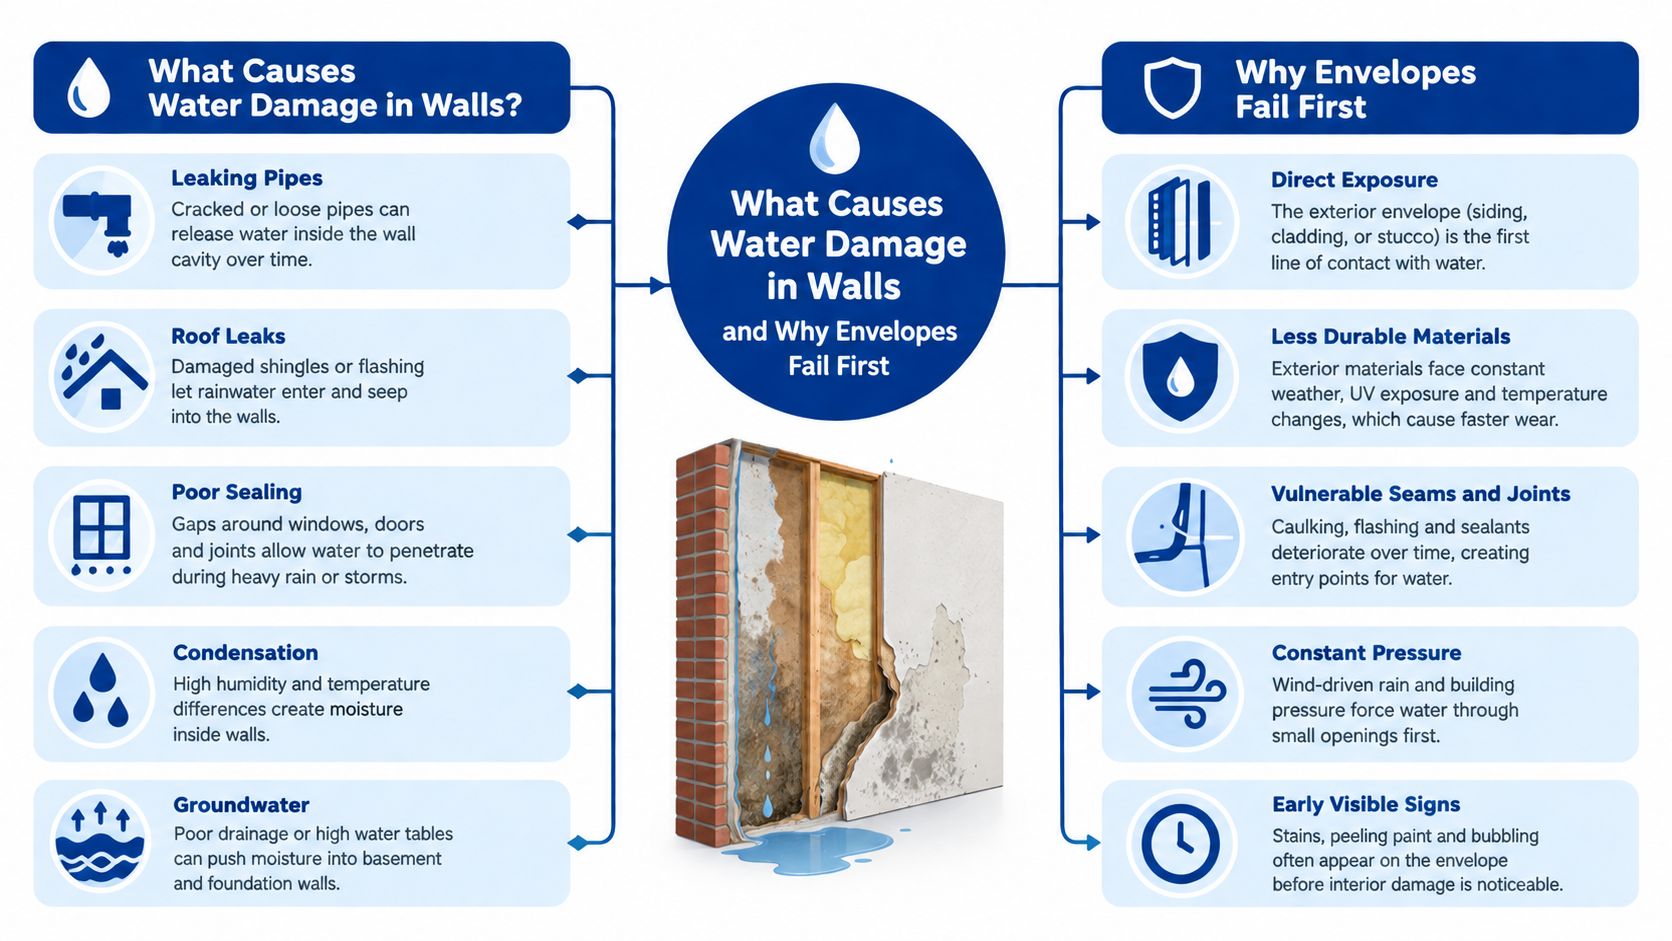
A wall assembly works much like a raincoat. The outer material sheds water, the seams protect vulnerable joints, and the openings for windows, doors, pipes, and vents need careful sealing. A raincoat can look intact while water enters through one failed seam. A building envelope behaves the same way.
Interior sources and exterior sources
Some wall moisture begins inside the home. A leaking supply line, drain, water heater connection, bathroom fixture, washing machine hose, or air-conditioning component can release water into an adjoining wall. These events range from sudden discharges to slow leaks that leave little evidence until finishes change.
Exterior moisture, however, deserves special attention after Central Texas storms. A Canadian housing report found that exterior moisture contributed to 91% of observed moisture problems, most often through direct rain penetration. The report identified windows, doors, and decks as common failure locations, while condensation accounted for 14% of observed problems. The Canadian housing report on moisture intrusion supports a source-control approach. If rain enters at a joint, drying the interior won't solve the recurring problem.
Where the envelope commonly fails
Inspect the places where one material meets another. These transitions experience movement, drainage demands, and repeated wetting.
- Window and door perimeters: Failed flashing, sealant, or drainage paths can let water enter behind trim.
- Deck and wall connections: Fasteners and ledger interfaces can create routes into the wall assembly.
- Cladding transitions: Stucco, siding, trim, and roof-to-wall intersections each need a reliable drainage and flashing strategy.
- Penetrations: Hose bibs, vents, electrical fixtures, and pipes interrupt the outer protective layer.
- Ground contact and drainage: Soil, grading, downspouts, and splashback can keep lower wall areas wet.
The Canadian report also found more reported moisture problems in stucco-clad buildings than in vinyl-clad buildings. That doesn't mean every stucco wall is defective or every vinyl wall is safe. It means cladding changes the risk profile, so an inspection must consider the entire assembly rather than blame one finish.
Why Central Texas weather expands the inspection
A single storm can test several weak points at once. Wind-driven rain can reach joints that stay dry during ordinary precipitation, while repeated wetting and drying can stress sealants and interfaces. Flash flooding can also affect lower walls, flooring, insulation, and adjacent assemblies together.
The repair sequence should follow the water's path. Stop the plumbing leak or correct the exterior entry point first. Then assess the cavity, dry the materials, and repair the finish. Otherwise, a clean-looking wall may hide the next round of wetting.
Early Warning Signs You Can See Smell and Feel
The first clue may be visual, but the most useful diagnosis comes from combining several senses. A small stain beside a window means something different when it appears with a musty odor, soft drywall, and a swollen baseboard. Clusters of signs usually tell a stronger story than any single symptom.
Read the wall as a timeline
Discoloration suggests that water has reached the finish, but it doesn't identify the source by itself. Brown or yellow marks may follow framing, spread outward, or reappear after rain. A stain that grows, darkens, or returns after cleaning deserves investigation rather than another coat of paint.
Paint and wallpaper often react before the wall looks structurally serious. Bubbling, peeling, cracking, and loose seams indicate that moisture has affected the bond between the finish and its substrate. If the drywall feels soft, crumbly, or unusually flexible under gentle pressure, avoid pushing harder. The surface may no longer support normal contact.
A dry-looking face can coexist with a wet cavity. Treat touch as a clue, not a final moisture test.
Other signs appear near the bottom or edges of the wall. Swollen baseboards, warped casing, loose trim, and gaps at flooring transitions can indicate that water has collected where materials meet. Cold patches may reflect evaporation or wet insulation, while a musty smell often points to moisture that hasn't fully cleared from an enclosed area.
Notice what changes with weather
Central Texas homeowners should compare the wall during dry conditions and after rain. A mark that expands after a storm points toward an exterior source, especially near a window, door, roofline, deck, or cladding transition. An odor that becomes stronger when the room is closed may indicate trapped moisture, but indoor humidity can also influence how noticeable the smell becomes.
Document the pattern without disturbing the area:
- Photograph the same view: Include a nearby fixed object so changes are easier to compare.
- Mark the edge carefully: Use removable tape beside, not over, the stain to track movement.
- Record conditions: Note recent rain, plumbing events, room use, and whether ventilation changed.
- Inspect both sides: Moisture may appear in an adjoining room before it becomes visible on the original side.

A wall that looks merely cosmetic can still need a measured assessment. Don't scrub visible growth aggressively, seal the stain with paint, or close an opening before the moisture source is understood.
How Hidden Moisture Is Found and How Far It Really Spreads
A single meter reading beside a stain can create false confidence. The useful question isn't whether one spot is wet. It's whether the reading differs from comparable locations, whether the pattern follows a likely water path, and whether nearby cavities remain affected.
Use a comparison pattern
A professional assessment generally begins with a visual map, followed by readings across the suspected wall and adjacent areas. Massachusetts guidance recommends comparing multiple wall locations with a control area, because a control reading helps distinguish a localized leak from generally humid conditions. Massachusetts moisture-measuring guidance also recognizes that gypsum wallboard can wick water substantially above the original wet area.
A practical sampling pattern includes:
- The visible center: Check the stain or soft area, but don't treat it as the boundary.
- The perimeter: Test above, below, and to both sides to identify a gradient.
- The likely source: Examine window corners, plumbing fixtures, roof intersections, or exterior penetrations.
- Adjoining assemblies: Check the opposite side of the wall, nearby rooms, baseboards, flooring, and ceiling edges.
- A control location: Compare with a similar wall that has no signs of water exposure.
Match the tool to the question
A moisture meter helps compare material readings. Pin and pinless meters work differently, and both can be influenced by material type, fasteners, salts, or other conditions. A thermal camera can reveal temperature patterns associated with evaporation or wet insulation, but a thermal image isn't proof of water by itself. It identifies areas that need confirmation.
Cavity inspection may require carefully removing trim, creating a targeted opening, or checking behind an accessible fixture. The purpose isn't to create unnecessary damage. It is to determine whether air can reach the back of the wall, whether insulation is holding water, and whether framing or sheathing remains wet.
Why wicking changes the scope
Standing water isn't required for a wall to spread moisture. Gypsum can draw water upward and sideways through its paper facing and core. Massachusetts guidance advises that when wallboard has been wet beyond 24 to 48 hours, removal may need to extend below the moisture mark and an additional foot above it. That recommendation illustrates why cutting only the visibly stained rectangle can leave wet material behind.
For a homeowner who wants a practical overview of instruments and inspection steps, this guide to detecting moisture in walls provides a related reference. The central principle remains simple: map patterns, compare controls, and confirm the cavity before deciding that the problem is localized.
Health Structural and Home Risks When Walls Stay Wet Too Long
Moisture creates a chain of consequences. First, materials absorb water. Then drying becomes more difficult, microbial growth becomes more likely, finishes lose stability, and nearby assemblies can become involved. The wall doesn't need to look dramatic for this chain to begin.
Time affects biological risk
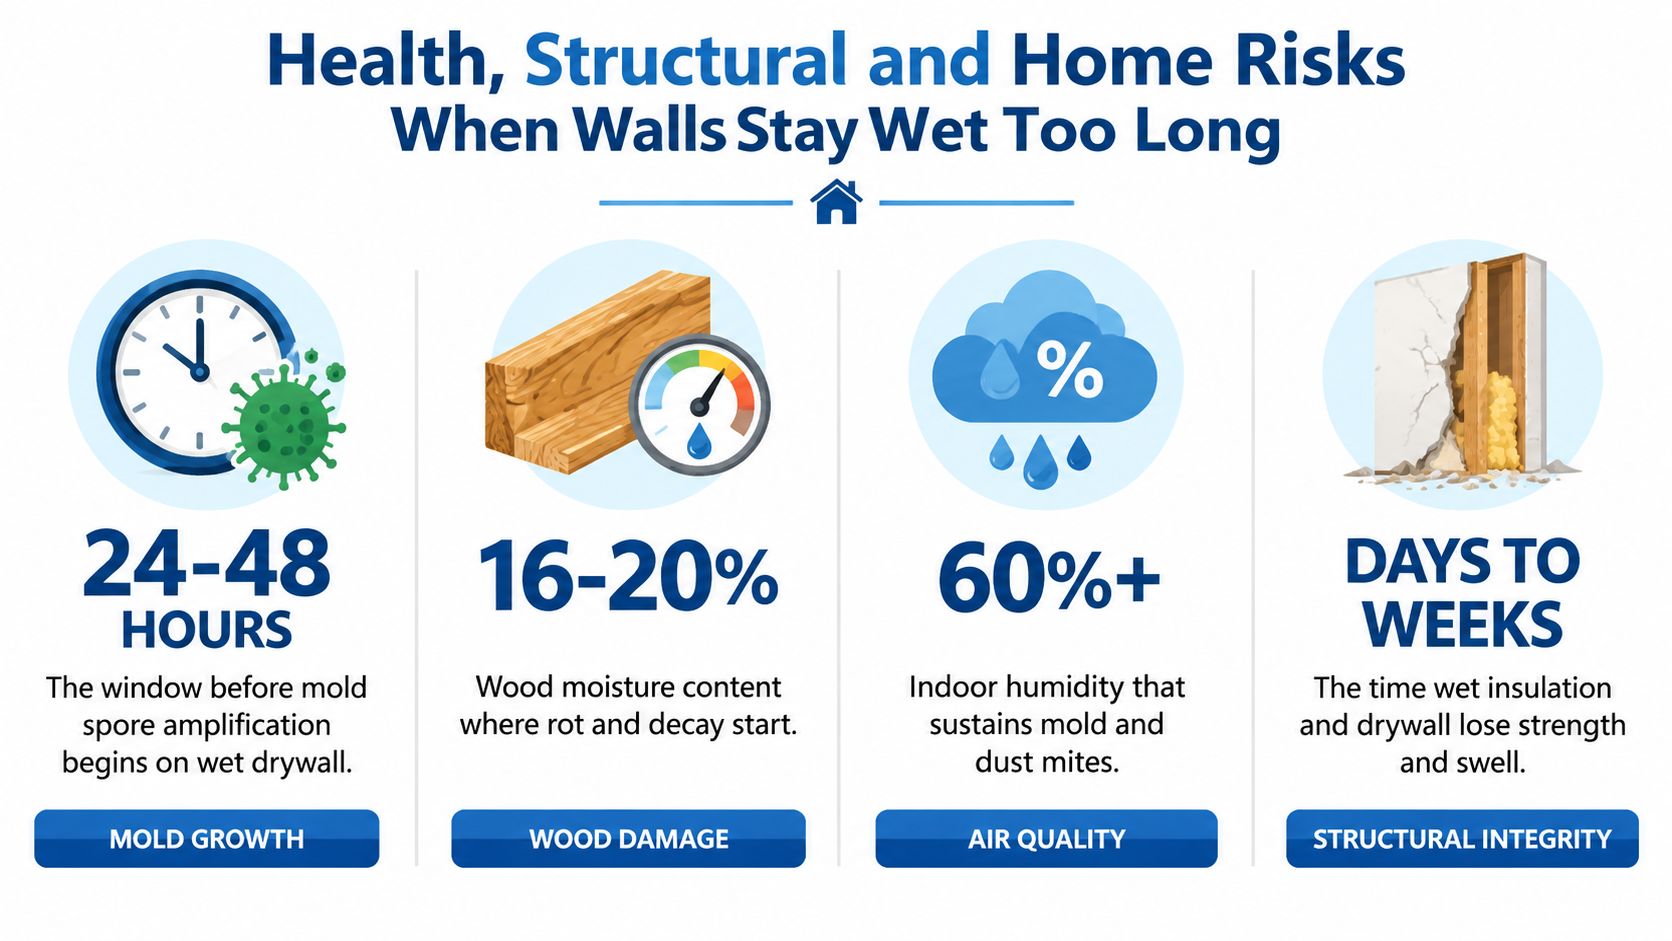
The EPA identifies a critical drying period of 24 to 48 hours for wet building materials before microbial colonization can begin, and its moisture-control guidance treats wood framing above about 19% moisture content as a significant fungal-growth risk. Gypsum wallboard can support mold amplification when surface relative humidity remains above roughly 70% for 24 to 48 hours. EPA moisture-control guidance explains why speed matters, but speed alone isn't enough. The materials must become dry, including the parts hidden behind the wall finish.
A damp cavity can also produce a persistent odor even when visible mold isn't present. Insulation, paper-faced drywall, dust, wood, and debris can all retain moisture. If the source continues, cleaning the room's surfaces won't correct the condition.
Moisture readings help define structural risk
Building-science guidance classifies wall moisture in the 20% to 28% range as risky and readings above 28% as very high risk. Fully capillary-saturated wood can hold two to four times its normal moisture content after liquid-water exposure. Building Science moisture-management guidance gives context to a common homeowner experience: a small-looking wet patch can conceal material that has absorbed far more water than the surface suggests.
The practical effects may include:
- Swelling: Gypsum, trim, and wood components can change shape or lose a tight fit.
- Weakening: Repeated wetting can reduce the reliability of finishes and affected wood.
- Secondary migration: Moisture can reach flooring, base plates, adjacent walls, or ceilings.
- Persistent recurrence: An unrepaired exterior or plumbing source can restart the cycle.
Decision point: Drying is successful only when measurements show that the affected assembly, not merely its surface, has returned to an appropriate dry condition.

Mold concerns should be evaluated in context, especially when occupants have respiratory sensitivities or when growth is visible. This explanation of whether water damage can create mold can help homeowners understand why moisture control comes before cosmetic repair. Testing and removal decisions should account for the affected material, the extent of growth, and whether the source has been corrected.
What to Do Right Now and How Professional Restoration Works
The first response should reduce danger and stop additional wetting. Don't begin by tearing open every wall or running fans across an area that may contain contaminated water. Follow a controlled sequence.
First actions at home
- Stop the source if it's safe. Close the local fixture valve or main water supply for a plumbing event. If rain is entering, use temporary protection only when you can do so without climbing into danger.
- Treat electricity seriously. Keep away from wet outlets, switches, appliances, and wiring. Have affected circuits shut off by someone qualified when needed.
- Protect contents. Move furniture, rugs, artwork, and electronics away from the wall if the area is safe to enter.
- Record conditions. Photograph the room, close-ups, source area, damaged contents, and any visible water line. Keep notes about when the loss occurred and what actions you took.
- Avoid sealing the evidence. Don't paint, caulk, replace baseboards, or close an access opening until the wall has been assessed.
Fans can help with a small surface spill, but a wall cavity may need controlled air movement and dehumidification. If the water came from a backup, flood, or unknown source, avoid direct contact and don't spread contaminated materials through the home.
When drying may be enough
EPA guidance says drywall may be dried in place when it has no obvious swelling and its seams remain intact. If mold growth is present or materials have been wet for more than 48 hours, professionals may need to test or remove affected materials. EPA guidance on water-damaged materials emphasizes that the decision depends on material condition, wetting duration, and whether the cavity can be dried effectively.
A restoration team may remove baseboards first, create targeted ventilation openings, extract standing water, install air movers, and operate dehumidifiers. Technicians then monitor readings until the structure reaches dry standards. If the source is unclear, leak detection can prevent a repeat loss. Mold inspection, microbial treatment, or asbestos testing may be appropriate depending on the material and conditions.
What the full workflow looks like
The sequence usually includes assessment, source control, extraction, stabilization, structural drying, cleaning or microbial treatment, and reconstruction. RestoTek TX provides these services for water-loss events in Georgetown, Austin, and surrounding Central Texas communities, including inspection, extraction, structural drying, leak detection, microbial prevention, mold testing, asbestos testing where required, and rebuilding.
Timing depends on the amount of water, the materials involved, access to the cavity, ventilation, weather, and whether the source continues. Costs also vary with the affected area, demolition, drying equipment, testing, contents, and reconstruction. Ask for a written scope, moisture documentation, photographs, and a clear explanation of what is being removed and why. This water damage restoration checklist can help you organize questions and records for your contractor and insurer.
Protecting Your Georgetown Home After Wall Water Damage
The safest way to think about wall damage is as a source-control and hidden-moisture problem, not a paint problem. A stain may be the first visible message from a leak at a window, door, deck, roof transition, pipe, or lower wall. Correcting the source without checking the cavity can leave moisture behind, while drying without source control can set up a repeat event.
Georgetown and Austin homeowners also need to account for Central Texas conditions. Heavy rain can expose weak envelope joints, wind can drive water into vulnerable transitions, and flash flooding can affect wall bottoms, flooring, insulation, and contents at the same time. After a storm, inspect beyond the room where you first notice the mark. Check adjoining walls, baseboards, window edges, flooring transitions, and the exterior drainage path.
Use a simple decision framework:
- Monitor: A minor, recent surface event with no swelling, odor, or cavity concern may need careful observation and documented readings.
- Investigate: Recurrent stains, musty odors, soft drywall, or storm-related changes call for a structured moisture assessment.
- Call promptly: Extended wetting, visible mold, contaminated water, electrical concerns, swollen materials, or suspected cavity involvement require professional help.
RestoTek TX is a family-operated provider led by Joan and Josh Garza, offering 24/7 emergency response, no-cost estimates, and an end-to-end path from inspection and mitigation through drying and reconstruction. Clear documentation and early communication can make a stressful loss easier to manage.
If you suspect water damage in walls, visit RestoTek TX to request an assessment for your Georgetown or Austin property. Their team can help identify the source, measure hidden moisture, dry affected structures, address microbial concerns, and coordinate repairs through reconstruction.