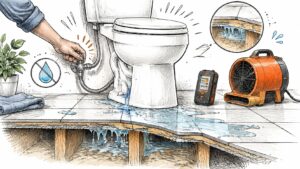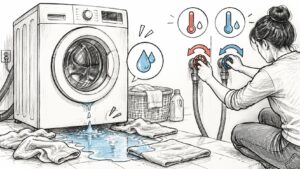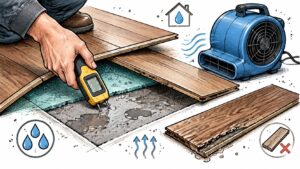
You step onto a cold bathroom floor at 6 a.m. and your sock comes away wet. There's no puddle you can point to, just a damp bath mat, a vanity base that feels cool, and a faint musty smell you can't quite place. That's how bathroom water damage usually announces itself in Georgetown and Austin homes, not as a dramatic flood, but as moisture that's already moved under tile, behind baseboard, or into a cabinet before you notice it. Treat it as a hidden moisture and evidence problem, not a mopping job. What you stop, photograph, and measure in the next hour decides whether you dry a small area or rebuild a floor assembly later.
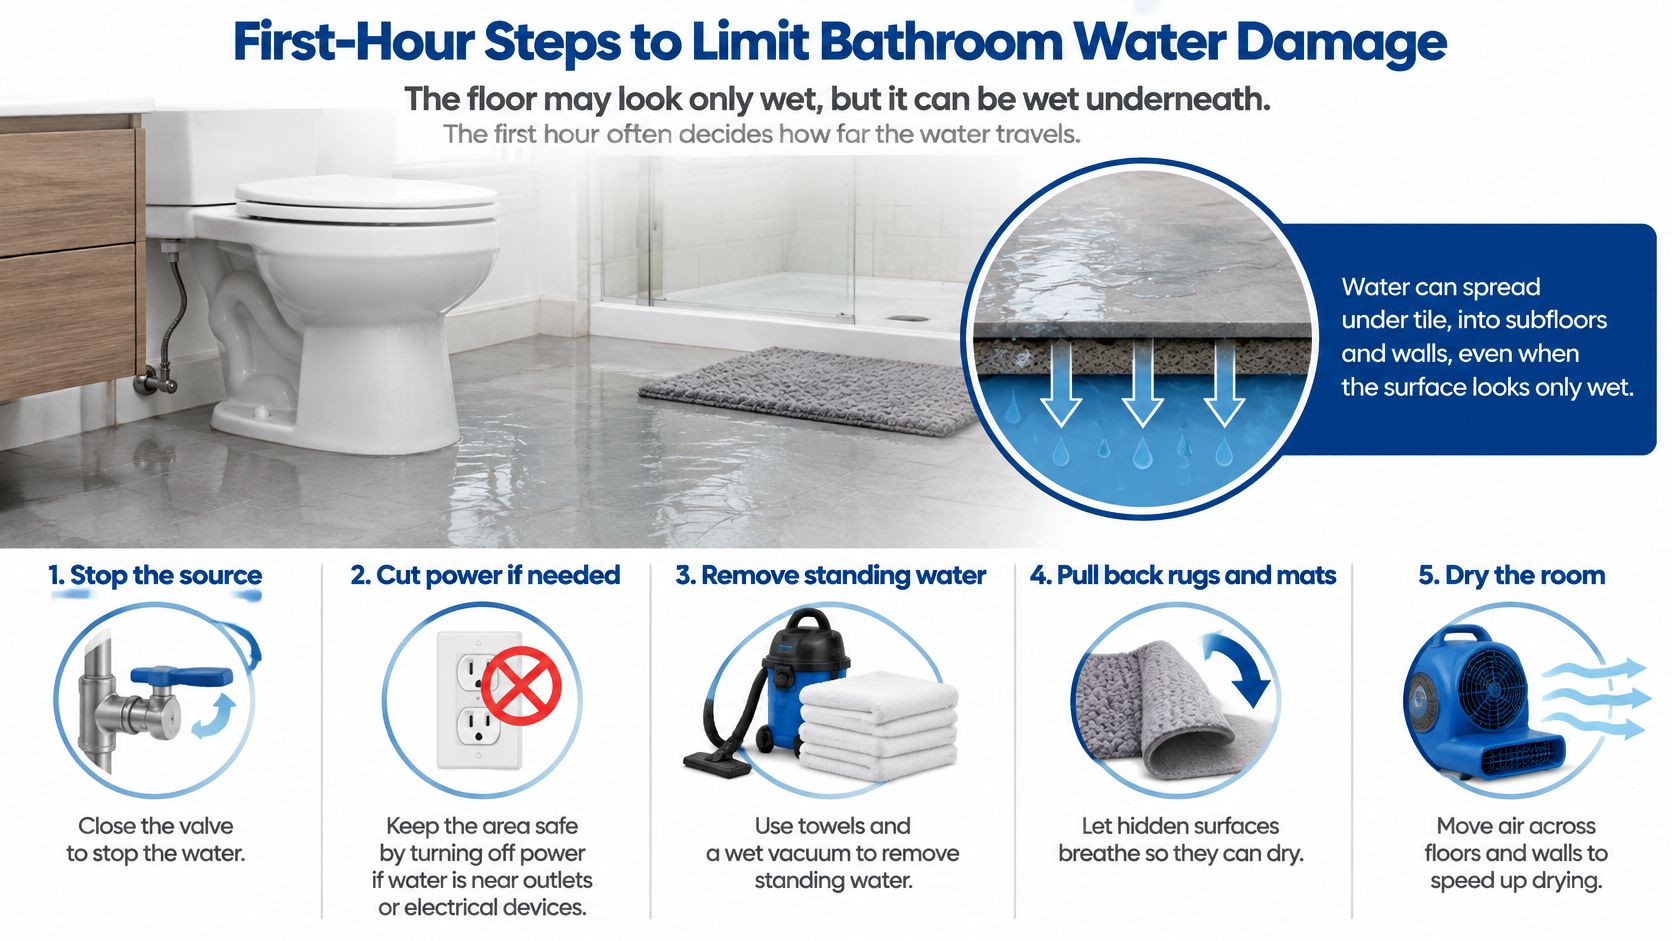
First-Hour Steps to Limit Bathroom Water Damage
A floor that looks only wet on top is often wet underneath. Water slips under tile, vinyl, and sheet flooring into underlayment and subfloor, and it travels behind trim and cabinets where you can't see it dry. The U.S. Environmental Protection Agency recommends drying wet building materials and furnishings within 24-48 hours because mold commonly develops when moisture remains available, and the EPA mold guidance treats that interval as a prevention guideline, not a guaranteed safe threshold. Porous materials may be difficult to dry completely in that window, so visible dryness doesn't prove the assembly is dry.
Stop, Make Safe, and Extract
- Stop the source first. Close the angle-stop valve under the sink or behind the toilet. If you can't find the source, or the valve won't hold, shut off the main and leave it off until the leak is identified.
- Cut power where water has reached it. Turn off the breaker for any outlet, light fixture, heated floor, or appliance in the wet zone. Don't step into standing water near live electrical fittings to unplug something.
- Remove standing water by extraction. Use a wet vacuum for puddles and seams, then towels for edges. Extraction pulls far more water out of flooring joints than mopping, which mostly pushes it toward baseboards.
- Get everything off the floor. Lift rugs, bath mats, trash cans, and stored items out of the vanity. Wet textiles hold moisture against flooring and hide how far water has spread.
Document Before You Disturb
- Photograph before you move finishes. Capture the source, the valve position, the water line on walls or cabinets, and every damaged item with timestamps on. Take wide shots of the room, then close shots of the toilet base, trap, supply hoses, and cabinet floor.
- Start controlled drying, not just airflow. Open the vanity doors, run the exhaust fan, and set a dehumidifier in the room with a fan moving air across the floor and lower wall. Close the bathroom door so humid air doesn't migrate into bedrooms and closets.
- Check what the surface hides. Slide towels or absorbent pads under the vanity toe kick and around the toilet base and see if they keep wicking moisture. Press a flat screwdriver gently into exposed subfloor or cabinet base at an inconspicuous spot. Soft, crumbling material means water has been there longer than this morning.
Practical rule: If pads keep coming back wet after extraction, assume the underlayment or wall cavity is holding water until a moisture meter proves otherwise.
Call a restoration provider the same day if water has spread beyond the bathroom, reached a wall cavity or ceiling below, or the source is still active after shutoff. That call isn't an overreaction. It's how you get concealed materials checked while drying can still save them.
Your first-hour check is simple. The source is shut off, standing water is extracted, the room is ventilated and dehumidifying, and a dated photo log exists. If any one of those four is missing, you're not finished with hour one.
Where Bathroom Water Damage Starts
Small failures add up faster than most owners expect. The U.S. Environmental Protection Agency estimates that household leaks waste nearly 1 trillion gallons of water nationwide each year, and the EPA Fix a Leak Week page notes a faucet dripping once per second can waste more than 3,000 gallons per year. The average property loses more than 9,300 gallons annually through leaks. Those are water waste figures, not restoration costs, but they explain why a slow bathroom drip deserves inspection before staining or soft flooring appears.
A concealed supply line, toilet, shower, or drain leak can run for weeks before it shows. Moisture migrates into subfloors, wall cavities, baseboards, and adjacent rooms while the fixture still works normally. By the time paint peels or a floor feels spongy, the wet area is usually larger than the visible stain.
| Source | Typical failure | Early warning sign | Spread risk |
|---|---|---|---|
| Supply line or faucet | Loose or burst braided hose, worn washer | Damp cabinet base, drip sound at night | High, runs for weeks inside cabinets |
| Toilet | Failed wax ring, cracked tank, overflow | Rocking toilet, staining at the base | High, reaches subfloor quickly |
| Shower or tub pan | Cracked grout, failed liner, failed seal | Soft floor, musty smell in the next room | High, hidden under tile |
| Drain or sink overflow | Clog, failed trap or connection | Slow drain, water pooling at the trap | Medium, spreads to vanity and floor |
| Hidden wall or floor leak | Pinhole pipe leak, failed seal | Peeling paint, warped baseboard | High, slow and out of sight |
Supply hoses and toilet seals cause the fastest hidden losses because they're pressurized or sit directly over subfloor. Shower failures are slower and sneakier. Cracked grout or a failed pan liner lets small amounts of water in during every shower, which is why guidance on shower tiles leaking matters when tiles sound hollow or grout keeps staining in the same spot.
The Central Texas Factor
In Georgetown and Austin, heavy rain and flash flood events raise the odds of drain backups and exterior infiltration in the same weeks when plumbing is already stressed. A bathroom that drains slowly on a dry day can back up during a storm. Check caulking, grout joints, and slow drains before storm season, not after the first backup.
You don't need visible damage to justify a check. An unexplained water meter rise, soft flooring near the tub, recurring odor after cleaning, or damp cabinetry under a sink each justify inspection. Repairing easily corrected household leaks can also cut the water bill, but the bigger saving is catching moisture before it becomes demolition.
Clean Water Versus Contaminated Water
The same puddle on the same tile can require two completely different responses. A clean supply line leak mainly threatens finishes and structural materials. A toilet overflow or drain backup can push biological contaminants into porous assemblies, where wiping the surface doesn't make the material safe.
EPA water damage guidance states that its 24-48 hour cleanup table applies to clean water damage and that suspected sewage or other biological pollutants require personal protective equipment and containment under OSHA-related precautions. That distinction changes who should enter the room, what gets removed, and whether air movers are appropriate at all before cleaning.
| Water category | Typical bathroom source | Handling requirement | Drying approach |
|---|---|---|---|
| Clean water | Supply line, faucet, tub overflow | Standard precautions, prompt extraction | Dry within the 24-48 hour window |
| Gray water | Sink or shower overflow with soap or detergent | Protective gear, treat as contaminated | Remove porous materials that stay wet |
| Black water | Toilet overflow, sewer or drain backup | Full PPE, containment, professional handling | Remove porous materials, specialized cleaning, dry cavities |
Delaying a clean water loss raises the probability of mold and secondary material damage. The water starts clean, but wet gypsum, wood, and cabinet particleboard don't stay neutral for long. Prompt extraction and dehumidification keep a salvageable loss salvageable.
Contaminated water creates the opposite risk. Treating it as an ordinary spill can spread contamination through aerosols, foot traffic, and HVAC airflow. Running a household fan across a sewage affected floor, for example, can move contaminants to surfaces that were never wet. Keep people and pets out, avoid running the central air handler if the return is near the loss, and don't tear out materials without containment.
If you're unsure whether toilet water carried waste or only tank water, handle it as contaminated until the source is confirmed.
A sound assessment documents the source, separates affected from unaffected areas, and prevents cross contamination between them. It evaluates porous materials for removal or specialized cleaning rather than assuming they can dry in place. It also confirms the subfloor and wall cavities are dry, not just the visible floor you walk on.
Finding Hidden Moisture and Deciding What Stays
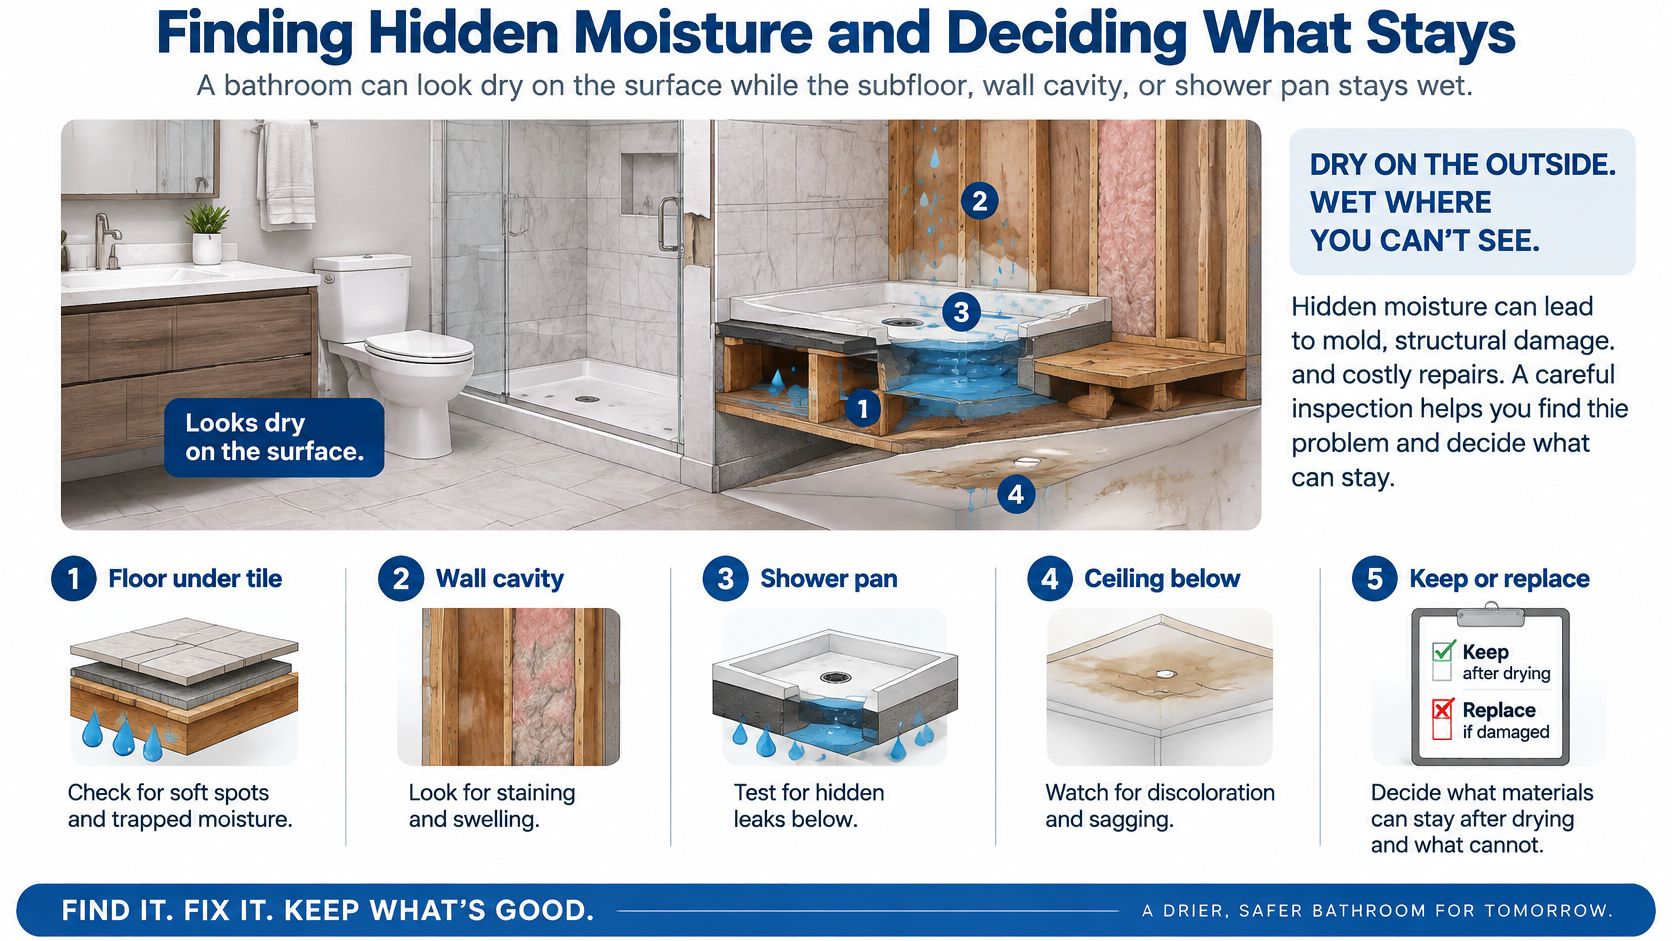
The trap with bathroom water damage is trusting the surface. Tile can feel dry and grout can look normal while the mortar bed, shower pan perimeter, or subfloor below stays wet for weeks. I would never sign off on a bathroom based on touch and appearance alone. Readings decide what stays. Appearance only tells you where to start looking.
Inspect From Floor to Ceiling
Start at the floor. Check under tile and resilient flooring at seams, transitions, and the perimeter where the shower pan meets the subfloor. A pinless moisture meter scans tile and vinyl without damage and flags wet zones, then a pin meter confirms readings in wood subfloor, framing, and cabinet material where small probe holes are acceptable.
Move to the walls next. Inspect the cavity behind the tub or shower wall, the back panel of the vanity, the cabinet base, and baseboard on both sides of a shared wall. A thermal camera helps here because wet material often reads cooler than surrounding dry material, which points you to where meter readings matter most. For a fuller method on how to detect moisture in walls, the principle is the same. Scan broadly, then verify with a meter, never the reverse.
Finish at the ceiling below an upstairs bathroom. Look for discoloration, sagging, bubbling paint, and soft gypsum around light fixtures and along joist lines. Probe questionable drywall and wood gently with an awl or screwdriver. Sound material resists. Wet gypsum crumbles and decayed wood gives with little pressure.
Every reading needs context. Compare each number against a dry reference point in an unaffected room with the same material, such as dry subfloor under a bedroom or dry drywall in a hallway. A reading without a reference is just a number. A reading well above reference that falls steadily during drying tells a useful story.
Dry in the Right Order
Drying starts only once the source is stopped and repaired. We coordinate plumbing repairs with licensed plumbers, ensure the source of water damage is resolved, and begin drying and restoration immediately after repairs. That sequence matters because drying against an active leak wastes days and gives false readings.
Extraction comes first, because removing liquid water is far faster than evaporating it. Dehumidification then lowers indoor humidity so moisture leaves materials instead of redistributing to cooler surfaces. Air movers speed evaporation across floors and into opened cavities. Used without dehumidification in a closed Central Texas home in summer, air movers alone can raise humidity and spread moisture to dry rooms.
| Material | Can it dry in place? | Typical action | Check before deciding |
|---|---|---|---|
| Subfloor plywood | Often, if readings fall after extraction and drying | Dry with air movers, replace if delaminated | Moisture meter reading against a dry reference |
| Ceramic tile on mortar | Usually, if the bond is intact | Lift only loose or hollow tiles | Tap test for hollow spots |
| Vinyl or sheet flooring | Only if the underlayment is dry | Remove if underlayment stays wet | Edges, seams and underlayment readings |
| Drywall | Sometimes, below the wicking height | Cut out the wet section, dry the cavity, replace | Probe for soft or crumbling gypsum |
| Vanity or cabinet base | Rarely, if the back panel or toe kick is wet | Remove for drying access | Check back panel and floor under the base |
| Baseboard and trim | Rarely, if swollen | Replace when fibres are swollen | Press test for softness |
Keep or Remove, by Reading
Sound materials that read near the dry reference and keep falling can usually dry in place. Plywood that is flat, firm, and drying steadily is worth saving. Tile with an intact bond over a drying mortar bed often stays too, which avoids a full floor replacement nobody budgeted for.
Saturated, swollen, or delaminated materials are different. Particleboard vanity bases swell and lose strength, sheet flooring traps moisture against underlayment, and wet drywall wicks upward well past the visible line. Leaving those in place can keep a wall or floor wet long after equipment is removed. Targeted removal of the failed section beats both extremes, full gutting and hopeful drying.
Counterpoint worth remembering: Aggressive demolition isn't always the careful option. Removing sound finishes wastes money and can destroy evidence an insurer needs, while measured openings at baseboard or cabinet backs often give enough access to dry a cavity.
When you talk to whoever assessed the room, ask two direct questions. Which areas were measured, and which readings were recorded? If the answer is vague, the decision to keep or remove materials probably rests on appearance.
End the inspection with a written list, not a verbal summary. It should name each material kept, each material removed, and the readings that support both calls. That list protects you during reconstruction, because nobody has to reconstruct the reasoning from memory three weeks later.
Mold and Odor After a Bathroom Leak
Mold commonly develops when wet materials stay wet, and odor is often your first honest signal that a hidden area hasn't dried. A bathroom can pass a visual check and still smell musty every time the door stays closed overnight. Trust that smell enough to investigate it. Odor that returns after cleaning usually means the moisture source or a wet cavity is still present.
We recommend mold testing when there are persistent musty or earthy odors, recent water damage or leaks, past flooding or plumbing failures, visible discoloration on walls or ceilings, respiratory symptoms that improve outside the home, or when buying or selling a home. Any one of those justifies testing. Two or three together make waiting hard to defend, especially before reconstruction closes a wall.
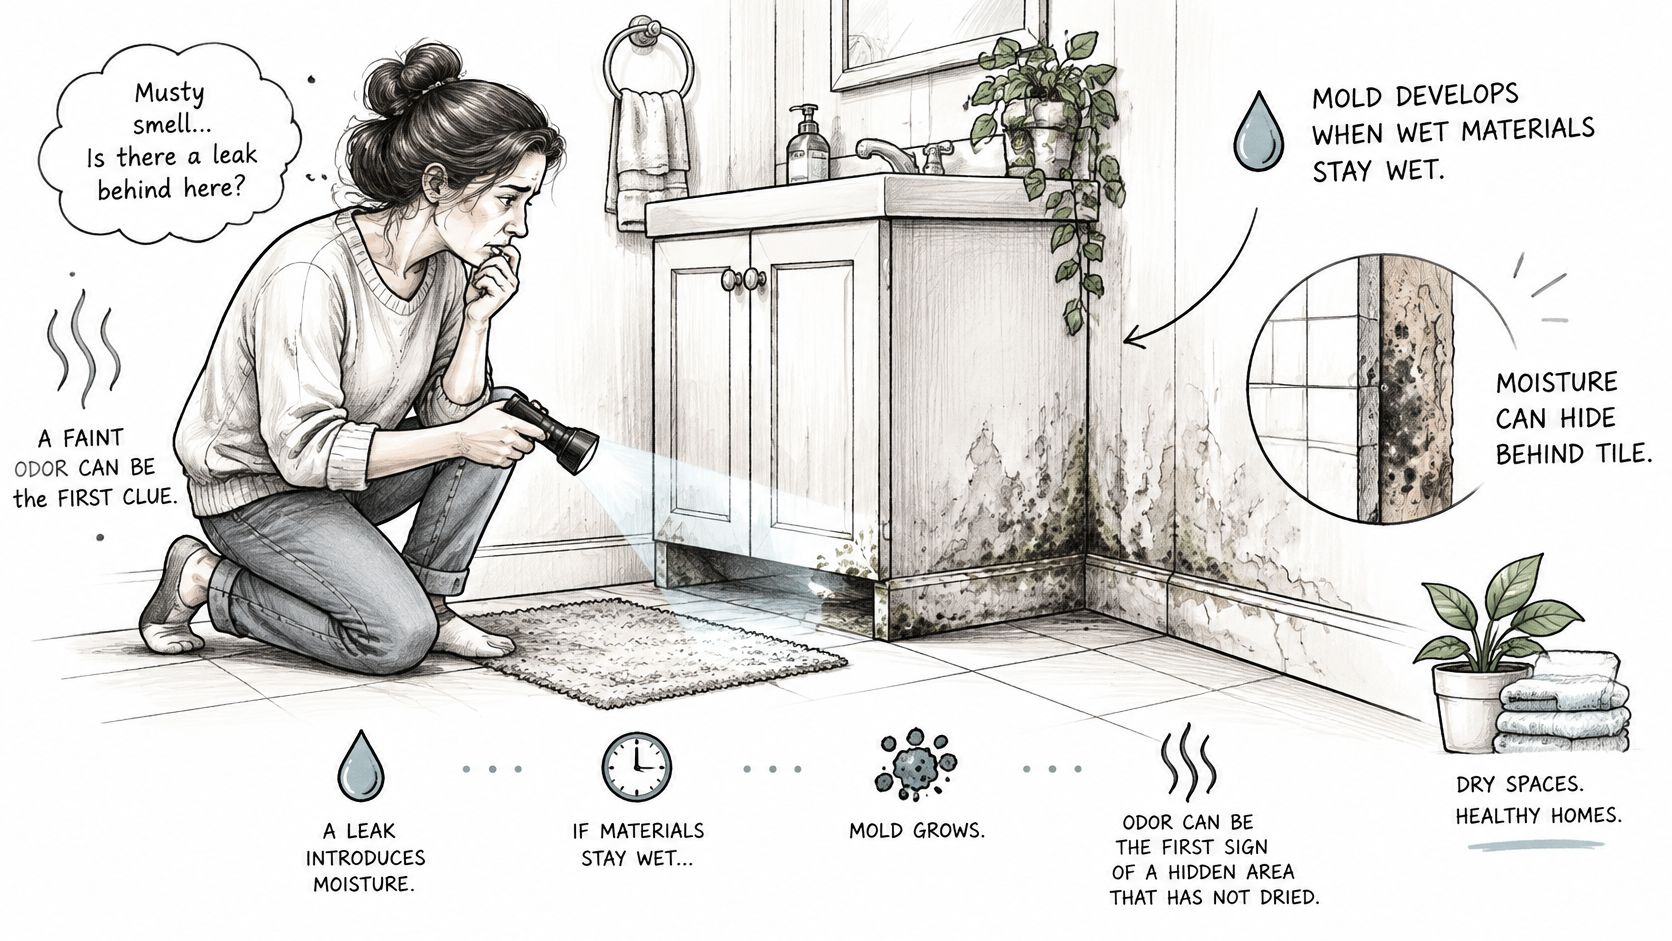
Testing and remediation aren't the same service, and confusing them wastes money. Testing identifies whether mold is present and at what levels. Remediation removes mold and fixes the moisture source that fed it. Testing without fixing moisture documents a problem that will return, and remediation without testing can leave you without a baseline for insurance or a property sale.
A testing service may include air sampling for airborne spores, surface sampling of suspected growth, moisture readings in high risk areas, and visual inspection of affected and concealed spaces. The moisture readings matter as much as the samples, because they show whether conditions still support growth. Practical steps on how to prevent mold after water damage follow the same logic. Control the moisture first, then verify.
Our mold testing process has four steps: Initial Inspection, Sampling, Analysis, and Results Review, which includes a clear explanation of findings and recommendations. Insist on that final step in writing, whoever does the work. Raw lab numbers without interpretation don't tell you whether to remediate, retest, or proceed with repairs.
If results come back high, do three things before reconstruction begins. Request the written report, confirm the moisture source is fixed and readings have returned to dry reference levels, and ask directly whether remediation is needed first. Closing drywall over an unresolved cavity doesn't solve the odor. It just makes the next investigation more expensive.
Insurance Evidence to Collect Before Repairs
The fastest restoration isn't always the safest one financially. Pulling finishes out in the first hour can destroy the evidence that shows where water started and how far it traveled. Waiting days to stabilize the room creates the opposite problem, because a covered loss gets worse while you wait for permission. The workable path separates emergency stabilization from demolition and reconstruction.
Interior water damage is a recurring, financially material claim category, which is why documentation carries weight. Insurance Information Institute data cited in an EPA leak detection guide indicate that from 2019 through 2023, 1.5% of homeowners submitted an insurance claim related to water damage or freezing, with an average claim cost of $15,400. A separate summary reports that between 2016 and 2020, approximately one in every 60 insured homes filed an interior water damage claim. Failed toilets, burst supply hoses, shower pan leaks, and overflowing tubs sit inside that broader category.
Build the Evidence File in Order
- Photos before demolition: Capture the source, water line, affected finishes, and room wide views before anything is removed.
- Dated moisture readings: Record where each reading was taken, the material, and the dry reference used for comparison.
- Plumber's written findings: Keep the diagnosis of what failed, not just the invoice for what was replaced.
- Emergency work invoices: Save receipts for extraction, drying equipment, and shutoff or repair visits.
- Damaged contents list: Name each item, its condition, and your best record of value, with photos where you have them.
- Timeline: Write down when water was found, when it was stopped, and when drying started, while those times are still fresh.
That average claim figure reflects what happens after water reaches building materials and contents, not the price of a replacement hose. Water under tile, in a subfloor assembly, or behind drywall increases drying, demolition, microbial prevention, and reconstruction scope quickly. Your file should show that progression, or show that you stopped it.
Coverage depends on your policy and the cause, and this guide can't promise an outcome. Insurers commonly treat a sudden accidental discharge, such as a burst hose, differently from long term seepage from a failed seal or neglected caulk. The resulting damage, the failed fixture itself, mold, and preventive maintenance can each be handled differently under the same policy.
For landlords and property managers, use a decision timeline with clear gates. Handle safety, shutoff, and extraction immediately without waiting for scope approval. Pause at demolition that isn't needed for drying access until the source and readings are documented. Approve reconstruction only after drying endpoints are recorded. That sequence protects both the property and the claim file.
Repair and Reconstruction Options After Drying
Reconstruction before drying endpoints are met is money spent twice. Work in the order the assembly was built, plumbing first and paint last, and don't close anything you haven't verified dry.
Start with the failed plumbing. Replace the fitting, braided supply hose, toilet wax ring, or shower pan liner that caused the loss, then confirm the repair holds with a pressure or flow test before walls close. Run the shower, flush repeatedly, and check every joint dry with a paper towel. A slow weep found now costs minutes. The same weep found after tile costs a reopening.
Rebuild the floor on a verified dry base. Install new subfloor sections where plywood delaminated or lost stiffness, and screw them to joists so the patch doesn't flex under tile. Set tile on a fresh mortar bed or new membrane, and lay vinyl or sheet flooring only over underlayment that reads dry at edges and seams.
For walls, cut drywall back to sound, firm gypsum rather than patching to the stain line. Leave the cavity open until framing and remaining drywall return to the dry reference, then patch, prime with a stain blocking primer, and paint. Swollen MDF baseboard gets replaced, not repainted, because swollen fibres never return to profile.
Cabinets follow the same honesty test. Replace the vanity base if the back panel or toe kick is swollen or soft, even if the doors and drawer fronts look fine. Salvageable doors can be dried, cleaned, and rehung on a new base, which saves cost without keeping a failed box.
Two paths cover most losses. Repair in place suits small, contained losses where materials dried and stayed. Full reconstruction fits losses where flooring, drywall, or cabinets were removed or mold was confirmed. For either path, record the scope, material list, and cost estimate in writing. Where a claim is open, get the scope approved by the insurer before reconstruction begins.
Decide Whether to Call a Restoration Crew Today
You don't need a gut feeling to make this call. You need a checklist, and if any item on it is true, the decision is already made.
Call Today if Any of These Apply
- Water is still moving: Pads keep wicking, the meter runs with fixtures off, or the source hasn't been found.
- Water reached cavities or ceilings: Baseboards are swollen, walls read wet, or the ceiling below shows staining or sagging.
- Contamination is possible: A toilet overflowed with waste, a drain backed up, or the water carries a sewage odor.
- Drying is already late: Materials have sat wet for more than a day without extraction and dehumidification.
- Materials have changed: Flooring feels soft, cabinets are swollen, or drywall crumbles when probed.
- Odor keeps returning: The musty smell survives cleaning and a day of ventilation.
A single provider arrangement typically covers inspection and assessment, mitigation and drying, mold testing where needed, plumbing coordination, and reconstruction under one contact. We provide a single point of contact for plumbing repairs and restoration, and we partner with licensed and insured local plumbers to handle plumbing repairs. That structure matters because handoffs between separate plumbers, dryers, and builders are where timelines and documentation usually break down.
Before work starts, ask five questions and note the answers. Who is my single point of contact? How is moisture measured, and against what dry reference? What documentation will I receive for insurance? What reading counts as the drying endpoint? Can you show proof of licensing and insurance? A provider who answers those plainly will usually document the job plainly too.
We offer a free estimate, which gives you a scoped starting point before you commit to demolition. Use any assessment, ours or another local provider's in Georgetown or Austin, to get readings on paper rather than opinions in the air. Numbers let you compare scopes.
Do one thing today, in this order. Photograph the damage, shut off the source, record whatever readings you can, then request an assessment. A bathroom that gets measured today can often be dried. A bathroom that gets guessed at for a week usually gets rebuilt.
If bathroom water damage has reached your subfloor, walls, or ceiling, RestoTek TX can inspect the loss, coordinate licensed plumbing repairs, dry the structure to recorded readings, and handle reconstruction under one point of contact. Request your free estimate and get a documented plan before moisture spreads further by visiting RestoTek TX.