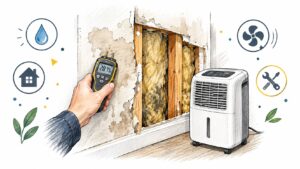
You open an Austin water bill in February and see a charge far above normal. Or you notice a musty smell behind the drywall, a warm patch of tile, or a faint hiss after everyone has gone to bed. The instinct is to search for a puddle. Hidden leaks rarely make it that easy.
The practical way to learn how to find a hidden water leak in a house is to climb a triage ladder. Start with a meter test and visual inspection, map moisture before opening walls, isolate plumbing zones, then escalate to thermal imaging, acoustic correlation, or tracer gas when the evidence points below the surface. The right order saves time, limits demolition, and tells you when a Saturday investigation has become a professional restoration problem.
When a Hidden Leak Should Be Your First Suspect
A high bill is a clue, not a diagnosis. Before blaming a roof, window, or drainage problem, ask whether water is moving through the plumbing while the house is idle. The U.S. Environmental Protection Agency says household leaks can waste more than 10,000 gallons per year for the average home, and 10% of homes have leaks wasting 90 gallons or more per day. Those losses often come from slow leaks that never form an obvious puddle. EPA WaterSense explains the scale of household leaks and why early repair matters.

Separate plumbing symptoms from building-envelope symptoms
Suspect a concealed plumbing leak when the meter moves with every fixture closed, a toilet runs intermittently, or you hear water after shutting off appliances. Warm tile over a slab points toward a hot-water line when the temperature difference is clear. Peeling paint, recurring mold at baseboards, soft drywall, and a persistent musty odor indicate moisture, but they don't identify the source by themselves.
A roof or exterior-envelope problem behaves differently. Staining that appears after rain, dampness around a window, or damage at an exterior wall may begin outside the plumbing system. A plumbing supply leak usually continues regardless of weather. A drain leak appears when a sink, shower, tub, or washing machine discharges, while an irrigation leak may leave soggy soil, unusually lush vegetation, or wet areas near zone valves.
Practical rule: A moving meter proves water loss. It doesn't prove where the water is escaping.
Use the symptom to choose your starting point
Begin with the cheapest reliable check. Photograph the bill, listen at night, inspect fixtures, and test the meter before buying specialized equipment. The EPA has also recommended leak detection and flow-monitoring devices as a way to identify irregular water use earlier, rather than waiting for stains or damaged finishes. This historical overview discusses the shift from manual checks toward continuous monitoring.
Your investigation should answer three questions in order:
- Is water being lost while the home is idle?
- Which room, branch, or outdoor zone is associated with the loss?
- Does the evidence justify professional localization?
If the meter keeps moving, water damage is active, or the suspected area includes a slab, wall cavity, or buried line, don't start cutting drywall at random. Move up the ladder with evidence.
Free Checks You Can Run in One Afternoon
Start at the meter. Turn off faucets, toilets, washing machines, dishwashers, ice makers, water softeners, and irrigation. Record the meter reading, then watch the sweep hand or leak indicator for about thirty minutes. Any movement means the property is losing water somewhere, although a brief delay from a pressure tank or appliance can complicate the first observation.
Repeat the test after confirming every fixture valve is closed. A toilet can refill, and an irrigation controller can activate a zone while you're inside. If the indicator moves, photograph it and note the time. That record helps a plumber or leak-detection technician avoid treating a suspected leak as a vague complaint.
Inspect fixtures in a fixed order
Work from the fixtures most likely to waste water to the ones most likely to hide a supply-line problem.
- Toilets: Add food coloring to the tank and wait without flushing. Color appearing in the bowl indicates water is crossing the flapper or another internal seal.
- Faucets and shower valves: Feel around escutcheons, cabinet backs, and the wall below the valve. Look for swollen trim, loose caulk, or a damp access panel.
- Laundry connections: Check both washing-machine hoses and the wall box. Look behind the appliance with a flashlight rather than relying on the dry front floor.
- Water heater: Inspect the pan, temperature-pressure relief discharge, shutoff, and fittings. A pan with standing water deserves immediate attention.
- Refrigerator lines: Examine the icemaker supply line where it enters the cabinet and wall. Small fittings can wet flooring slowly.
- Irrigation: Walk every zone, including valve boxes, bubbler heads, sprinkler bodies, and the strip between the meter and the house.
Central Texas clay soils make outdoor losses easy to miss because water can travel laterally or collect below the visible surface. A wet patch near the foundation doesn't automatically mean the house slab is leaking. Test irrigation before assuming the problem is indoors.
Map visible damage before touching finishes
Use painter's tape to mark the edge of a stain, write the date beside it, and photograph the area. Check ceiling penetrations, baseboards, flooring transitions, cabinet floors, and the wall shared with a bathroom or laundry room. Don't paint over a stain or remove trim until you've established whether the material is still wet.
If the meter is still moving after the fixture inspection, the free checks have done their job. They have confirmed a loss and narrowed the search. They haven't localized a concealed pipe, so the next step is moisture mapping rather than demolition.
Reading the Right Moisture Meter the Right Way
A moisture meter answers a narrower question than most homeowners expect. It tells you where building materials contain moisture, not automatically where the plumbing defect sits. Water can travel along framing, insulation, slab edges, or flooring before it becomes visible, so the wettest surface may be downstream from the source.
Choose pins for confirmation and pinless scanning for coverage
A pin meter uses penetrating probes to read moisture in a specific spot. It earns its place when you need to determine whether a drywall stain, wood baseboard, or cabinet panel is wet now. The probes leave small holes, so use them discreetly and avoid electrical wiring, plumbing, and finished surfaces unless you understand the safety limits of the instrument.
A pinless meter scans a broader area without puncturing the material. It's faster for tracing the edge of a damp wall, following a baseboard, or comparing the floor on both sides of a plumbing wall. Pinless readings can be influenced by density, metal, fasteners, and the material beneath the surface, so treat the result as a map, not a laboratory measurement.
For practical guidance on using these instruments, see RestoTek TX's moisture meter reading guide.
Scan in a grid instead of chasing the darkest mark
Start at the visible stain or odor source. Move outward in consistent steps, recording readings at the center, perimeter, floor line, ceiling line, and nearby corners. Then scan the adjacent room, especially if it shares a bathroom, kitchen, laundry, or mechanical wall.
Use the same meter setting and compare the same material. A reading on painted drywall isn't directly comparable to one on hardwood, tile, or raw framing. Establish a dry-looking baseline in an unaffected part of the same wall, then look for relative changes across the grid.
| Feature | Pin Meter | Pinless Meter |
|---|---|---|
| Primary use | Confirming moisture at a precise point | Mapping moisture across a wider surface |
| Surface impact | Leaves small probe marks | Noninvasive |
| Strongest application | Verifying an active stain or wet wood | Tracing migration along walls and floors |
| Main limitation | Narrow sampling area and penetration risk | Readings can be affected by material and hidden metal |
A low reading doesn't clear the area. Slow slab leaks may wet only a small path, and a meter can miss moisture if you scan beside rather than directly over it. Repeat the scan at different heights, inspect both sides of shared walls, and check flooring transitions.
A moisture map is a search boundary. It isn't a license to open the wall at the single darkest reading.
When moisture is confirmed, mark the pattern and keep the log. The pattern helps determine whether thermal imaging, acoustic correlation, or tracer gas is the sensible next tool.
Thermal Imaging, Acoustic Correlation, and Tracer Gas
Professional leak detection works best when the method matches the pipe and the building location. Thermal imaging needs meaningful temperature contrast. Acoustic correlation needs a pressurized line that transmits detectable sound. Tracer gas is valuable when the pipe is depressurized, nonmetallic, or too quiet for acoustic work.
Match the tool to the evidence
Thermal imaging is useful for hot-water supply lines inside walls and radiant loops beneath slabs. A FLIR-style camera can reveal an abnormal temperature pattern while the system is operating. It won't identify every leak, and a cool-water line, poor insulation, sunlight, air movement, or a recently inactive system can erase the contrast. Confirm thermal anomalies with moisture readings and a small, targeted opening.
Acoustic correlation uses two sensors placed on accessible points of a pressurized line. The equipment compares the timing of the leak sound at each sensor and calculates a likely position. Under good conditions, it can localize a leak to within a few feet, but the result depends on accurate pipe length, sound-velocity assumptions, pipe material, and the absence of branches that distort propagation. It is particularly useful for slab lines, buried supply piping, and irrigation mains when the line carries pressure and transmits leak noise.
Tracer gas is the late-stage option for quiet or nonmetallic systems. A 5% hydrogen and 95% nitrogen mixture is introduced into the isolated line, and a handheld sniffer detects gas escaping at the defect. The method suits depressurized pipes, PVC systems, and situations where temperature and sound provide little information. The area needs appropriate ventilation and controlled access during the process.
| Method | Best Pipe Type | Best Location | Main Limitation |
|---|---|---|---|
| Thermal imaging | Hot-water supply lines and radiant loops | Walls and slabs with clear temperature contrast | Can't localize a leak without useful thermal difference |
| Acoustic correlation | Pressurized lines that transmit leak noise | Slabs, buried supply lines, and irrigation mains | Branches, incorrect pipe data, and quiet materials reduce accuracy |
| Tracer gas | Depressurized or acoustically quiet nonmetallic lines | PVC systems, buried pipes, and difficult slab locations | Requires isolation, ventilation, and specialized detection |
The field sequence matters. RestoTek TX's thermal imaging leak-detection information supports the practical approach of scanning, mapping moisture, correlating the likely path, and verifying at the smallest reasonable inspection point. Don't use a thermal camera as a substitute for moisture confirmation, and don't use acoustic equipment because a slab is involved.
Isolating the Leak by Shutting Off Zones
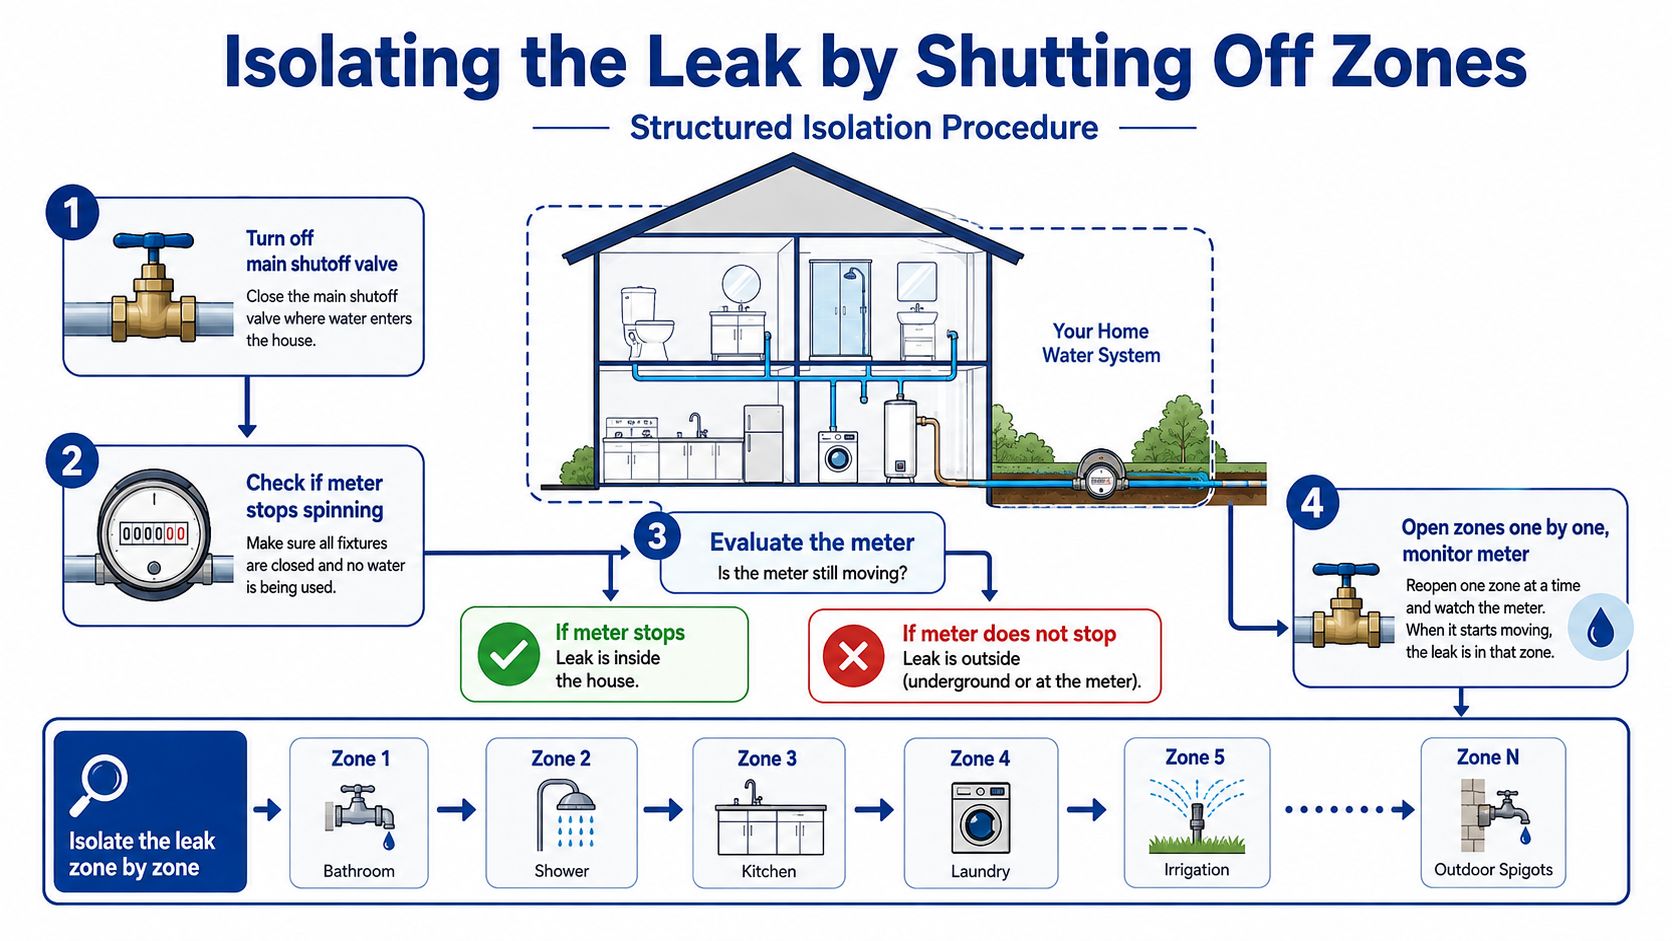
Treat the house as a diagnostic circuit. The main shutoff tells you whether the loss is downstream of the home's entry point, while fixture valves help identify the branch that changes the meter behavior. Work slowly and record each result. Randomly turning valves on and off creates confusion.
Close the main house shutoff while leaving the irrigation arrangement clear. With every fixture already off, check the meter. If movement stops when the house is isolated, the loss is inside the home envelope or on a branch served by the house supply. If the meter continues moving, investigate the line between the meter and the house and the irrigation lateral before opening interior finishes.
Isolate one branch at a time
Return the main supply to its normal position, then close accessible branch valves. Use the angle stops beneath sinks, toilet supply valves, the water-heater supply, washing-machine valves, and refrigerator line. After each change, wait for the meter sweep or leak indicator to settle, then record whether movement continues.
The important observation is the moment the meter drops to zero or stops changing. That branch becomes the leading suspect, although a shared line or second leak can still exist. In a two-story home, separate upstairs and downstairs fixtures before opening drywall. A bathroom wall that looks wet may share a supply route with another fixture on the opposite side.
Drain leaks require a different test. A drain only leaks while water is flowing through it, so a quiet meter doesn't clear the drain assembly. Fill a tub, drain it, run the shower, discharge a basin, and observe the ceiling or cabinet below during each event. Keep the tests separate so you know which fixture produced the response.
Use this decision path
- Meter moves with all fixtures closed: Suspect a pressurized supply line, toilet fill problem, irrigation lateral, or service line.
- Meter stops when the house is isolated: Focus on interior branches and fixtures.
- Meter stops until a fixture drains: Investigate that fixture's trap, drain, overflow, or connected waste line.
- Moisture appears after rain without meter movement: Investigate roof, window, grading, or exterior-envelope sources.
- Moisture is present but no active meter movement occurs: Consider an old loss, condensation, a drain leak, or residual migration.
Stop isolating when the evidence points to a concealed line. More valve cycling won't tell you the exact location, and opening finishes without a moisture map can increase the repair scope.
Documenting the Loss for Insurance and Calling RestoTek
Create one claim folder before removing anything. Insurance conversations become easier when the record shows what you observed, when you observed it, and how the affected area changed. Save original photos rather than relying only on compressed messages or screenshots.
Build a usable evidence package
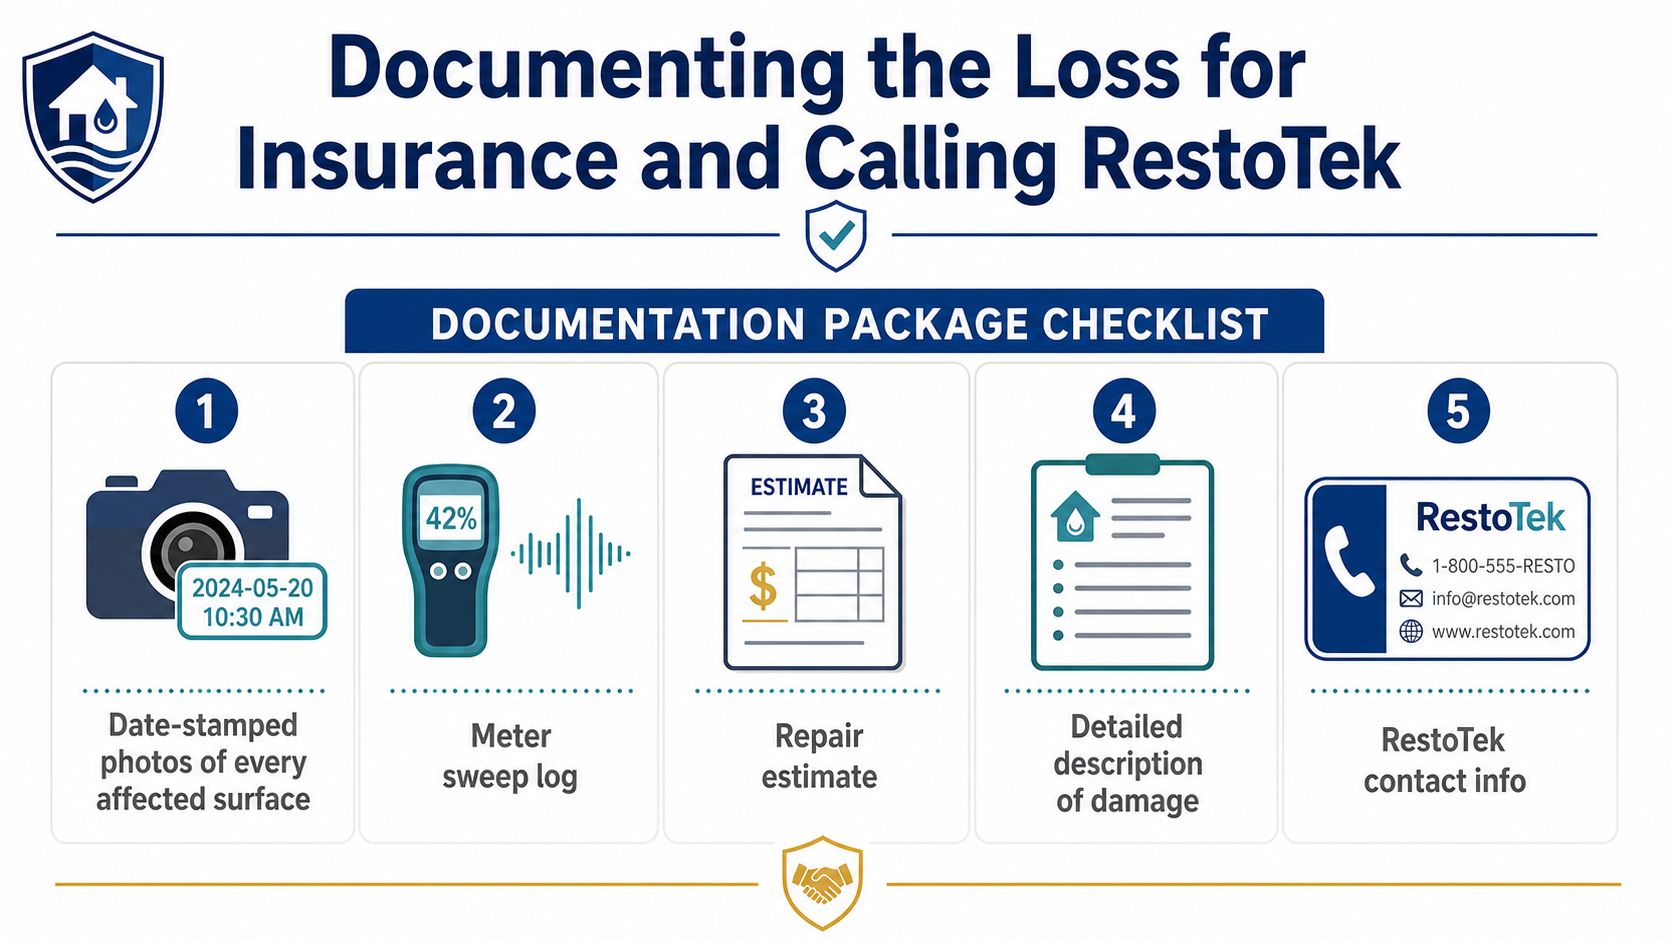
Take date-stamped photos of every affected surface, including wide room views and close-ups of stains, swelling, peeling paint, standing water, and visible mold-like growth. Photograph the meter sweep or leak indicator when the loss is confirmed. Add a written timeline that records when you noticed the bill, odor, sound, stain, or first active water.
Keep the water bill that triggered the investigation. Save the plumber's invoice, leak-detection report, repair estimate, and any notes describing whether the source was a supply line, drain, irrigation system, roof, or appliance. Record moisture-meter readings by room, material, location, and date rather than writing only “wall wet.”
Your contractor file should include a scope of work covering demolition, extraction, drying equipment, monitoring, cleaning, microbial prevention, and reconstruction where applicable. RestoTek TX's progress documentation resource reflects why organized progress records matter during a water-loss project.
Know when investigation ends and mitigation begins
In Texas, homeowners should read their own policy rather than assume every leak receives the same treatment. Policies commonly distinguish sudden, accidental discharge from long-term seepage, so the discovery timeline, meter record, moisture logs, and professional findings can become important context for the claim.
Call the plumber or leak-detection specialist to repair or isolate the source first. Once water has affected drywall, flooring, cabinets, insulation, or structural materials, mitigation should begin promptly. RestoTek TX provides inspection, water extraction, structural drying, microbial prevention, documentation, and reconstruction services for properties in Austin, Georgetown, and surrounding Central Texas communities.
Don't keep probing saturated drywall while waiting for an adjuster. Photograph first, protect people from electrical or structural hazards, and ask the restoration contractor to document conditions before controlled removal.
Your Leak Search Checklist and When to Stop
Use this list in order. It prevents a homeowner from jumping to expensive equipment before confirming that water loss exists, and it creates a clean handoff when a professional needs to take over.
- Confirm the symptom: Record the high bill, musty odor, sound of running water, visible stain, soft finish, or unexplained outdoor dampness.
- Secure the area: Keep away from wet electrical components, swollen ceilings, unstable flooring, and contaminated backup water.
- Run the meter test: Close every fixture and irrigation valve, record the reading, and watch for movement.
- Check toilets: Use a tank dye test and inspect the supply connection, base, and nearby flooring.
- Inspect fixtures: Check faucets, shower valves, washing-machine hoses, the water heater, and the icemaker line.
- Walk irrigation zones: Look at valve boxes, bubblers, sprinkler bodies, foundation edges, and the service route.
- Map moisture: Scan from the visible damage outward, compare the same materials, and record each location.
- Isolate branches: Close accessible angle stops and appliance supplies one at a time, checking the meter after each change.
- Test drains separately: Run the suspected tub, shower, sink, or washer while watching the area below and around the fixture.
- Escalate intelligently: Use thermal imaging for meaningful heat contrast, acoustic correlation for pressurized lines, and tracer gas for quiet or depressurized systems.
Know the hard stop
The DIY ladder ends when you see active dripping, structural swelling, microbial growth, saturated drywall, or continuing meter movement with all fixtures closed. Stop opening surfaces if you can't identify the source, if the suspected line runs beneath a slab, or if water has reached electrical equipment or insulation.
A professional should also take over when your moisture map spreads across multiple rooms, when the leak appears intermittent, or when the suspected source is a buried supply, irrigation main, or quiet PVC line. Early mitigation in Austin and Georgetown homes usually limits demolition and gives the insurance file a clearer timeline.
RestoTek TX can inspect hidden moisture, support leak detection, extract water, dry affected structures, document progress, and manage reconstruction after the source is repaired. If your meter is moving or your walls and floors are already showing damage, visit RestoTek TX to request help for your Austin or Georgetown property.