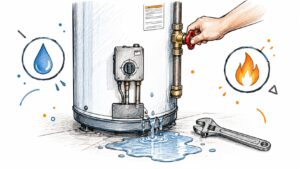
You find a puddle around the water heater, wipe it up, and watch another bead form at the tank. The floor may already be wet under the unit, and your first instinct is probably to turn off the water. Stop and assess the hazard before touching a valve. A leaking water heater can involve plumbing, electricity, gas, heat, and hidden moisture at the same time.
The safest response is location-based: identify where the water is coming from, keep away from hot or electrically contaminated water, isolate the energy and water supplies only when it's safe, then document and contain the damage. If you smell gas, see smoke, hear sparking, or find water around electrical equipment, leave the area and call emergency help from a safe location.
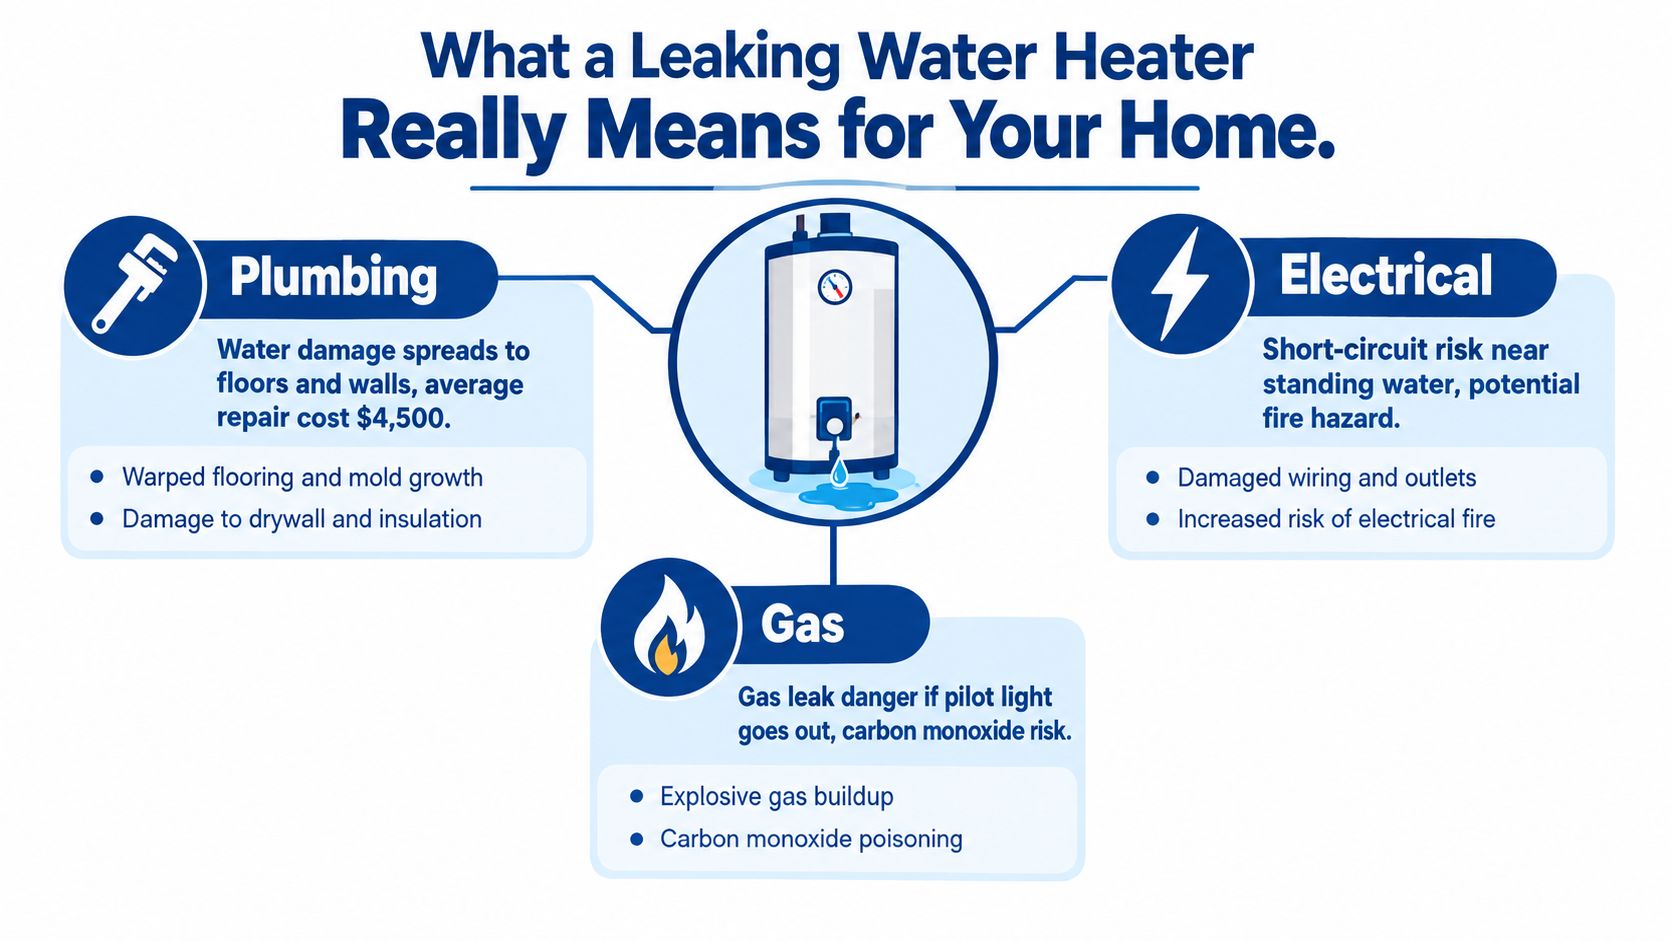
What a Leaking Water Heater Really Means for Your Home
A water heater isn't just a tank with a pipe attached. It connects to the home's water supply and, depending on the model, an electric circuit, a gas line, or both plumbing and electrical controls. That combination is why FEMA treats a damaged heater as both a water-damage emergency and a possible fire or carbon-monoxide hazard, especially when the unit is gas-fired. FEMA's water-heater safety guidance explains that physical damage can rupture plumbing, damage gas connections, ignite fires, or create carbon-monoxide risks.
Before you reach for a shutoff, look from a dry location. Try to determine whether water is coming from the tank body or seam, the drain valve, the temperature-and-pressure relief discharge, or a supply connection at the top. Don't stand in pooled water to investigate, and don't touch electrical equipment if water has reached it.
Four leak locations change the response
- Tank body or seam: Water emerging from the metal body, base, or seam usually means the tank has failed internally. Don't try to patch it or keep operating it. Shut down the unit only if you can do so safely, then call a qualified plumber and prepare for replacement and water extraction.
- Drain valve: A drip from the small valve near the bottom may come from a failed valve or connection. Treat it as an active leak, but don't put your hands into hot water or use force that could break the fitting.
- T&P discharge: Water from the temperature-and-pressure, or T&P, discharge pipe may signal excessive pressure, thermal expansion, overheating, or a defective relief valve. It isn't an ordinary nuisance drip, and you must never cap or plug the pipe.
- Supply connection: A leak at a hose, inlet, outlet, or fitting may be repairable. It still needs prompt isolation because water can travel behind walls and below flooring long before the puddle looks dramatic.
Immediate priority: Keep people away from standing water and electrical equipment. If the source is unclear, gas may be involved, or the leak is substantial, leave the area and call qualified help.
Turning off the water alone may not be enough. A gas burner or electric heating element can remain energized after the water supply is closed, while a failed tank can continue releasing water already inside it. The next move is to match the visible symptom to the safest shutdown sequence.
Match Your Leak to the Right First Action
A puddle under a water heater is a triage problem. Start from dry ground with a flashlight, never your hands, and trace the wettest path upward. Look for the point where water first appears, while keeping people away from hot water, standing water, and exposed equipment.
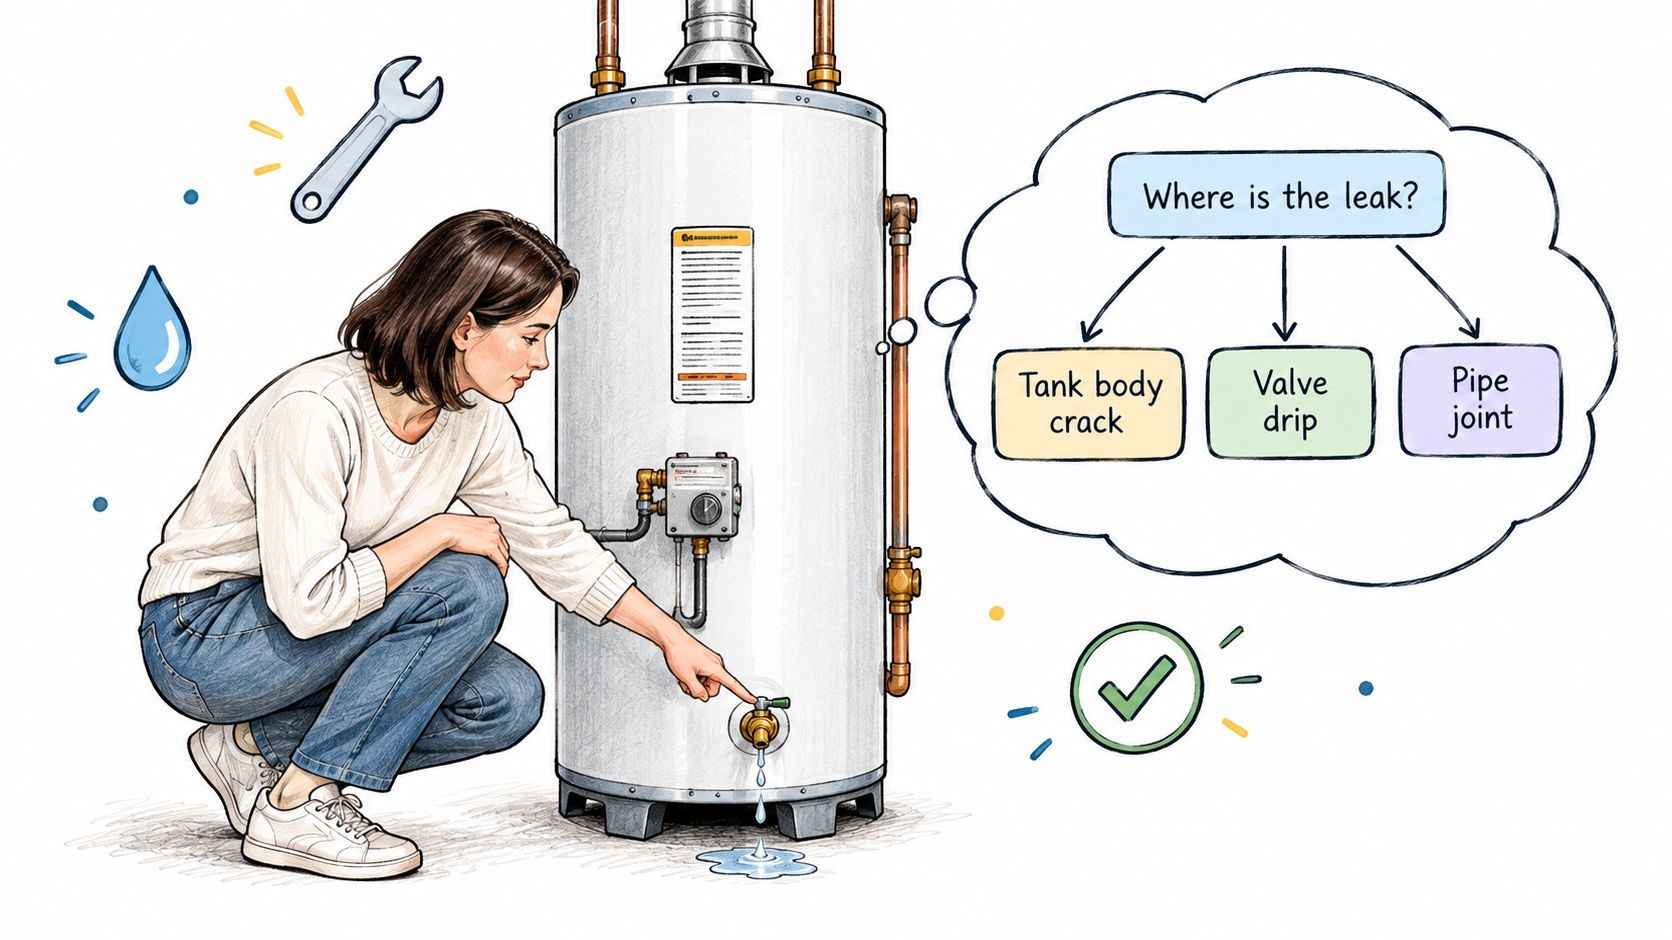
Use the location to set your priority
Water is coming from the tank body, bottom, seam, or corrosion-through area. Treat the tank as failed and keep clear of the unit. A failed tank can hold 40 to 80 gallons, so the shutoff sequence in the next section matters as much as the diagnosis. Call a plumber and prepare for water extraction rather than spending time searching for a fitting to tighten.
Water is coming from a drain valve or supply fitting. The component may be repairable, but the safest response depends on temperature and access. If the water is cool and you can view the connection from a dry position, document its location and contact a plumber. A hidden leak can travel behind walls or below flooring before the puddle shows its full extent, so a water leak detection guide can help after immediate hazards are controlled.
Water is discharging from the T&P pipe. Stay away from the discharge because it may be hot. A qualified plumber must determine whether pressure, overheating, thermal expansion, or a defective relief valve is responsible. The National Board's guidance on water-heater relief valves identifies the relief system as a safety device, not a fitting to handle casually.
Water is near gas controls or electrical components. This condition overrides source identification. If water is spreading toward a panel, wiring, an outlet, or the control compartment, do not reach through it or operate nearby controls. Leave immediately if you smell gas, hear hissing, see an unexpected flame, or hear a carbon-monoxide alarm. Contact the gas utility or emergency services from outside.
Once you know which branch you are in, the shutdown order in the next section tells you what to turn off first.
Shut Off Water and Energy in the Right Order
Once the area is safe to approach, isolate the heater in a controlled sequence. Keep people away from hot water or steam. If the tank is overheating or the T&P valve is discharging, shut off the energy source first, then close the water supply. If you can't reach the controls without stepping into dangerous water or moving past gas odor, stop and call for help.
Start with the energy hazard
For an electric water heater, switch off the dedicated breaker only if the electrical panel and route to it are dry and safe. Don't touch the panel if water is pooled nearby, if wiring is wet, or if you see sparking. Don't reset a tripped breaker. A trip may indicate a fault, and restoring power can create a shock or fire hazard.
For a gas water heater, turn off the gas control only when there's no immediate danger and you can reach it safely. If you smell gas, don't operate switches, use flames, or approach the control. Leave the building, then contact the gas utility or emergency services from outside. FEMA emphasizes that damaged gas connections and dislodged vent pipes can create fire and carbon-monoxide risks, so a gas odor or vent concern is not a do-it-yourself inspection.
For a heat-pump water heater, treat the unit as electrically powered. Turn off its breaker if the panel and path are dry. Heat-pump models can have additional controls and condensate components, so don't open panels or disconnect wiring while water is present.
Close the water supply
After energy is isolated, find the cold-water inlet valve above the heater. Turn the valve clockwise until it stops, without forcing a corroded or damaged handle. If the valve is inaccessible or fails to close, use the property's main water shutoff. This guide to finding a home water shutoff valve can help you locate the main valve before an emergency occurs.
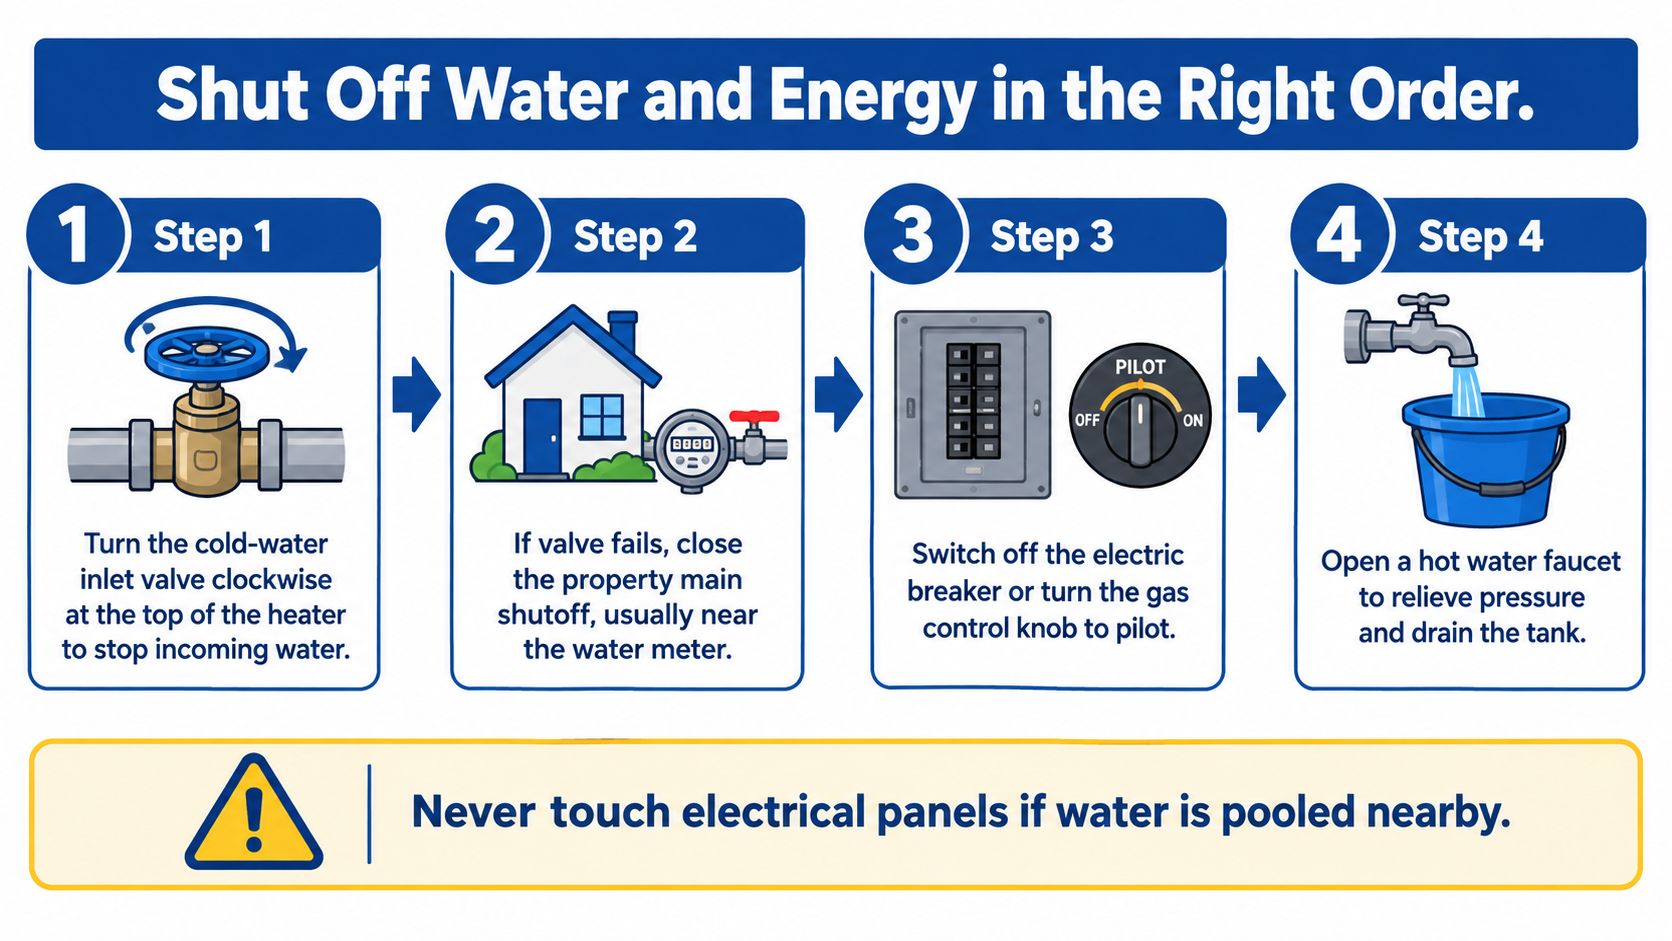
Do not cap or plug the T&P discharge pipe. Do not manually obstruct the relief valve, spray an overheated tank, add cold water to it, or dismantle the valve. Its discharge path must remain open and terminate safely. Opening a hot-water faucet may relieve pressure and help the system drain, but only do this if the water is not dangerously hot and the faucet can be reached without crossing a hazard.
Never energize an electric heater while the tank is empty or partly drained. Confirm that the tank is full before power is restored, or the heating elements can be damaged.
A closed inlet stops new water from feeding the leak, but it doesn't remove the water already inside the tank or the water that has entered the structure. Once the unit is stable, move to extraction and drying.
Limit the Damage Before It Spreads Beyond the Mechanical Room
Stopping the leak is only the first half of the emergency. Water can move beneath flooring, into wall cavities, behind baseboards, and into cabinetry. A dry-looking surface doesn't prove that the subfloor, insulation, drywall, or nearby contents are dry.
Begin with controlled extraction. If the water is cool, the power is safely isolated, and the equipment is rated for wet pickup, use a wet-dry vacuum. Don't use electrical equipment from a wet area or run extension cords through standing water. If electrical safety is uncertain, leave extraction to a professional.
Protect the surrounding structure
Move boxes, stored items, rugs, and furniture away from the wet area. Lift or remove items that can wick water into flooring. Use towels for small surface amounts, but don't rely on mopping when water has reached seams, wall edges, or cabinetry.
Check adjacent materials without opening walls recklessly:
- Flooring: Look for swelling, cupping, soft spots, separated seams, and dampness at the wall edge.
- Drywall and baseboards: Check for discoloration, soft sections, bubbling paint, or moisture at the bottom edge.
- Cabinetry and insulation: Remove wet contents and inspect the backs, toe kicks, and cavities that may hold water.
- Nearby rooms: Follow the water path beyond the mechanical room, especially below the heater or along shared walls.
If you have a moisture meter and know how to use it, record readings at affected and nearby dry areas. Don't cut into walls or floors near wiring, gas lines, or structural components without professional direction.
Dry the hidden moisture
Use safe airflow and dehumidification after standing water is removed. Position air movement so it supports drying rather than spreading contaminated water or blowing debris through the home. Keep monitoring the affected materials instead of assuming that a running fan has solved the problem.
Don't run the heater, and don't restore HVAC equipment if water has entered ductwork or electrical components. A restoration professional may need to extract water from below flooring, open targeted access areas, dehumidify enclosed spaces, and verify that structural materials have reached appropriate dry conditions.
The objective isn't merely to make the puddle disappear. It's to prevent a small mechanical-room loss from becoming damaged flooring, swollen drywall, affected cabinetry, persistent odor, or microbial growth in concealed spaces.
Repair the Unit or Replace It and Why the Answer Usually Depends on Age
The repair-versus-replace decision starts with where the water comes from, then considers the heater's age and condition. A leaking fitting can be a component repair. A tank shell that has corroded through is a replacement problem, no matter how slowly it drips.
Chubb's North American loss-prevention data reports that 75% of water heaters fail before age 12, and that the average failed unit is 10.7 years old. The same source reports that water damage and freezing represent 19.5% of homeowners' insurance incurred losses. These figures support a practical rule: an older tank with body corrosion or a persistent leak deserves urgent attention, even when the initial flow seems minor. See Chubb's water-damage prevention guidance for the underlying loss-prevention data.
Repair vs Replace at a Glance
| Leak Source | Likely Cause | Usual Action |
|---|---|---|
| Supply hose or inlet/outlet fitting | Failed connection, washer, or fitting | Isolate the water and energy safely, then have a plumber repair the connection |
| Drain valve | Worn valve or damaged seal | Replace the valve if the tank body remains sound |
| T&P discharge pipe | Excess pressure, thermal expansion, overheating, or defective valve | Keep the discharge unobstructed and have a qualified plumber diagnose the cause |
| Tank seam, base, or body | Internal corrosion or tank-shell failure | Replace the water heater rather than patching the tank |
| Corrosion around the bottom | Structural deterioration that may be close to breakthrough | Treat as time-critical and arrange inspection or replacement |
A T&P discharge deserves its own diagnosis. The valve may be responding to unsafe pressure or temperature, or the valve itself may have failed. Replacing it without investigating the cause can leave the underlying hazard in place.
If the heater is electric, don't restore power after draining or replacing a connection until the tank is confirmed full. Running the elements dry can damage them. For any model, record the diagnosis rather than inferring the answer from the puddle alone.
Document Everything Before Cleanup Wipes the Evidence Away
Take photographs before moving damaged materials, unless doing so would delay emergency stabilization. Insurance decisions commonly depend on whether damage was sudden and accidental, whether the owner reported it promptly, and whether reasonable steps were taken to limit further loss. Good documentation shows what happened before cleanup changed the scene.
Start with wide photographs of the entire mechanical room and adjacent areas. Then take close-ups of the leak source, tank body, corrosion, valves, shutoff positions, wet flooring, damaged drywall, cabinetry, insulation, and affected belongings. Photograph the model and serial labels so the heater's identity and installation information are preserved.
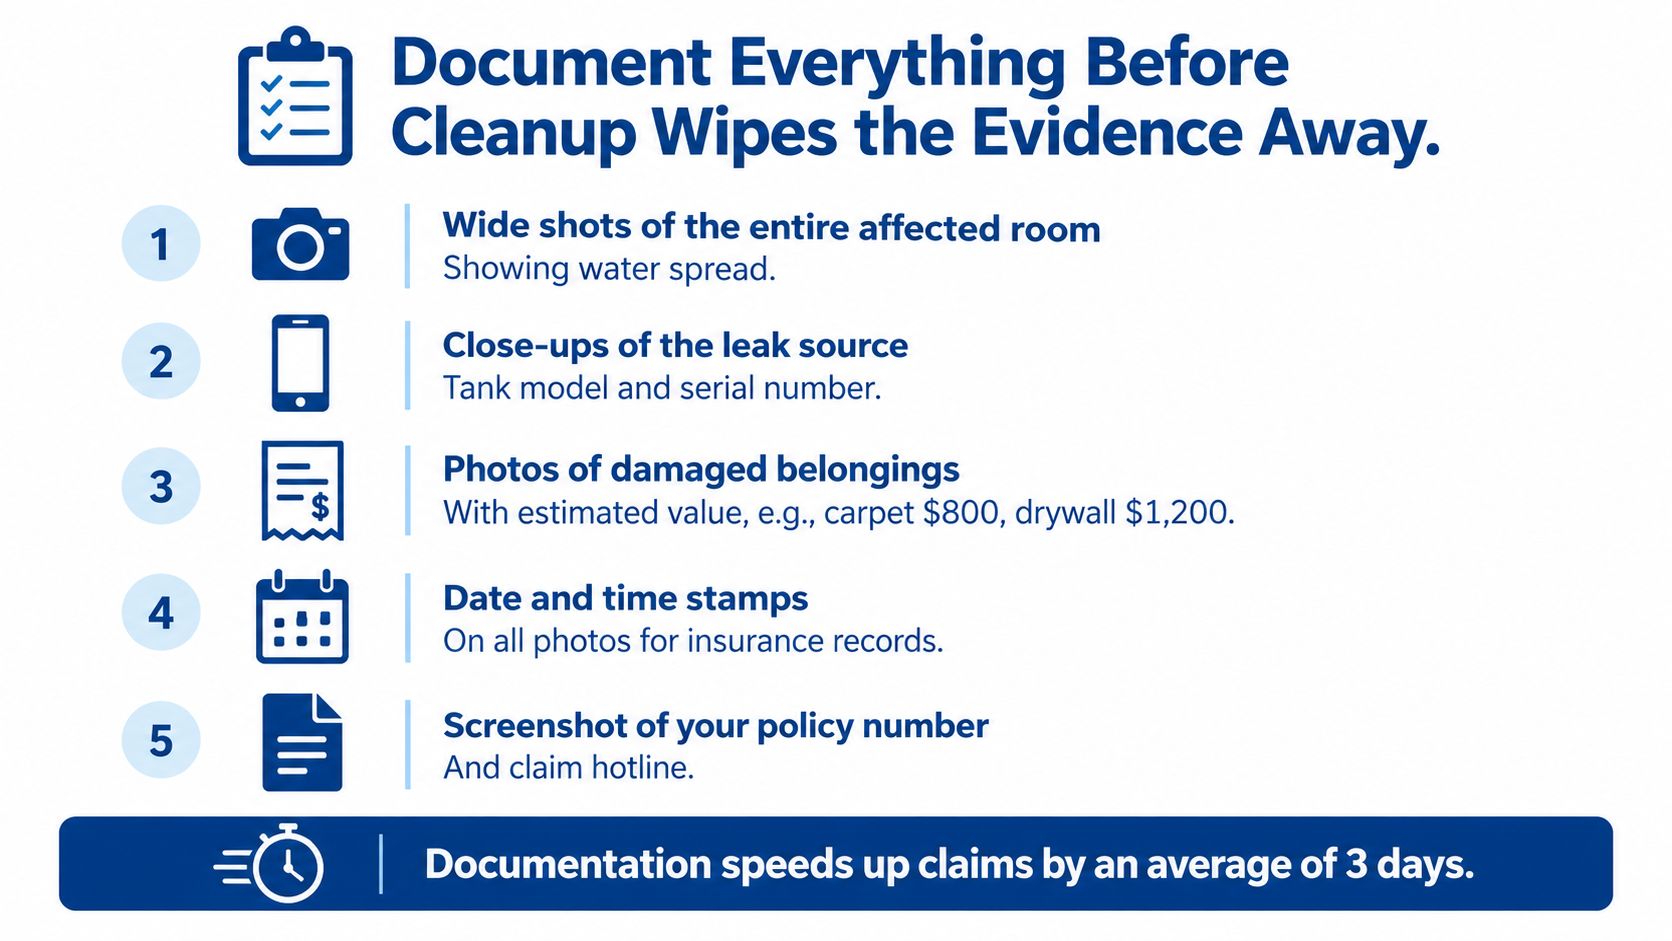
Build a usable loss record
- Record the timeline: Write down when you discovered the leak, what you saw, when you shut off water or energy, when you notified the insurer, and when contractors arrived.
- Save the diagnosis: Ask the plumber to document the leak location, failed component, tank condition, and recommended repair or replacement.
- Keep physical evidence: Retain failed parts when practical, along with receipts for emergency plumbing, extraction, drying, materials, and temporary protection.
- Track drying work: Keep moisture readings, equipment records, inspection notes, photographs, and invoices. Progress documentation for water losses helps organize this record.
- Notify the right parties: Contact your insurer promptly, and notify a landlord, property manager, tenant, or buyer when responsibility or habitability may be affected.
Don't delay emergency work to create a perfect file. Stabilize the hazard first, photograph from a safe position, then preserve the evidence while mitigation continues. For landlords and property managers, this record can clarify who discovered the leak, who authorized work, which materials were affected, and whether the property was safe to occupy.
When to Call RestoTek TX or a Plumber and What Happens Next
Call a plumber when the tank itself leaks, the source remains unclear, a valve won't isolate the flow, the T&P system discharges, or the unit has gas or electrical concerns. Call a restoration professional when water has reached flooring, drywall, cabinetry, insulation, contents, or hidden cavities. You shouldn't have to choose between stopping the plumbing failure and protecting the building.
Use professional help immediately when the leak is substantial, water is near electrical or gas systems, the flow continues after shutoff, or you suspect concealed moisture or microbial growth. If you're unsure whether the area is safe to enter, stay out. A qualified team can coordinate the plumbing diagnosis with extraction and drying instead of treating the puddle as an isolated appliance problem.
A typical response includes:
- Inspection and assessment: The team identifies the source, maps visible and hidden moisture, and checks safety conditions.
- Water extraction: Standing water is removed from floors and affected contents with appropriate equipment.
- Mitigation and stabilization: The area is protected from additional damage while the failed plumbing component is repaired or replaced.
- Structural drying: Air movement and dehumidification address moisture in flooring, walls, cabinetry, and cavities.
- Microbial prevention: Affected materials and odors are evaluated, with mold testing or inspection where warranted.
- Material testing and rebuild: Asbestos testing may be needed before disturbing certain building materials, followed by reconstruction of damaged structures, finishes, and fixtures.
RestoTek TX provides 24/7 water-damage response, inspection, extraction, structural drying, microbial prevention, and reconstruction for Georgetown, Austin, and surrounding Central Texas communities. The family-operated company, led by Joan and Josh Garza, also coordinates plumbing-related work and offers no-cost estimates. The right next step is to stabilize the heater, preserve your evidence, and make the call before hidden moisture spreads.
RestoTek TX can coordinate water-heater leak response, extraction, structural drying, microbial prevention, and reconstruction for homes and properties in Georgetown, Austin, and nearby Central Texas communities. Visit RestoTek TX to request help and a no-cost estimate.