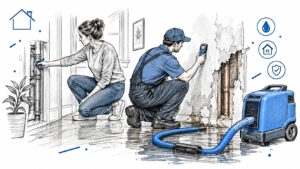
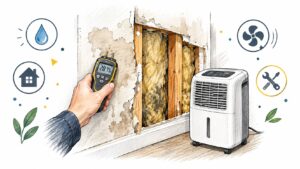
You're on a job, the wall cavity looks dry enough at first glance, and the meter gives you a number that seems to settle the argument. Then the next pass says something different, the baseboard decision gets shaky, and now everyone is asking whether the meter is bad, the wall is still wet, or the test was wrong from the start. That's the reality of moisture meter calibration on real water-loss work in Georgetown and Austin, where one reading can affect drying calls, demolition scope, and how a claim gets documented.
Calibration isn't a one-time setup chore. It's an ongoing field discipline that starts before the meter ever touches the material and continues through verification, repeat checks, and clean records. On restoration jobs, the important question isn't just whether the meter was calibrated sometime in the past. It's whether the meter was verified on that day, on that surface, under those conditions, with a method you could defend later.
Why Moisture Meter Calibration Matters on Real Water-Loss Jobs
A wall in a Central Texas house can look stable while the cavity behind it is still carrying moisture from a supply-line leak. If a technician trusts a drifting meter, the call can go the wrong way fast, either by pulling trim too early or by leaving wet material in place long enough to keep feeding the damage. In the field, a small offset isn't a minor nuisance, it can change whether you dry, demo, document, or sign off.
Official programs treat that kind of accuracy as a narrow target, not a vague preference. The USDA's moisture meter directive says the average difference between a meter model and the USDA air-oven method must not exceed ±0.15 percentage points of moisture, and the FAO's calibration guidance allows no more than 0.15 g/100 g for products that do not require preconditioning and 0.20 g/100 g for those that do (USDA Directive 9180.61). That's a strong reminder that calibration is tied to reference methods, not guesswork.
What that means on a water-loss site
A meter reading only has value when it's linked to the last credible verification on that specific instrument. That verification protects the property owner from unnecessary demolition, protects the technician from a weak dry-standard call, and gives the adjuster something more than a raw number to trust. In practice, the whole job depends on whether the instrument is behaving like the reference tool it claims to be.
Practical rule: if a reading is going to influence dry-down termination, baseboard removal, or reconstruction scope, treat the meter like evidence, not a convenience tool.
The standards above also explain why calibration records matter so much in major markets. They aren't optional maintenance logs. They're part of the chain that shows the number came from a meter that was checked against something known, not just powered on and hoped for the best.
Pin Meters Versus Pinless Meters and How Verification Differs
Pin and pinless meters both belong in restoration work, but they fail in different ways, so they need different verification habits. A pin meter is about contact through the material, while a pinless meter is about contact with the surface and what lies under it. That means the same technician can get excellent results with one tool and misleading results with the other if the verification method doesn't match the physics.
Pin meters are sensitive to electrode condition and penetration depth. Bent or corroded pins won't bite into the material the same way, and shallow insertion can give you a reading that looks clean but doesn't represent the interior of the material. They're also more material-dependent, because wood grain, drywall paper, and subfloor composition don't all respond the same way.
Pinless meters need flat, solid, full-pad contact. If the sensor isn't seated well, or if paint texture, trapped air, or an uneven surface interrupts the scan, the dielectric response changes and the number drifts. That's why pinless units are fast on finished surfaces, but they're also the ones most likely to mislead you when the substrate is irregular or layered.
| Aspect | Pin Meter | Pinless Meter |
|---|---|---|
| Verification method | Check against a reference standard with solid pin contact | Check against a matched calibration block or flat reference surface |
| Common failure mode | Bent, corroded, or poorly seated pins | Poor pad contact, air gaps, texture, or substrate interference |
| Best substrate check | Dry-reference material, then in-range material | Flat reference block, then a known consistent surface |
| What it's best at | Targeted confirmation at a point | Fast screening over broader areas |
For slab-related comparisons, it helps to keep the substrate question front and center, especially when you're moving between finished flooring and concrete assemblies, like the guidance in RestoTek TX's concrete slab moisture resource. A pinless meter that's working perfectly can still be the wrong tool for a layered assembly if the underlying material is affecting the scan.
A Defensible Verification Workflow You Can Run on Every Job
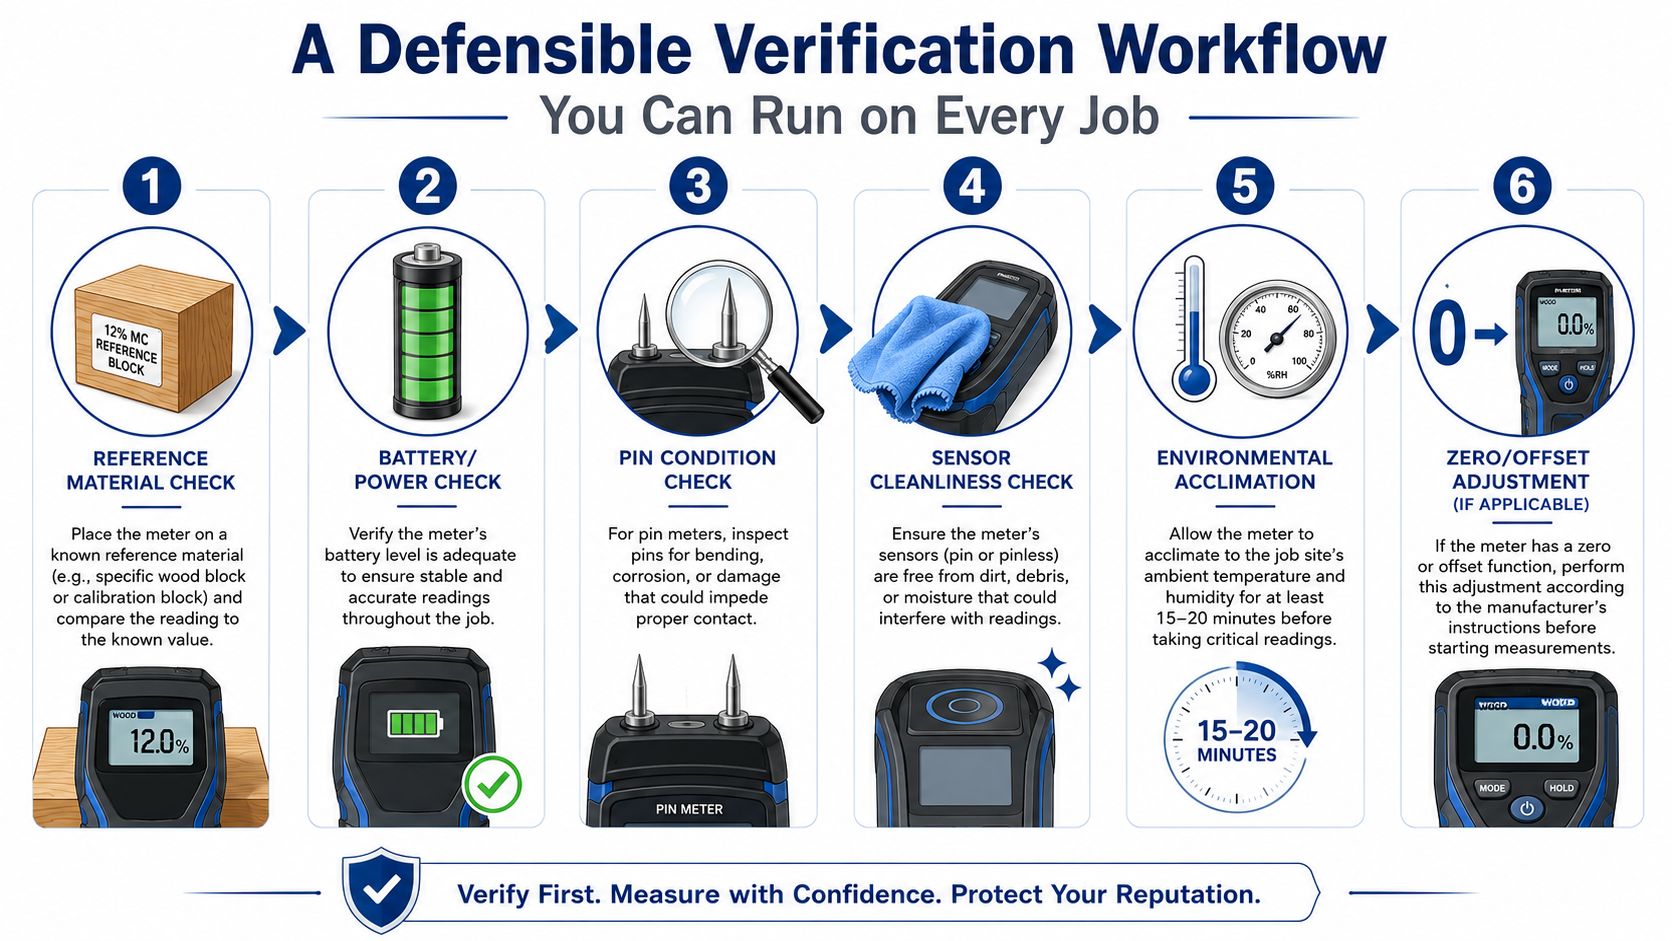
Start with a known reference, not the wall in front of you. Put the meter on a manufacturer-matched reference standard or calibration block and compare the display to the stated value. That first check tells you whether the instrument is close enough to trust before it ever touches a customer's property.
From there, move to an in-range check. Delmhorst's verification guidance is practical because it shows pin-meter checking on the metal contacts of a moisture-content standard, then comparing the reading to the standard's value, while pinless meters need solid sensor-block contact and repeat checks across locations to confirm consistency (Delmhorst moisture meter calibration guidance). That step gets skipped when someone trusts one clean number too fast. One pass only shows a snapshot, not whether the meter stays steady across the range you will use on the job.
What a real check looks like in the field
A sound verification sequence stays simple, but it has to be done the same way every time:
- Dry-reference check. Confirm the meter responds correctly on a known dry baseline before you trust any other reading.
- In-range check. Test against a standard that sits closer to the values you expect on the job.
- Repeat reading. Take a second reading at a different point or orientation to see whether the result holds.
- Second location check. Reconfirm on a separate spot or reference area so you are not fooled by a local contact problem.
A single pass is a screening result, not a serviceable calibration record.
The geometry still matters. Pin meters need proper contact with the standard, and pinless meters need the sensor pad seated flat and fully on the block. Wagner's calibration guidance makes the same point from the other direction, since poor seating in the recessed area can throw off accuracy before the cycle even finishes, which is why the beep-and-done confirmation matters in its procedure (Wagner moisture meter calibration guidance). If you are deciding whether to pull baseboard or mark a wall for demolition, that difference is not academic.
Calibration is not a one-time setup. It is part of job control, and it only helps if you keep the meter verified, document the checks, and separate true instrument error from a bad surface, a layered assembly, or a reading issue caused by the material itself. For more details see our moisture meter reading guide.
A sound verification flow protects the decision later in the day. It gives you a meter you can trust before you ask it to tell you whether a cavity is still wet, a floor is ready, or a drying standard has been met.
Pre-Check Conditions That Decide Your Reading Before Calibration Even Starts
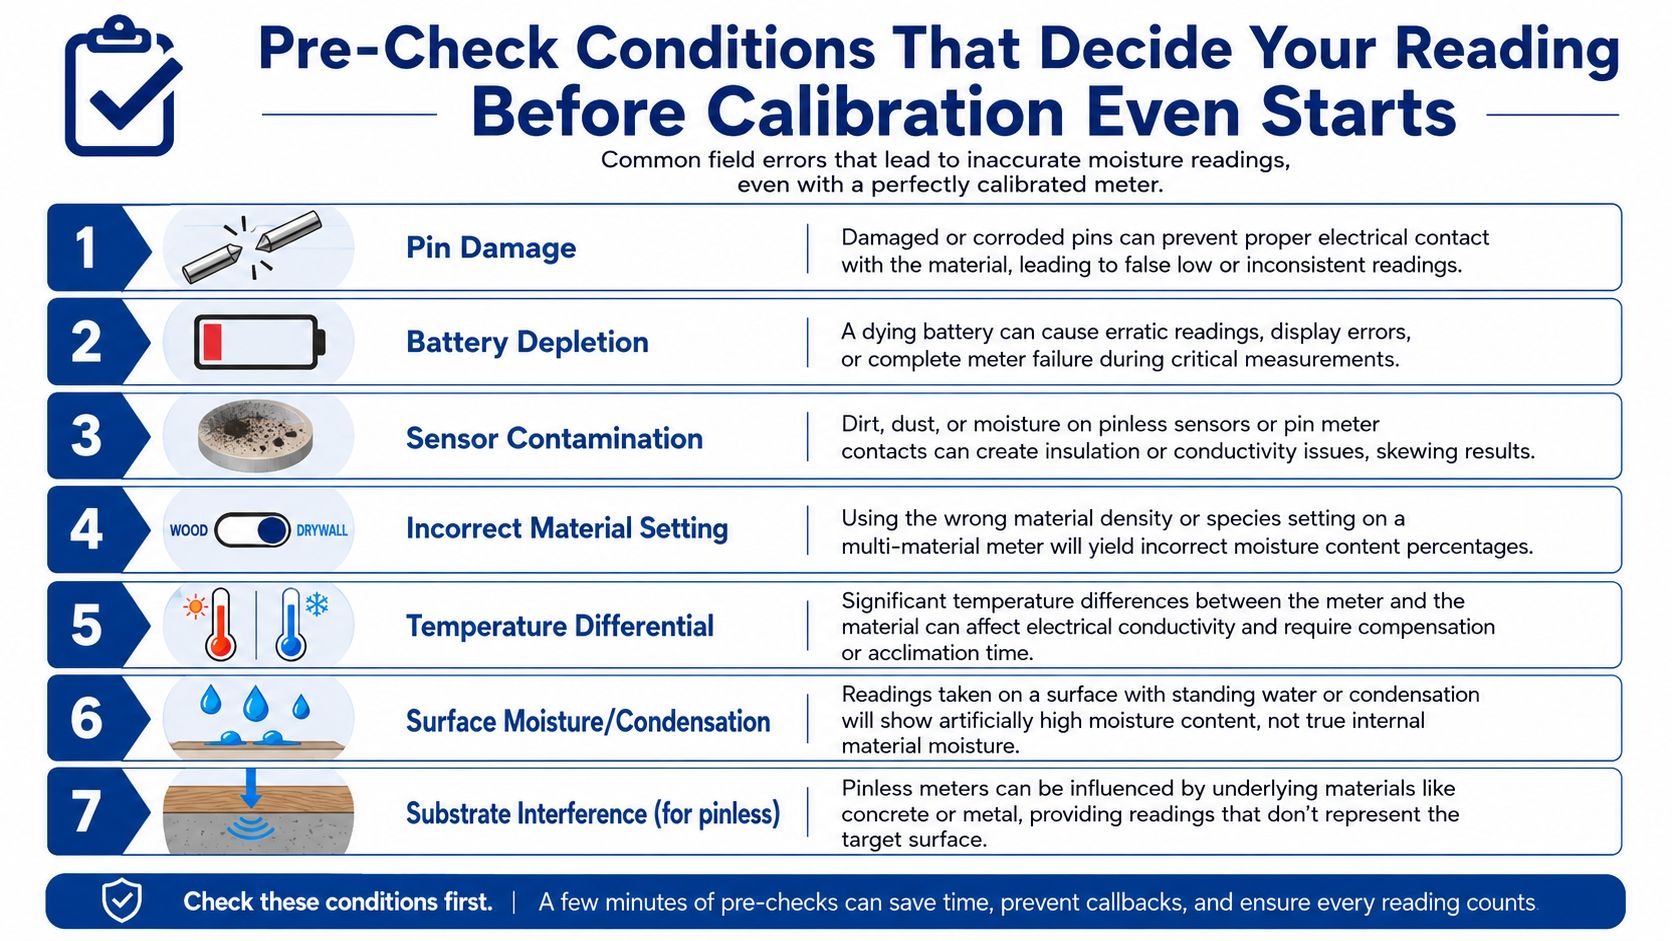
A lot of bad readings get blamed on calibration when the actual problem is the meter's condition, the room's condition, or both. Bent or corroded pins, dirty electrodes, low battery voltage, and unstable temperature or humidity can all shift the result before you've even started a formal check. One technical source notes that misaligned probes can introduce errors up to 5% moisture content, which is large enough to mislead a drying decision on a job where the margins are already tight (SKZ tester moisture meter calibration and maintenance tips).
The field checks that actually prevent drift
Clean the electrodes with isopropyl alcohol if they're dirty, and inspect the pins for bending or corrosion before you trust the next reading. Low battery voltage matters more than people think, because unstable power can make the display wander or sag under load. On pinless meters, the sensor face has to stay clean and undamaged, or the contact response changes in ways that look like calibration failure but aren't.
Environmental conditioning is part of the same picture. Guidance from the same technical source recommends a stable environment around 20–25°C and 40–60% RH to reduce thermal drift (SKZ tester moisture meter calibration and maintenance tips). If you've ever watched a meter behave differently on a cold slab, in a humid garage, or on a wall that's still warmer than the room, you already know why this matters.
Rule from the field: clean the hardware, confirm the battery, stabilize the environment, then decide whether the meter needs verification.
The FAO's check procedure adds another important habit, since it requires four successive measurements from four test portions of the same sample, which reinforces that repeatability matters as much as the first number (USDA Directive 9180.61). That's why I don't treat a persistent offset as normal variance. If the meter still sits off after cleaning, battery replacement, and re-checking, I remove it from service and stop pretending the next reading will be different.
How Often to Verify Your Meter Based on Real Job Risk
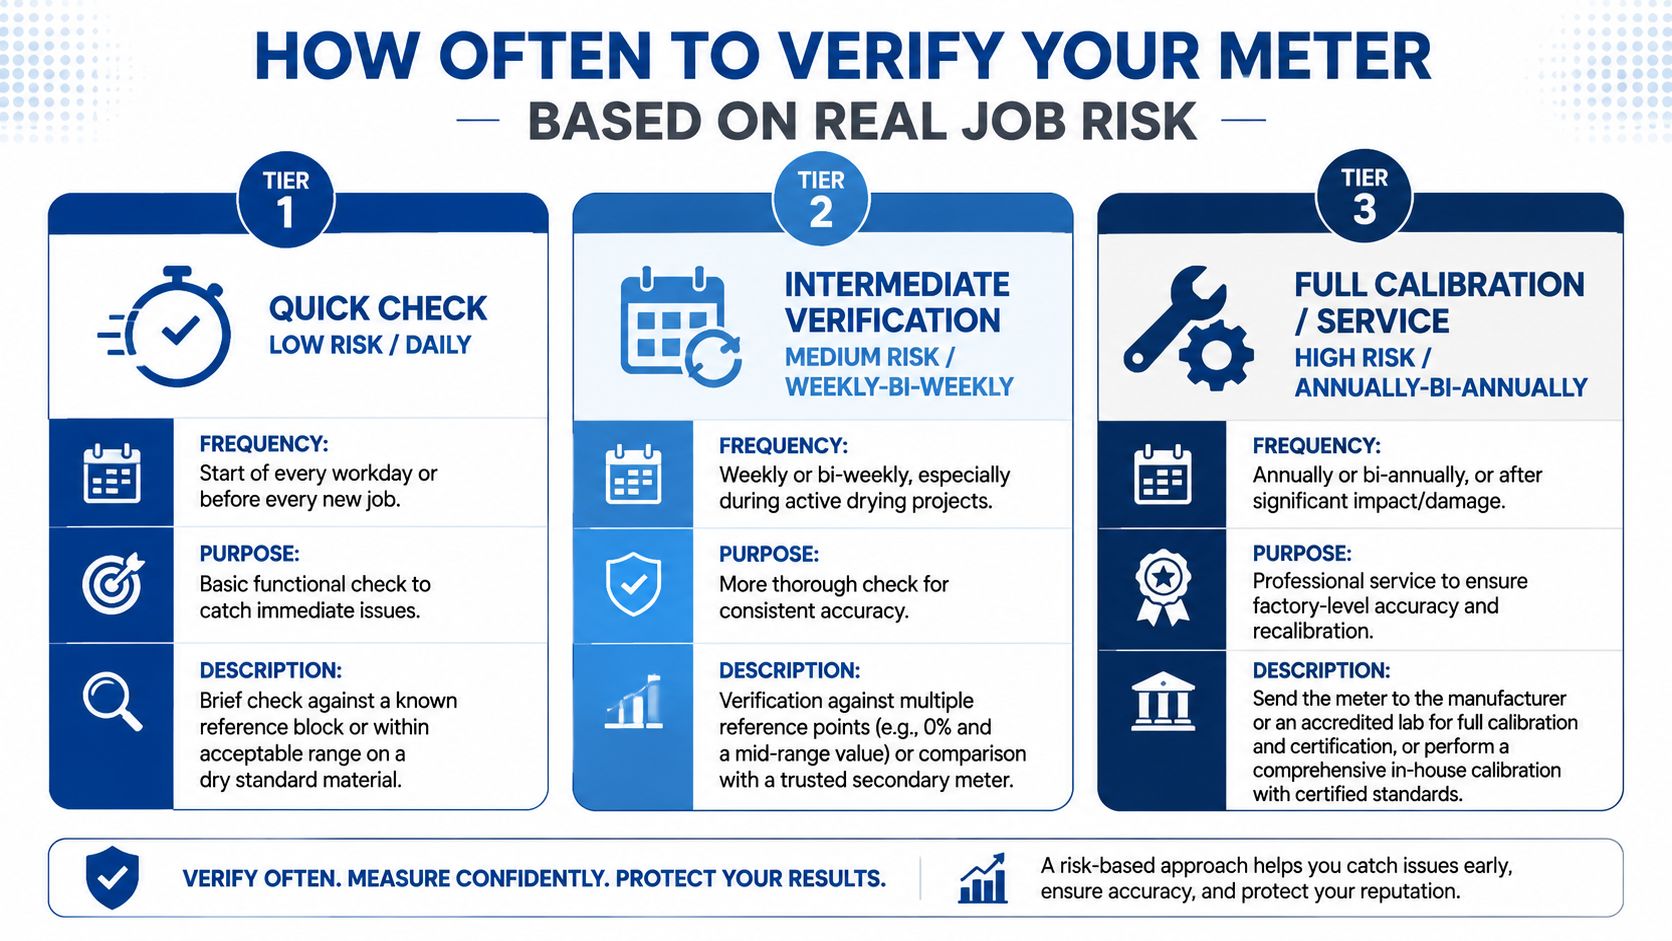
Most guidance says to verify the meter regularly, but that's too vague for field work. A restoration tech making drying calls needs a different schedule than a property manager doing routine checks, and a homeowner with an occasional leak doesn't need the same cadence as a crew that uses the meter all day. The right schedule depends on what the reading will decide.
A practical risk-based schedule
- Daily or before each job. If the meter will influence active mitigation, dry-down termination, or demolition scope, check it at the start of the day. That's the safest habit when the number will shape a live decision.
- Weekly to monthly. If the meter is used for routine inspections, property oversight, or periodic leak checks, a deliberate verification window makes more sense. You still want enough discipline to catch drift before it becomes a quiet habit.
- Annually or after a shock event. Factory recalibration or service is the right move after a drop, pin change, battery event, or any exposure that could have altered the meter's behavior. Public guidance is not perfectly consistent on frequency, but it does consistently point to re-checking after those events (Moisture handbook guidance.pdf)).
The trade-off is simple. Daily users protect against bad dry calls. Weekly users protect against missed leaks. Annual service protects the logbook from slow drift that no one notices until a claim gets disputed.
If the reading will go into an insurance file, verify more often than your comfort level suggests.
A lot of articles stop at calibration intervals, but operational risk is the part that really matters. The defensible schedule is the one that matches the consequence of being wrong. When the meter will guide remediation, sign-off, or reimbursement, the frequency should be closer to a work habit than a calendar reminder.
When the Meter Is Fine but the Reading Is Still Wrong
A surprising reading doesn't automatically mean the meter is broken. On real jobs, the more common problem is that the material or test condition doesn't match what the meter expects. That's especially true on layered assemblies, mixed-density materials, and surfaces where the moisture isn't evenly distributed.
Temperature and material density can move the number even when calibration is solid. If a sample hasn't acclimated, or if the meter is set to the wrong species or material mode, the reading can look wrong while the instrument is behaving normally. Mixed assemblies, like flooring over concrete, can also confuse the result because the meter may be sensing more than the surface layer you intended to test.
How to tell a context problem from a calibration problem
Start with the substrate. If the reading changes when you move to a more representative area, or if it stabilizes after the sample has had time to equilibrate, the meter probably wasn't the issue. If the meter behaves inconsistently across the same wall, check the mode setting, the material thickness, and whether the surface is giving you surface moisture instead of core moisture.
The corrective move is often simple. Let the material acclimate, switch to the correct mode, or shift the scan to a cleaner, flatter, more representative spot. That's usually a better first response than reaching for recalibration, especially when the material itself is capable of confusing the display.
Thermal imaging can help you choose the right area to test before you start blaming the meter, which is why crews often pair it with moisture readings during leak detection work. A good overview of that workflow is in RestoTek TX's thermal imaging leak detection resource.
Decision rule: if the meter is clean, powered, verified, and still inconsistent, suspect the substrate or conditions before you suspect the calibration.
That mindset saves time on site. It also keeps technicians from recalibrating a meter to “fix” a wall that was never going to read cleanly in the first place.
Documenting Calibration for Insurance Claims and Reconstruction Sign-Off
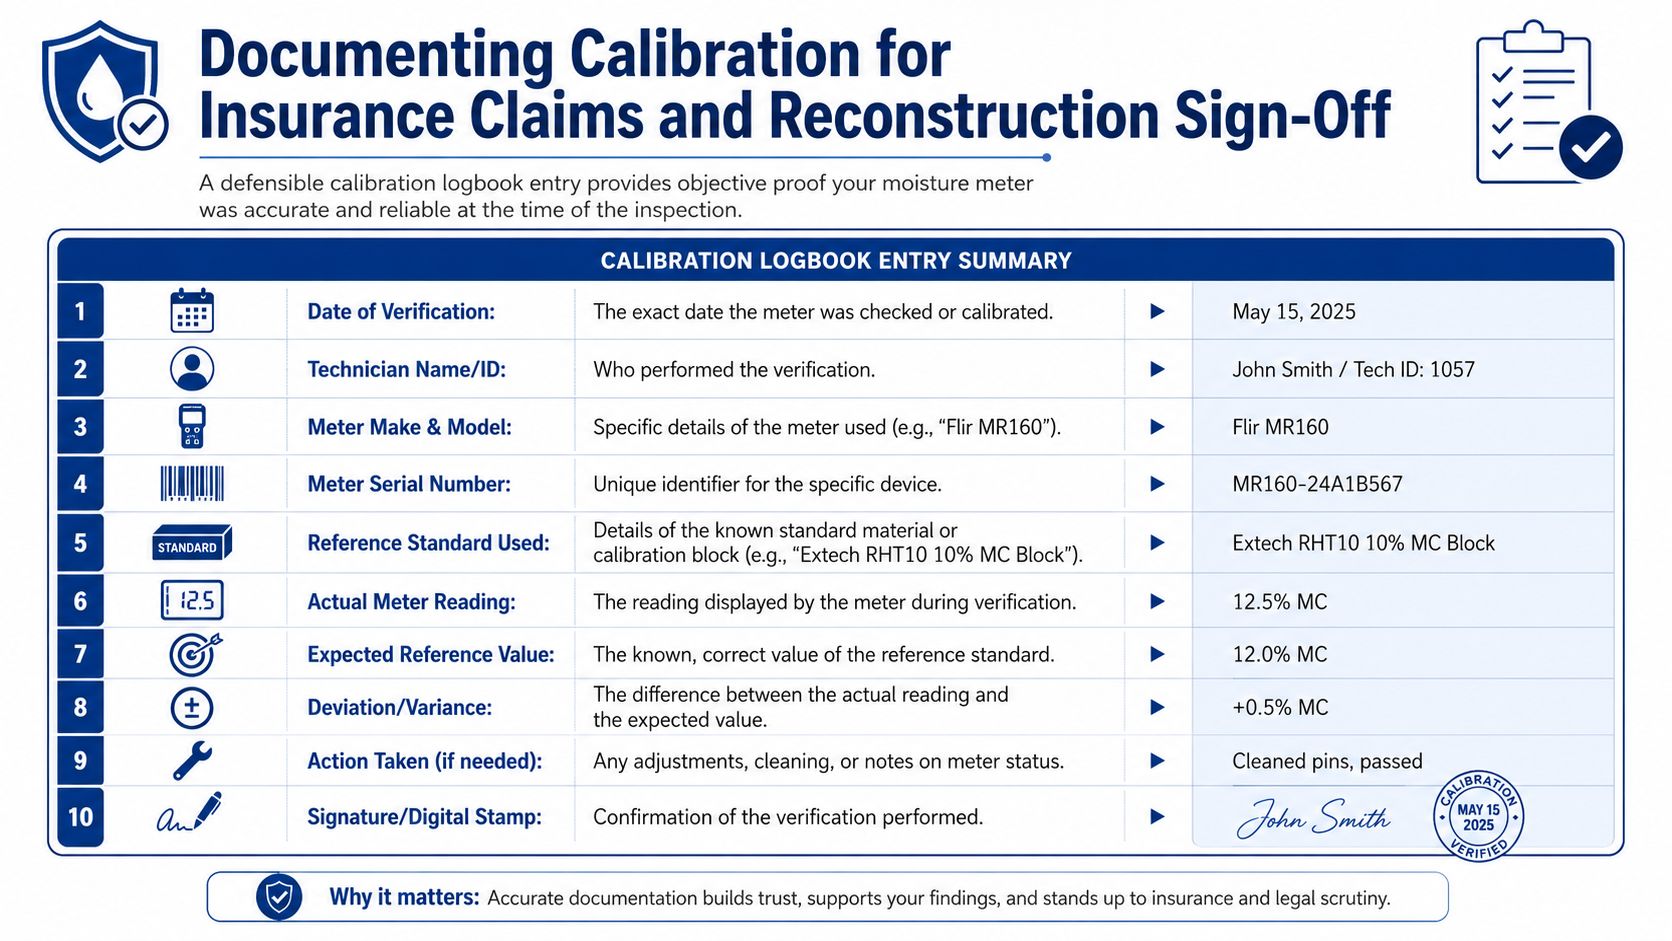
A good logbook entry turns a number into evidence. On a Georgetown or Austin water-loss file, that matters when the dry-termination date gets challenged, when reconstruction costs are questioned, or when someone asks whether the reading was reliable enough to support the scope. If the calibration record is missing or sloppy, the best reading in the world gets treated like an opinion.
A defensible entry is simple. Record the meter make and model, the serial number, the reference standard used, the expected value, the reading obtained, the variance, the ambient conditions, the date, and the technician's initials or digital stamp. Keep it on one page, not buried in a narrative note that nobody can compare later.
The strongest logs are the ones that show the meter was checked before the decision was made. If the claim involves a drying-termination dispute, the adjuster wants to know whether the meter had been verified that day. If reconstruction sign-off is on the table, the record needs to show the reading came from a known standard, not a loose field assumption.
A clean logbook doesn't prove perfection, but it does prove the technician followed a process.
That's what claims handlers and reconstruction leads need. Not theater, not filler, just a traceable record that connects the instrument to the decision. If you want a defensible moisture measurement process in the field, start with the habit of documenting it like it might be reviewed line by line later.
RestoTek TX handles water damage inspection, mitigation, drying, leak detection, and reconstruction for Georgetown and Austin properties, and that end-to-end workflow is exactly where careful moisture meter verification pays off. If you want a team that understands how meter readings, drying decisions, and claim documentation fit together in real Central Texas losses, visit RestoTek TX and see how they approach water-damage work from first inspection through final rebuild.