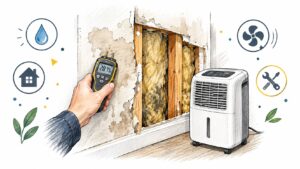
Two weeks after a flash flood, a Georgetown homeowner notices a musty smell near the baseboards. The drywall looks intact, the floor feels dry, and a store-bought swab kit promises quick answers. But the core question isn't just whether mold spores are present. It's where moisture entered, which materials stayed wet, whether growth is hidden, and what evidence will support the repair and insurance process.
A professional mold inspection answers those questions through a structured building investigation. The inspector combines visual observations, moisture readings, building-material assessment, and targeted tools. Laboratory sampling may help in selected situations, but it shouldn't replace the investigation that explains the problem.
What a Professional Mold Inspection Actually Is
A professional mold inspection examines the property as a system. The inspector looks for visible growth, musty odors, water staining, high moisture, damaged materials, ventilation problems, and pathways that could carry moisture or airborne contaminants into other areas. The work may be appropriate after a flood, plumbing failure, roof leak, HVAC issue, recurring condensation, or unexplained odor.
That makes the inspection very different from a DIY swab kit or a one-page air-test result. A kit can produce information about the sample collected, but it usually won't explain whether a wall cavity is wet, whether a crawlspace contributed to the odor, or whether the HVAC system connects an affected room to the rest of the home. The value of a professional is the connection between observations, measurements, likely sources, and next actions.
When hiring an inspector makes sense
A professional assessment is especially useful when:
- The odor persists: A musty smell remains after visible water has been removed or cleaned.
- The loss involved hidden spaces: Water reached walls, flooring systems, cabinets, crawlspaces, insulation, or ceiling assemblies.
- The property needs documentation: Owners, contractors, property managers, and adjusters need a written record of conditions.
- The source isn't obvious: Staining or dampness could come from a slab leak, roof intrusion, plumbing failure, condensation, or drainage problem.
- Occupants have concerns: A structured investigation can identify building conditions without relying on fear-based assumptions.
A useful report should identify the inspection scope, document affected areas with photographs, record moisture conditions, describe suspected sources, and recommend appropriate next steps. It may include laboratory results, but the report should remain useful even when sampling isn't necessary.
Practical rule: A lab result can describe a sample. A professional inspection should explain the building.
Why Inspection Is a Moisture Problem, Not Just a Mold Problem
Mold needs moisture, so the first diagnostic question is usually where water or sustained humidity came from. The U.S. Environmental Protection Agency says that when visible mold is present, sampling is usually unnecessary, and the EPA's guidance on mold testing and sampling explains why visual assessment often provides the information needed to guide action. The CDC and NIOSH also state that thorough visual inspections and detecting musty odors are more reliable for finding mold problems than routine air sampling.
There isn't a federal mold-spore limit that tells an inspector a home passes or fails. The EPA's guidance makes clear that federal numerical limits don't exist, so inspection findings help determine remediation scope rather than prove compliance against a national threshold. That's why a serious inspection focuses on wet materials, hidden cavities, HVAC components, and evidence of past water intrusion.
What the inspector is trying to discover
The investigation typically asks:
- What got wet: Drywall, framing, flooring, insulation, cabinetry, contents, or HVAC components may require different decisions.
- How long moisture remained: A recent overflow presents a different assessment problem than recurring condensation or an old leak.
- Where moisture traveled: Water can move through wall cavities, under flooring, along framing, and into adjacent rooms.
- Whether growth is hidden: The EPA identifies spaces such as behind walls, crawlspaces, pipe chases, utility tunnels, and above ceiling tiles as possible locations for hidden mold.
- Whether inspection could disturb contamination: The EPA cautions that disturbing moldy areas can spread spores, so targeted investigation is safer than unnecessary opening or aggressive probing.
The InterNACHI/IAC2 Mold Inspection Standards of Practice distinguish between a complete mold inspection and a limited mold inspection. A complete inspection considers the whole property, while a limited inspection focuses on a defined concern, such as one room after a small plumbing overflow. The correct scope depends on the loss history and the questions the property owner needs answered.
For prevention steps after a water loss, homeowners can also review this guide to preventing mold after water damage. The central principle remains simple: find and correct the moisture source before treating the visible symptom.
How an Inspection Actually Unfolds On Site
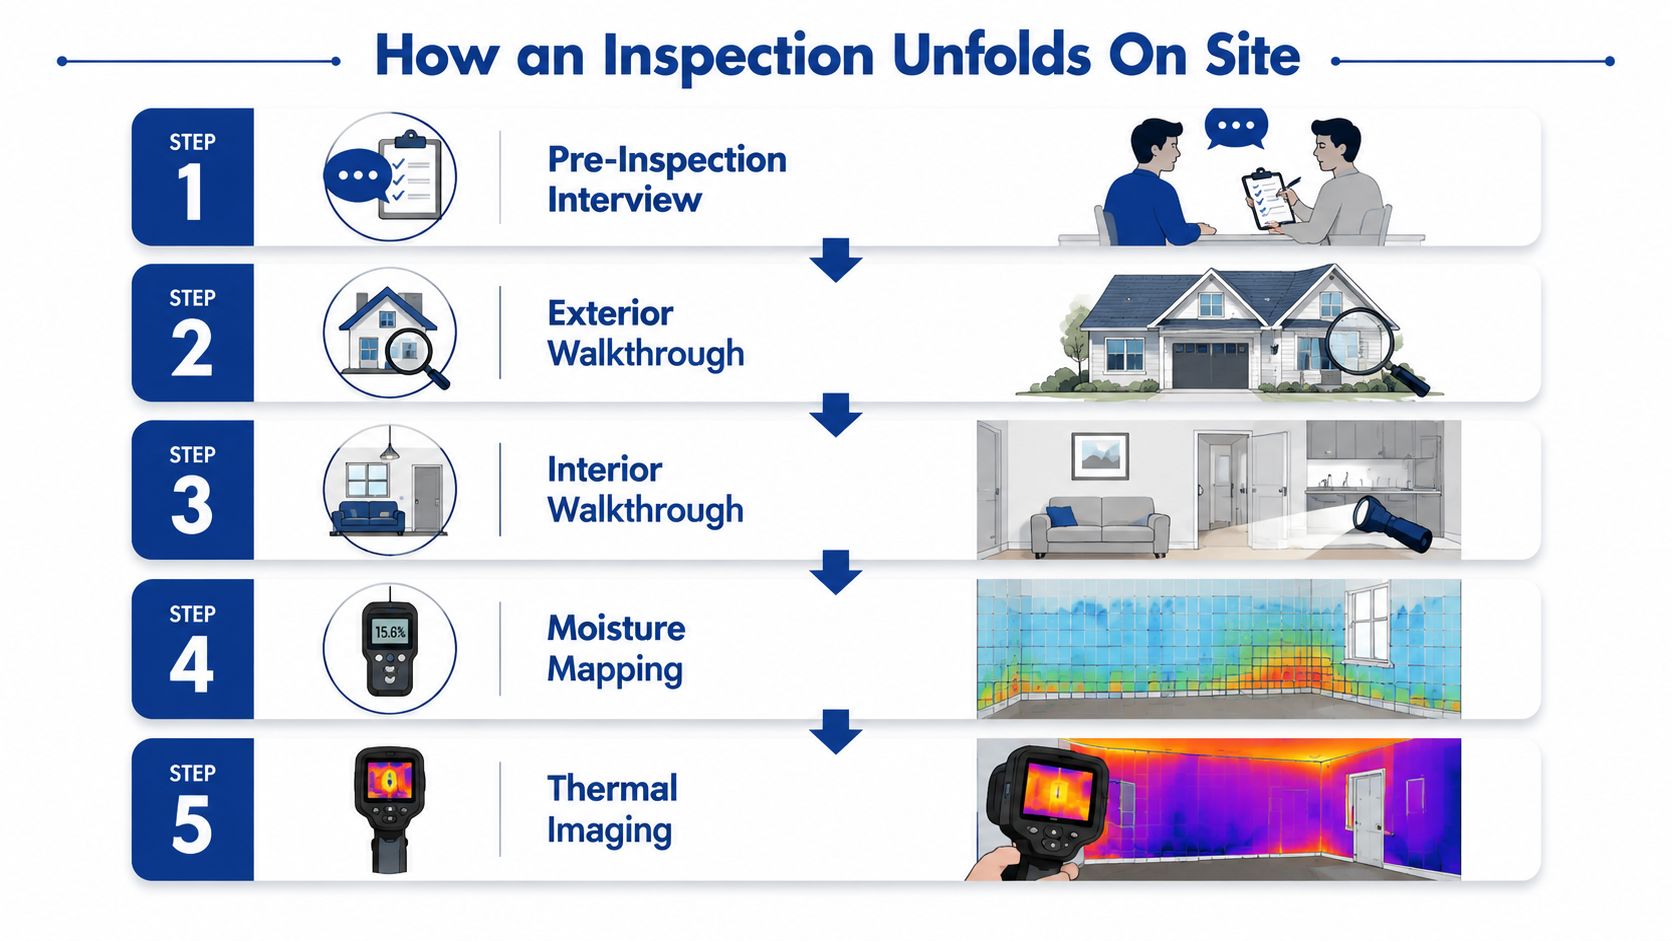
A qualified technician usually begins before opening a toolbox. The pre-inspection interview establishes the timeline, affected rooms, previous repairs, odors, visible staining, occupants' observations, and any work already performed. Photos, invoices, plumbing records, and insurance claim notes can help the inspector distinguish a current loss from older conditions.
The walkthrough then moves from outside to inside. Exterior observations may include roof penetrations, flashing, gutters, grading, drainage, siding, windows, and areas where stormwater could reach the structure. Indoors, the inspector follows the evidence rather than walking randomly, checking rooms near the reported source and adjacent areas that may share walls, floors, ceilings, or HVAC pathways.
Instruments answer different questions
A moisture meter can help identify wet drywall, wood, or other materials that don't feel damp at the surface. Pin meters use small probes, while pinless meters scan without making the same type of contact. A hygrometer helps evaluate temperature and relative humidity, which can explain condensation or slow drying.
Thermal imaging doesn't directly prove mold. It shows temperature patterns that may suggest hidden moisture or air movement, so the inspector interprets those patterns alongside moisture readings and construction details. A borescope can provide a view inside a small opening or cavity where access is limited, but the inspector should use it purposefully and document why the area was examined.
The technician may review air handlers, condensate lines, accessible ductwork, crawlspaces, attics, cabinets, plumbing chases, and wall penetrations. The EPA's guidance on investigating hidden mold describes moisture meters and borescopes as tools that can help locate wet materials and hidden growth.
Complete and limited scopes
A complete inspection is appropriate when the property has widespread water intrusion, a complex history, or a need for whole-property documentation. A limited inspection may fit a contained concern, such as a single bathroom after a supply-line leak.
The homeowner should provide safe access to rooms, closets, utility areas, attic entries, crawlspace entrances, HVAC equipment, and affected storage spaces. The visit's duration depends on property size, access, damage complexity, and whether sampling or follow-up is needed. A careful inspector won't promise a meaningful conclusion from a rushed visual pass.
Air, Surface, and Bulk Testing, When Each One Earns Its Place
Sampling is most useful when it answers a specific question that visual and moisture assessment can't resolve. Air sampling captures airborne particles at a particular moment. Surface sampling examines material collected from a defined location. Bulk sampling analyzes a piece of the building material itself.
None of these methods independently explains the moisture source. A sample can support an investigation, clarify a disputed observation, or help document conditions after remediation, but it can't replace a property-wide assessment. The EPA's position is especially important here: when visible mold is present, routine sampling is usually unnecessary, and no federal mold-spore limit establishes a universal pass or fail result.
| Method | What It Measures | Best Used When |
|---|---|---|
| Air sampling | Airborne particles collected during a specific sampling period | A professional needs supporting information about airborne conditions or post-remediation conditions |
| Surface sampling | Material collected from a defined surface | The inspector needs to evaluate a suspicious area or characterize growth on a particular material |
| Bulk sampling | A physical piece of building material | Material identity or contamination within the material needs closer examination |
Choosing the method by the decision
Air sampling may earn a place after cleanup when the project requires additional documentation, but the result still needs context. Surface sampling can help distinguish a suspicious deposit from another substance, especially when the appearance is uncertain. Bulk sampling may be useful when a piece of drywall, insulation, flooring, or another material must be analyzed directly.
A responsible inspector can also recommend no laboratory testing. If visible growth and an active moisture source already establish the need for correction, collecting a sample may add cost without improving the decision. Homeowners who want a broader discussion of sampling options can review air quality testing services, while keeping the larger principle in view: the inspection should serve the building decision, not the test result.
What a Useful Inspection Report Should Contain
A professional report should let another person understand what the inspector saw, where the inspector measured moisture, what limitations affected the work, and why the recommendations follow from the evidence. It should be clear enough for a homeowner to use and specific enough for a contractor or adjuster to review.
Essential report components
Look for these elements:
- Scope and limitations: The report should state which areas were inspected, which were inaccessible, and whether the work was complete or limited.
- Photo log with captions: Photos should identify rooms, materials, visible conditions, and the reason each image matters.
- Moisture readings and locations: Readings should connect to rooms, surfaces, or a sketch rather than appear as unexplained numbers.
- Findings map: A floor-plan mark-up or location diagram can show where moisture, staining, odors, or suspected growth occurred.
- Sample locations and laboratory results: If samples were collected, the report should identify the exact locations and explain how the results affect the recommendation.
- Source and material identification: The report should distinguish suspected water sources from affected materials and explain uncertainty where access was limited.
- Prioritized recommendations: The next steps should address source correction, drying, removal, cleaning, containment, or follow-up assessment as appropriate.
A report becomes more useful when it separates observed facts from professional interpretation. For example, “moisture recorded at the lower wall beside the patio door” is an observation. “Storm-driven intrusion is a possible source” is an interpretation that should be supported by the surrounding evidence.
A one-page spore-count result may come from a legitimate laboratory, but it isn't a complete inspection report by itself. Without photos, moisture information, source identification, scope, and recommendations, the document gives a contractor and an adjuster too little context to plan the next step.
From Findings to Remediation and Insurance Claims
The inspection report becomes the evidence layer for the work that follows. It can help a remediation contractor decide which materials may be cleaned, which may need removal, where containment could be necessary, and where drying equipment should be directed. It can also show whether the problem appears connected to a recent water event, a continuing leak, condensation, or a condition that needs a separate repair.
Consider the Georgetown homeowner who noticed a musty odor after a flash flood. A weak file might contain only an air-test sheet and a general statement that mold was present. A stronger file connects exterior water entry, room-by-room observations, moisture readings, affected materials, photographs, and the recommended sequence for drying and remediation.
What documentation clarifies
A well-supported claim file can help separate:
- The water-loss source: Such as storm intrusion, an overflow, a backup, or a plumbing failure.
- The affected building materials: Including drywall, insulation, flooring, cabinets, framing, or contents.
- The immediate mitigation work: Extraction, drying, dehumidification, and stabilization.
- The microbial scope: Cleaning, removal, containment, deodorization, or additional assessment.
- The policy question: Whether costs relate to the underlying water loss, a mold endorsement, exclusions, or another coverage provision.
An inspector can't decide coverage, and a report can't guarantee payment. The adjuster and policy language determine that outcome. Still, precise documentation reduces avoidable disputes because each recommendation has a location, an observed condition, and a reason.
For the claim file: Keep the inspection report with flood photographs, drying records, invoices, contractor estimates, and communication about the loss. Consistent records make the timeline easier to review.
The report also helps prevent premature demolition. Removing materials without documenting their condition can erase evidence about where water traveled and whether the damage was recent. Inspection should support safe, targeted action, not create unnecessary disturbance.
How to Choose a Qualified Mold Inspector
Start by asking what the inspector delivers. A credible provider should be able to describe the inspection scope, moisture-investigation process, documentation standards, laboratory relationships, and limits of any sampling. The provider should also explain whether inspection and remediation are separate services and how conflicts of interest are handled.
The InterNACHI/IAC2 standards describe complete and limited inspections, so ask which scope the provider proposes and why. Training from organizations such as IICRC may support technical knowledge, but a certificate or logo alone doesn't prove that the inspector will investigate the building carefully.
Questions worth asking before scheduling
- “Can I review a sample report?” Look for photos, location-specific moisture readings, sketches, limitations, source analysis, and practical recommendations.
- “What happens if you find visible mold?” The answer should focus on documenting conditions and addressing moisture, not automatically selling a cleanup package.
- “Which areas will you inspect?” Ask about crawlspaces, attics, HVAC components, plumbing chases, closets, and adjacent rooms when relevant.
- “When would you recommend sampling?” The inspector should connect each sample to a decision.
- “How do you document inaccessible areas?” A professional report should disclose limits instead of implying certainty.
- “Have you handled Central Texas water losses?” Experience with storm-driven intrusion, crawlspace humidity, slab leaks, and condensation can improve the relevance of the investigation.
The EPA doesn't certify mold inspectors or remediation firms, and it doesn't maintain a national provider list. That means homeowners should verify local qualifications, insurance, references, report quality, and business practices rather than treating federal affiliation as a credential.
A common red flag is the test-only sales pitch. Be cautious when a provider emphasizes a low-cost sample, offers no moisture readings, avoids discussing the water source, refuses to show a sample report, or immediately upsells remediation. If cleanup is required, compare the assessment with the proposed work and confirm that the contractor's scope matches the documented findings. For information about the broader cleanup process, review mold remediation services.
Central Texas Realities and Your Next Steps With RestoTek TX
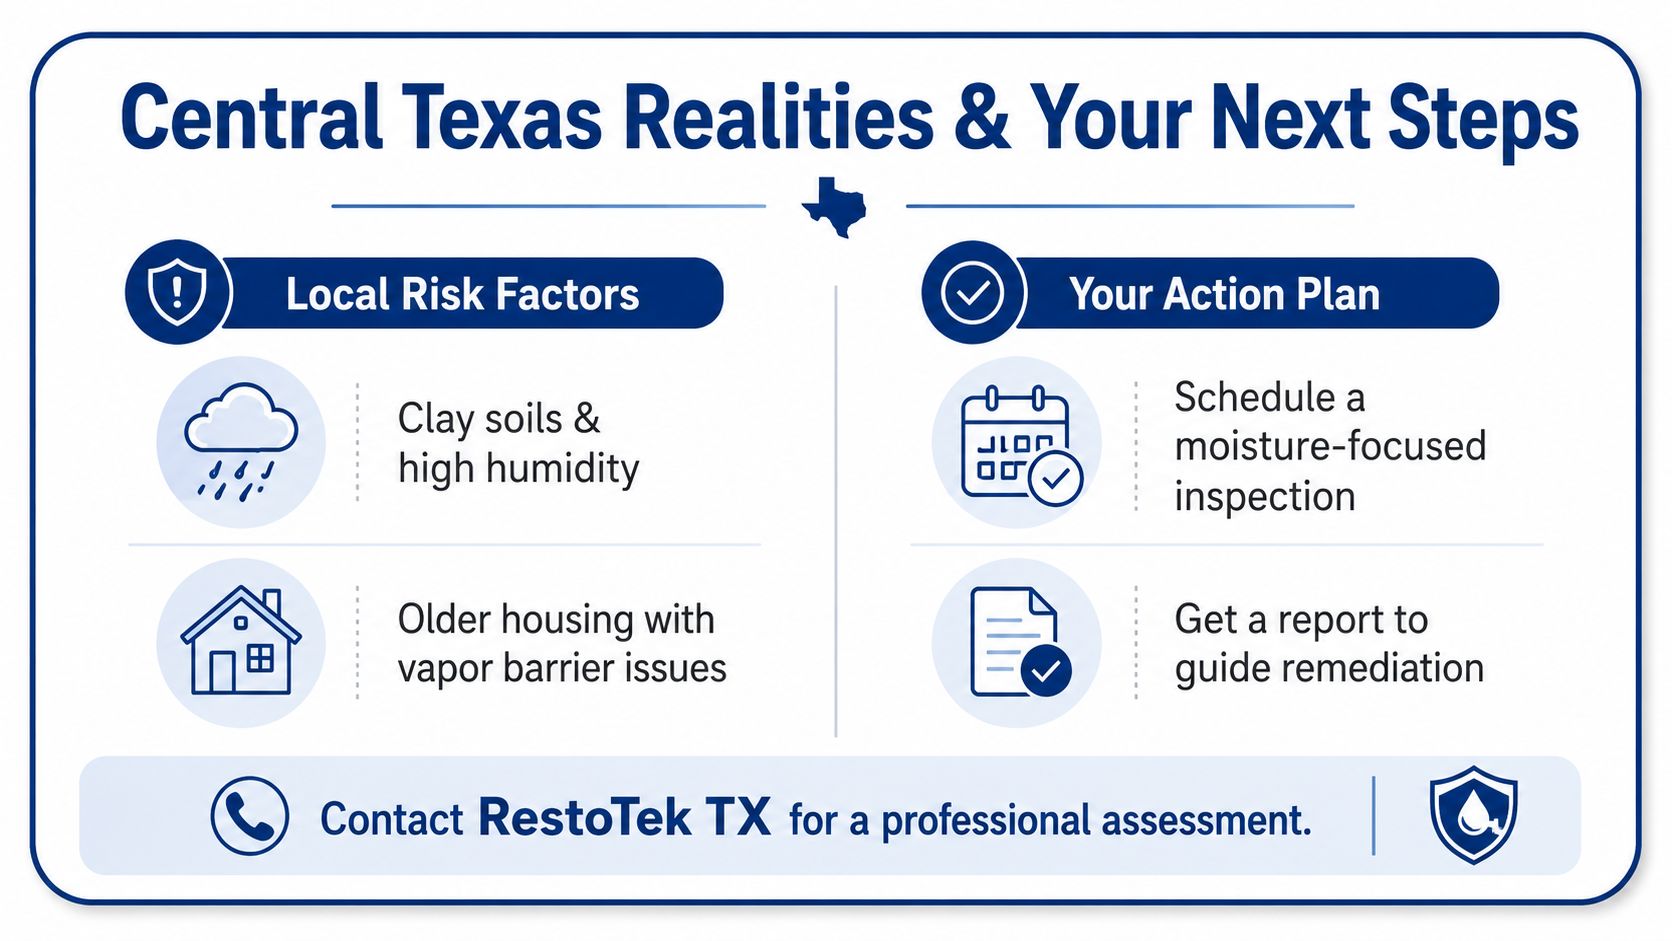
Central Texas properties can hide moisture problems behind weather damage, construction details, and delayed leaks. Heavy rain may enter through roofs, windows, drainage paths, or exterior assemblies. Flash flooding near waterways and low-lying corridors can reach floors, crawlspaces, contents, and wall systems before the full path is clear.
Humid summers create a different set of conditions. Crawlspaces may retain moisture, HVAC components can develop condensation, and older homes may have concealed plumbing failures or vapor-management problems. With slab-on-grade construction, water can travel beneath finishes and appear away from the original leak.
A practical response plan
After a water event:
- Protect people first: Avoid unsafe electrical areas, contaminated standing water, and visibly damaged building materials.
- Record the condition: Photograph rooms, stains, flooring, contents, equipment, and the suspected source before unnecessary removal.
- Stop active water: Contact the appropriate emergency or plumbing service when a leak, backup, or storm entry continues.
- Request a moisture-focused assessment: Ask for readings, source analysis, affected-material documentation, and a written scope.
- Preserve the file: Keep reports, drying documentation, invoices, estimates, and claim communications together.
- Follow the evidence: Use the findings to guide drying, cleaning, removal, reconstruction, and any follow-up verification.
Timing depends on access, property size, hidden-space concerns, active water, and the need for follow-up documentation. Cost varies with scope, travel, sampling, reporting, and loss complexity. Ask the provider to explain the proposed work before authorization, rather than relying on a universal price.
If water is entering the property, address the source promptly instead of waiting for an odor. Keep people away from unsafe electrical areas and contaminated water, document conditions before removal, and arrange moisture assessment, drying, and repairs through appropriately qualified professionals. RestoTek TX is one local option for water-damage inspection, moisture assessment, extraction, structural drying, microbial prevention, mold testing and inspection, and reconstruction support in Georgetown, Austin, and surrounding Central Texas communities.
A professional mold inspection connects building conditions with the recovery plan. It can preserve useful claim evidence and keep a narrow test result from driving repairs that are too large, too small, or aimed at the wrong moisture source.
RestoTek TX can assess moisture conditions, document suspected mold concerns, and coordinate restoration steps from drying through repair for Georgetown and Austin properties. Visit RestoTek TX to request an assessment or no-cost estimate, especially if a flood, leak, backup, or persistent musty odor has affected your property.