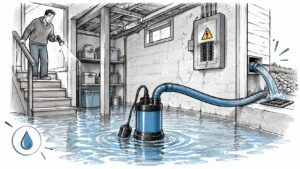
You reach the basement stairs and hear splashing where you expected a dry floor. The sump pump may be silent, the carpet may already be soaked, and your first instinct is to get downstairs and start moving things. Stay on the stairs until you know the space is safe.
To pump basement flooding safely, you need more than a machine that moves water. You need to identify the source, protect yourself from electricity and contamination, preserve evidence, and dry the materials that remain. An empty basement isn't proof that the drainage problem is fixed.
Check Electrical Hazards and Shut Off Utilities First
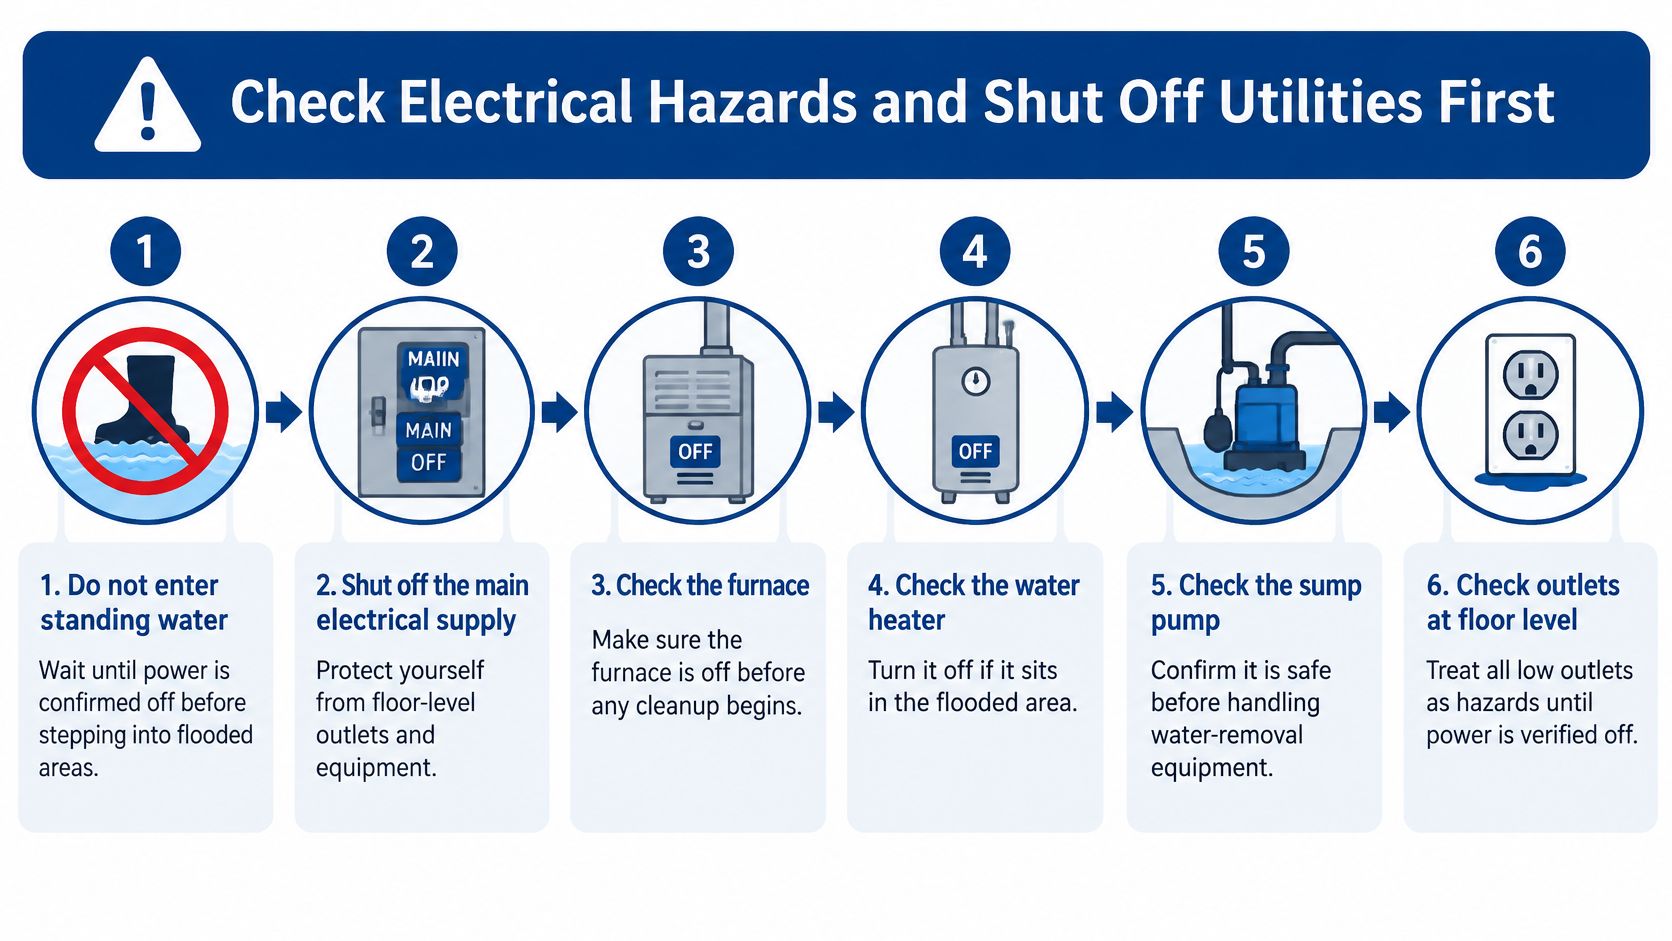
Do not enter standing water until electrical power is confirmed off.
A furnace, water heater, sump pump, extension cord, or low outlet can put electricity where you're about to stand. A stopped pump doesn't prove the circuit is dead, and flipping a light switch tells you nothing about submerged equipment.
Make the space safe from a dry location
Look from the stairs. Check whether water reaches outlets, appliances, cords, or the electrical panel, without touching railings or equipment that may be energized. If electrical equipment is wet or you can't assess the risk, stay out and call the electric utility or an electrician to arrange safe disconnection.
Disconnect power only if the controls are safely accessible. Operate the main breaker only from a dry location with dry hands and dry footing. Don't cross water to reach a basement subpanel, remove a panel cover, or assume switching off a branch circuit makes the whole room safe.
Stop incoming plumbing water where you can safely reach the valves. Close the main water valve for a suspected supply-line break, or the washing machine supply for a failed appliance hose. If sewage is rising through a floor drain, stop flushing toilets and using sinks or laundry equipment.
Leave immediately if you smell gas. Don't operate switches, unplug equipment, or investigate a submerged gas furnace or water heater. Call the gas company from outside, away from the building.
Use protective equipment after the electrical hazard is resolved. Waterproof gloves, eye protection, and sturdy waterproof boots help protect against dirty water and sharp debris. Ordinary rubber boots are not electrical protection.
The safety sequence below is a reminder, not permission to approach flooded equipment.
Don't test wet equipment
Skip the urge to unplug the pump, reset its breaker, or try another outlet. Have wet circuits and appliances evaluated before they're returned to service. This guidance on water in an electrical outlet explains why drying the visible surface doesn't establish electrical safety.
Practical rule: If reaching the shutoff requires entering the flooded area, the shutoff isn't safely accessible.
Say a Georgetown homeowner starts wading toward a silent sump pump and notices an extension cord floating beside a storage bin. There's no safe way to judge whether that cord is energized by looking at it. Staying on the stairs avoids turning a property loss into an electrical emergency.
Documenting the Damage Before Cleanup Begins
The source of the water can change the claim. Surface flooding, sewer backup, foundation seepage, and sump overflow may leave similar damage, but they aren't interchangeable insurance events.
The FEMA basement flood-protection guidance explains that the National Flood Insurance Program may cover certain basement equipment, including sump pumps, while generally excluding damage caused solely by sump-pump overflow or sewer backup without a general condition of flooding. Your homeowners policy and any backup endorsement need separate review.
Collect evidence without delaying mitigation
Take photographs from a safe location before extraction changes the scene. Don't enter hazardous water for a better camera angle.
- Water level and entry points: Photograph standing water, marks on walls, floor drains, windows, and visible seepage. These establish where water appeared and how far it spread.
- Pump and discharge: Record the pump, float, basin, discharge piping, and visible obstructions before anyone repairs or removes them.
- Room and contents: Capture wide views and close-ups of damaged flooring, furniture, stored belongings, and finishes. A narrated video helps connect individual photographs to their locations.
- Equipment history: Save the pump model, alarm notifications, maintenance records, and the approximate sequence of events. Separate what you observed from what you suspect.
- Independent findings: Retain outage notices, plumber reports, and electrician findings. Ask contractors to describe the condition they found, not only the repair performed.
- Costs and drying progress: Keep rental receipts, cleanup invoices, and dated moisture readings with locations.
Preserve evidence, not unsafe conditions
Contact the insurer promptly and ask how it wants damaged materials documented. Obtain disposal instructions where practical, especially for expensive belongings or equipment that may establish the failure.
Don't leave sewage-soaked carpet or deteriorating drywall in place indefinitely while waiting for approval. Photograph it thoroughly, record identifying details, and discuss safe disposal with the adjuster and restoration contractor. Save samples only when safe and specifically useful.
A restoration progress documentation record should connect the original condition, work performed, and drying results. Keep original photographs and a simple dated activity log rather than relying entirely on messages scattered across your phone.
Coverage decisions belong to the insurer under your policy terms. Good documentation supports the claim, but it doesn't guarantee payment.
Choosing and Setting Up the Right Pump
Where is the water coming from? That question matters more than the horsepower printed on the box.
A permanent pit that fills during storms calls for a sump-system assessment. A contained, clean-water incident without a pit may suit a portable utility pump. Water coming through a sewer drain calls for a plumber and contamination control, not a larger sump pump.
The FEMA flood-smart property guidance recommends sump pumps where basement flooding recurs or the water table is above the foundation, discharge that can't return toward the structure, and battery-operated backup protection. Treat those as parts of a drainage system, not separate accessories.
Portable and permanent pumps compared
Published flow ratings aren't directly comparable unless they use the same discharge height and piping conditions. Use the manufacturer's pump curve to check delivery at your actual installation.
| Pump type | Best for | Typical flow | Power | Main weakness |
|---|---|---|---|---|
| Submersible sump pump | Permanent pit with recurring seepage | Check the pump curve at the installed discharge height | Permanent electrical supply | Stops during an outage without backup |
| Battery backup sump pump | Maintaining protection during primary-pump or utility failure | Check rated output at the required lift and battery condition | Battery with charger | Limited runtime and battery maintenance |
| Portable utility submersible pump | A contained flood with no permanent pit | Check output at the actual hose length and lift | Cord-connected electrical supply | Requires safe power and may leave shallow residual water |
| Gas or electric trash pump | Bulk removal where the intake and water conditions suit the machine | Match the rated curve and solids-handling capacity to the job | Gas engine or suitable electrical supply | Intake blockage; gas exhaust must remain outdoors |
A utility pump designed for relatively clean water isn't a substitute for sewage-handling equipment. Likewise, a high-volume trash pump may remove bulk water efficiently but leave more cleanup than a low-level utility pump.
Check the installation, not just the motor
Vertical lift and pipe friction reduce delivered flow. Measure the rise from the pump to the discharge point and account for hose length, elbows, and restrictions. A larger motor won't correct a collapsed hose or blocked outlet.
For a permanent sump installation, check these details:
- Float clearance: The switch must move freely without catching on the basin wall, cables, or piping.
- Check valve: A correctly installed valve limits water draining back into the basin and causing repeated cycling.
- Discharge route: The outlet must remain unobstructed and send water somewhere it won't return to the foundation.
- Basin condition: Remove sediment and loose debris safely, with equipment isolated before handling.
- Backup readiness: Inspect the charger, battery condition, connections, and high-water alarm.
A sewer backwater valve addresses reverse flow through the sewer connection. It doesn't collect groundwater or replace sump capacity.
Finish with an operational test after electrical clearance. Activate the primary float according to the manufacturer's procedure, observe discharge, and check for abnormal cycling. Then test the backup under controlled loss-of-power conditions and verify that the alarm sounds or sends its notification.
A pump that hums has demonstrated that its motor receives power. It hasn't demonstrated that water reaches a safe discharge point.
How to Pump Out the Water Without Causing More Damage
Speed is the wrong goal when saturated soil is pressing against the foundation. Emptying a flooded basement changes the pressure balance across the walls and floor. If outside floodwater remains high, walls are damaged, or groundwater conditions are uncertain, get a qualified assessment before starting extraction.
The FEMA National Flood Hazard Layer guidance identifies saturated soil as an additional source of hydraulic loading on basement walls. Visible indoor water depth alone doesn't tell you whether rapid pumping is safe.
Establish a controlled discharge route
This diagram shows the basic arrangement: collect water inside and discharge it away from the house.
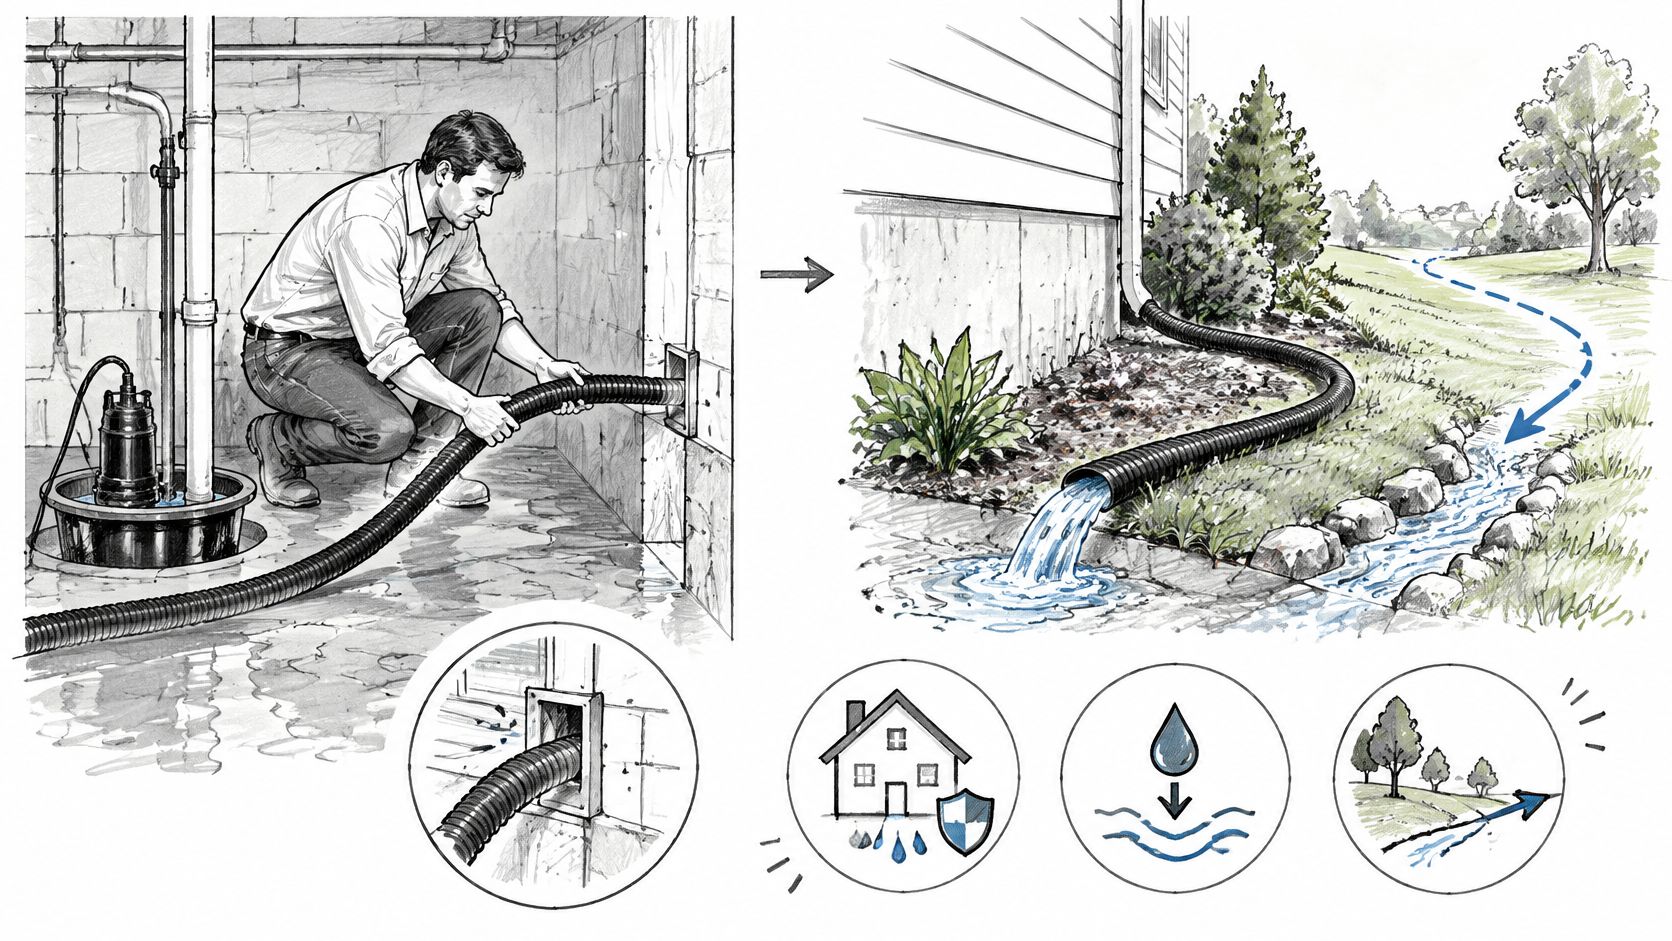
- Route the hose to an appropriate outdoor discharge point, keeping it away from the foundation, neighboring buildings, and places where runoff will return indoors.
- Position the pump at a suitable low point, using the sump basin or a stable floor location without assuming a sewer-connected floor drain is a safe outlet.
- Remove water in controlled stages when exterior saturation is a concern, pausing to assess conditions instead of treating a fast emptying time as the target.
- Watch for structural changes during removal, stopping and leaving the area if walls bow, cracks widen, masonry shifts, or unusual movement occurs.
- Finish shallow clean-water removal with a wet-dry vacuum and squeegee, because a pump intake may stop drawing before the floor is clear.
- Monitor the operating equipment and discharge, shutting off and isolating power before clearing an intake or repositioning electrical equipment.
Keep fuel-powered pumps and generators outdoors, away from doors, windows, and air intakes. Never run an engine in a basement or attached garage.
Don't use a universal drawdown schedule
Some basements can be extracted promptly after a stopped plumbing leak. Others need a site-specific pumping plan because outside water or saturated soil remains against the structure. A fixed pump-and-pause schedule isn't a substitute for assessing that difference.
Record water-level changes, pump start and stop events, and whether the level rises again during a pause. A rebound can help a contractor distinguish continuing inflow from water left in isolated floor areas. Don't keep buying bigger pumps without investigating why the water returns.
For a hypothetical Austin basement with water across a finished floor, the useful sequence is controlled extraction, safe removal of wet rugs and contents, and inspection of the flooring assembly. Pumping the visible water and leaving carpet padding against the subfloor can leave the assembly wet. Early access may improve salvage options, but it can't guarantee that the subfloor is undamaged.
A room-volume estimate can help plan equipment, but it won't predict completion by itself. Ongoing inflow, discharge lift, hose restrictions, and the pump's minimum operating depth all affect the work.
Stop condition: New wall movement or worsening cracks means leave the basement and seek structural assessment, not increase the pumping rate.
Drying the Space and Stopping Mold Growth
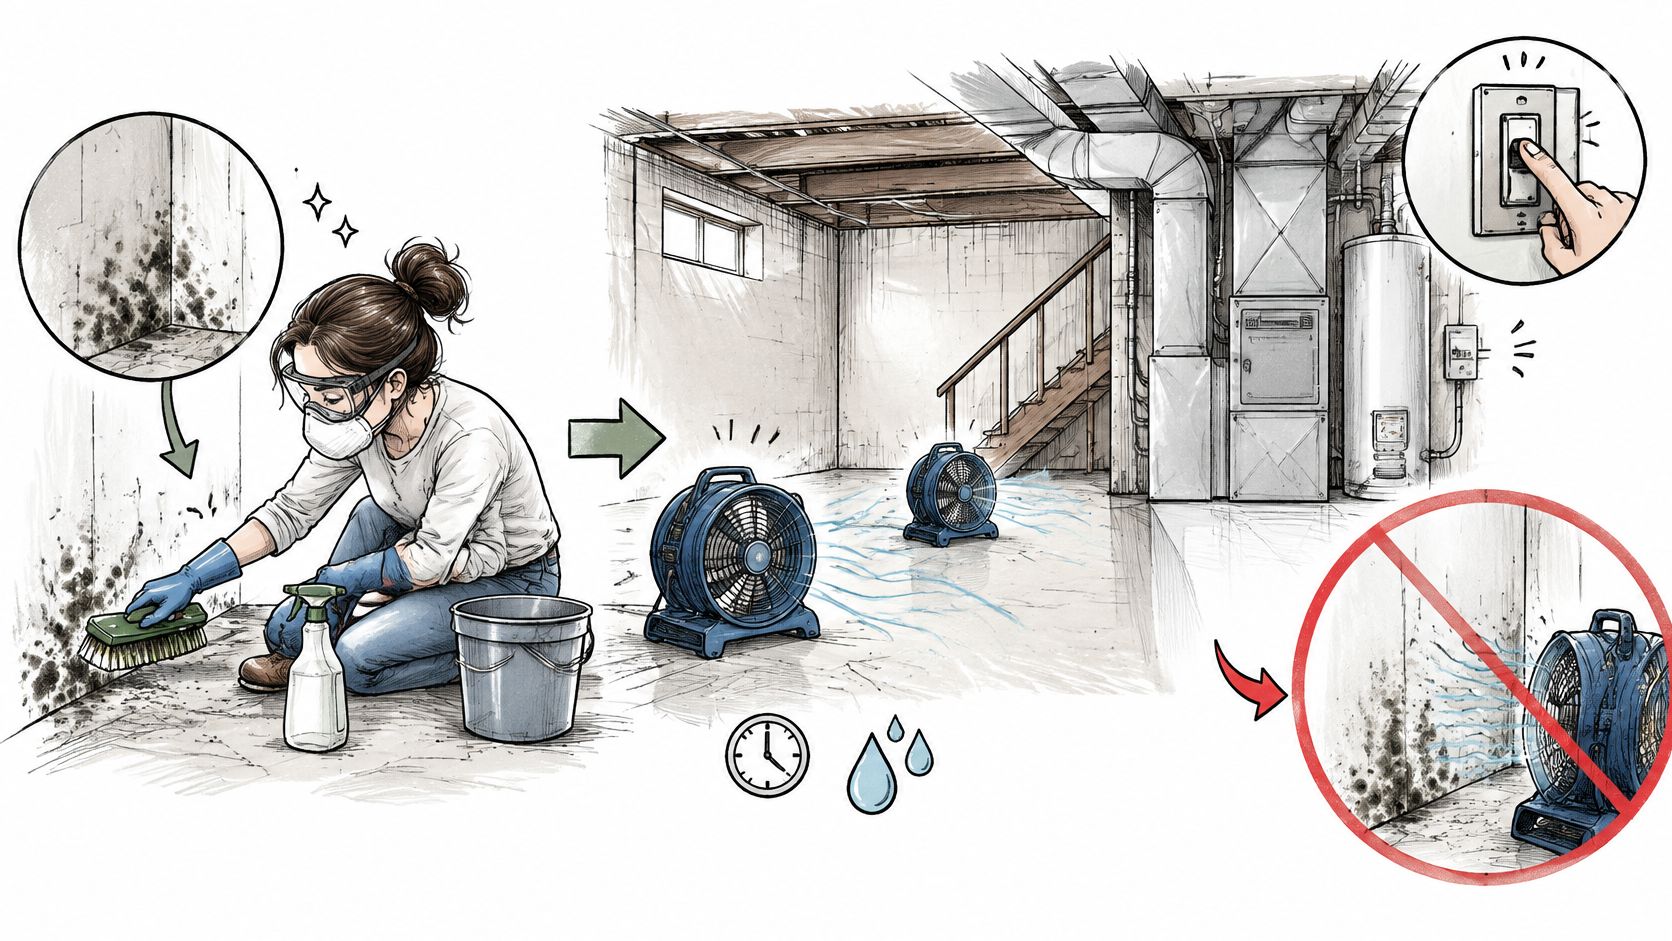
Don't aim fans at visible mold. Airflow can disperse spores into areas that weren't affected. Resolve the mold-cleanup scope first, and keep flooded heating, ventilation, and air-conditioning equipment off until it has been assessed.
An empty floor can hide wet insulation, damp wall plates, saturated padding, and moisture beneath cabinets. Extraction removes standing water; structural drying removes moisture held in the building materials.
The image below highlights the relationship between cleanup and drying. Fans belong in a controlled drying setup, not pointed across untreated mold.
Set material-specific drying targets
The EPA damaged-building guidance identifies 15% or less moisture content as a practical refinishing benchmark for many building materials, describes a concrete plastic-sheet check lasting approximately 16 hours, warns that porous contents wet for roughly 48 hours may become difficult or impossible to salvage, and notes that drying can take several days to weeks.
Drying targets and time limits by material
| Material or condition | Target or time limit | Why it matters |
|---|---|---|
| Porous contents such as carpet, upholstery, and cardboard | Start separation and salvage decisions immediately, before prolonged wetting | Wet porous contents can support mold and become unsalvageable |
| Wood or building materials before refinishing | Verify a suitable moisture-content benchmark for the material | Surface appearance doesn't establish readiness for finishes |
| Concrete slab before new flooring | Check residual vapor, then meet the flooring manufacturer's testing requirements | Moisture beneath new flooring can cause adhesion and finish failures |
| Overall drying period | Continue until repeated material readings establish acceptable conditions | Hidden cavities and low-airflow areas may remain wet |
The plastic-sheet check is a useful screen, not a replacement for the moisture testing required by a flooring or adhesive manufacturer. A moisture meter also needs the correct material setting and interpretation. Don't treat a relative reading on masonry as though it were a wood moisture percentage.
Expose moisture and measure progress
After electrical clearance and contamination assessment, open affected assemblies where appropriate so drying air can reach wet materials. Check for concealed wiring, plumbing, and materials requiring testing before cutting walls or lifting flooring.
Pair air movers with dehumidification. Fans alone move moisture into the air; the dehumidifier removes that moisture from the space. Guidance on selecting a dehumidifier for flood damage can help distinguish room-comfort equipment from a structural-drying setup.
Log readings at consistent, labeled locations: wall bases, flooring edges, accessible cavities, and sheltered corners. Compare affected materials with an appropriate dry reference where possible, and investigate readings that stop improving.
Watch for signs that the room is still holding moisture:
- Musty odor: Investigate concealed wet materials rather than masking the smell.
- Cupped flooring: Check moisture beneath the boards and in the supporting assembly.
- Dark baseboard staining: Inspect the wall base and adjacent cavity.
- Soft subfloor: Assess deterioration before reinstalling finishes.
Don't paint, seal, or reinstall flooring just because the exposed surfaces feel dry.
Deciding When to Call a Professional Restorer
A homeowner may manage a limited clean-water loss when electrical safety, the source, and drying access are clear. Call a professional when the uncertainty extends beyond operating the pump.
- Sewage or an unknown source: Contamination requires protective handling and a suitable cleaning plan.
- Mold beyond an isolated accessible patch: Growth behind walls or across connected materials needs a defined remediation scope.
- Wet concealed assemblies: Insulation, wall cavities, and subfloors can require selective removal and instrumented drying.
- Recurring flooding: Have drainage, sewer pathways, grading, and foundation conditions assessed rather than repeating extraction.
- Submerged electrical components: An electrician must determine what can safely return to service.
- Missing drying evidence: A restorer can establish moisture mapping and progress records when you can't reliably produce them.
Treat recurrence as a separate repair problem
The FEMA Individual Assistance Multiple Loss Flood Properties dataset defines repetitive-loss residential properties through damage in at least two federally declared flooding events and records foundation type and water depth. That formal definition isn't a diagnosis of your property, but it underscores why flood history matters.
Today, arrange safe utility isolation, stop an accessible plumbing source, and photograph the damage without entering hazardous water. Then ask a restorer whether the materials can be dried in place and which specialist should investigate the entry pathway.
RestoTek TX offers 24/7 water-loss response in Georgetown and Austin, including extraction, moisture inspection, structural drying, mold testing, and claim documentation. Visit RestoTek TX to request an assessment of the flooded space and a drying plan that addresses both hidden moisture and the cause of the water entry.