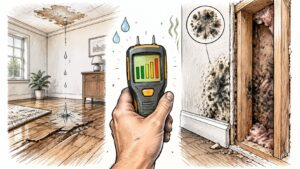
Waiting for a patch to turn black is poor advice after a leak. Water damage starts when water soaks into building materials; mold is a separate problem that can develop when those materials remain damp. Color doesn't tell you how urgent the situation is. Moisture duration, material type and the people exposed do.
For an Austin homeowner with a leaking supply line or a Georgetown landlord facing a flooded unit, the useful question isn't whether a stain looks like toxic black mold. It's whether the affected assembly can be dried completely, whether contamination is present and whether anyone needs to avoid the space.
Water Damage and Black Mold at a Glance
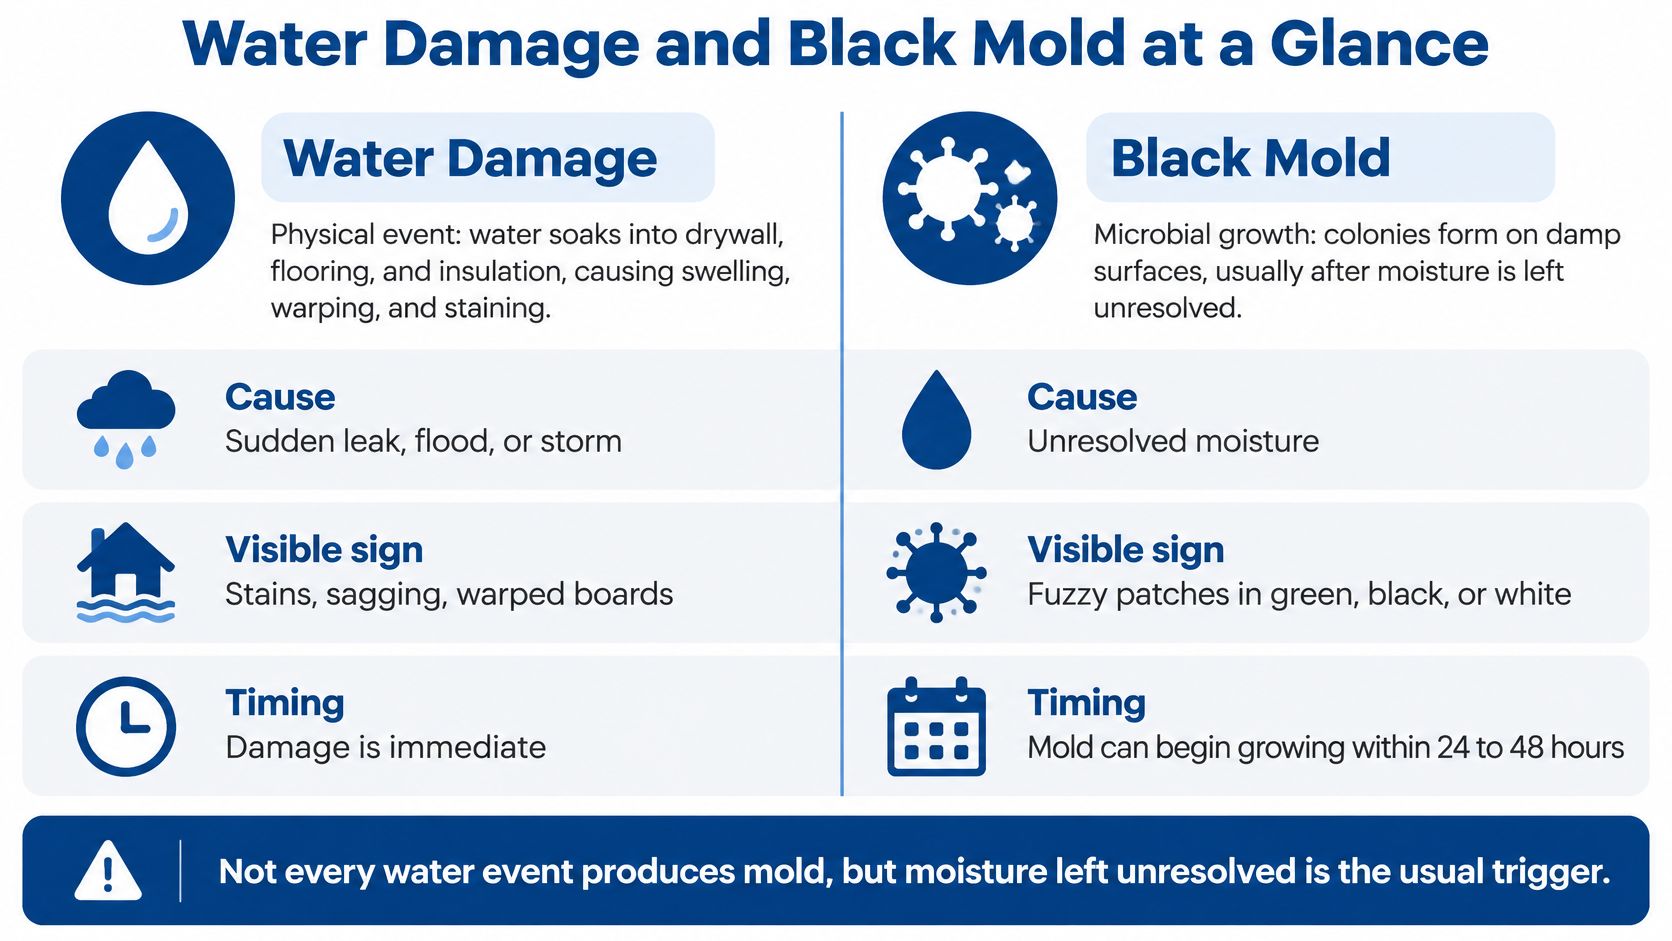
Water damage is a physical event affecting building materials, while black mold is a consumer label for microbial growth, not a diagnosis. A property can have water damage without mold, mold without obvious standing water, or both at once.
Water damage vs black mold at a glance
| Criterion | Water Damage | Black Mold |
|---|---|---|
| What it is | Physical event where water enters building materials | Microbial growth that follows persistent dampness |
| When it starts | Immediately after a leak, backup, overflow or flood | After materials remain damp long enough to support growth |
| Main hazard | Structural, flooring, insulation and contents loss | Allergic reactions, irritation and asthma triggers |
| Time pressure | Begin extraction and drying immediately | Stop the moisture supporting growth and arrange controlled cleanup |
| Visible signs | Standing water, stains, sagging drywall, warped flooring | Discolored or fuzzy patches, musty odor, growth in cavities |
| Primary fix | Extract, dry and replace materials that can't dry | Correct the moisture source, then remove or clean growth |
| Typical responder | Water restoration contractor, often insurer-coordinated | Mold inspector and remediation contractor |
These are different scopes of work, not competing explanations for the same stain. Extraction equipment removes water, but it doesn't remove established mold from damaged drywall. Conversely, applying a mold treatment doesn't dry a saturated subfloor.
The national scale explains why prevention matters: the Congressional Budget Office reported that flooding damage averaged about $46 billion annually over the most recent ten-year period, measured in 2023 dollars, and estimated that roughly 17 million U.S. properties face at least a 1% annual chance of a flood of one foot or more. Those are national estimates, not a flood forecast for an individual Austin or Georgetown address.
Start with the wetting history: How long did the materials stay wet?
That question separates a fresh loss with a realistic drying opportunity from a situation that needs investigation for established growth. It doesn't settle every decision, but it's more useful than matching a spot to an internet photograph.
How Water Damage Turns Into Mold
Mold needs moisture and a usable food source. Paper-faced drywall, accumulated dust, wood and carpet backing can supply that food; persistent dampness supplies the condition that allows growth.
The EPA's mold and moisture guide recommends drying wet materials within 24–48 hours to help prevent mold growth. That's a prevention guideline, not a guarantee that growth starts at a fixed hour or that everything dried before the deadline is salvageable.
Moisture timeline from water event to mold risk
| Time Since Wetting | Material Condition | What Is Happening | Required Action |
|---|---|---|---|
| First day | Water pooled or materials saturated | Water moves into drywall, insulation and subfloor | Extract water and start appropriate drying equipment |
| During the recommended drying window | Porous materials still damp | Conditions can support growth | Confirm drying progress or plan removal |
| Beyond the recommended drying window | Cavities or subfloors remain wet; surfaces may look dry | Hidden growth becomes a concern, not a certainty | Assess materials, correct the source and determine remediation needs |
| Visible growth present | Patches on drywall, wood or carpet backing | Growth is established and disturbance can spread particles | Control the work area and remove or clean affected materials |
| Days to weeks with an ongoing leak | Repeated wetting | Growth can spread and musty odor can develop | Stop the source before repair or cleanup |
The surface isn't the whole assembly
Early extraction limits how much water reaches adjoining materials. After that, dehumidifiers remove moisture from the air while controlled air movement helps wet surfaces release it.
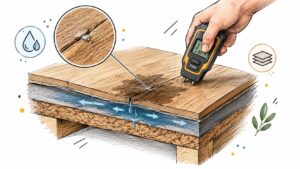
A dry-looking floor doesn't establish that the subfloor is dry. Water can remain beneath flooring, behind baseboards and inside insulated cavities after exposed surfaces feel normal.
Say a dishwasher leaks beneath a floating floor. Toweling the visible puddle leaves the underlayment inaccessible to room air, so a contractor may need to lift flooring rather than keep aiming a fan at it.
Materials set the salvage decision
Carpet and backing need prompt extraction and thorough drying, including attention to the pad and substrate. Structural wood often warrants a drying attempt when it's sound and accessible, but aggressive heat can damage finishes or distort materials.
Drywall isn't automatically disposable after clean-water exposure. However, crumbling gypsum, swollen seams, wet insulation and damaged ceiling tiles are poor candidates for drying in place.
A missed drying window is a reason to reassess the assembly, not proof that every wet surface has mold.
Once growth is visible, or inaccessible materials remain damp, adding fans is not an adequate plan. The job needs a material-by-material evaluation and controls appropriate to the contamination.
Signs That Tell the Two Problems Apart
A black spot isn't a species identification, and a pale patch isn't automatically harmless. The scientifically useful distinction is between moisture damage and mold exposure, not between dark and light growth.
A CDC-hosted evidence review reports that a 2007 meta-analysis of 33 studies estimated that exposure to dampness and mold in homes increased the risk of asthma development, ever-diagnosed asthma and current asthma by approximately 30% to 50%. That finding concerns dampness and mold exposure broadly, not black-colored mold alone.
Field signs and what they usually mean
| Observation | Usually Points To | Next Step |
|---|---|---|
| Standing water, sagging ceiling or fresh stain after a known leak | Water damage requiring immediate assessment | Keep clear of sagging areas; extract and dry once safe |
| Musty odor with no visible stain | Hidden moisture or growth inside a cavity | Take moisture readings and arrange controlled access to suspect areas |
| Dark patches on drywall or trim that feel damp | Possible mold growth on wet material | Stop the source and assess cleaning or removal |
| Bubbling or peeling paint on a wall | Moisture behind the surface | Investigate the wall rather than repainting |
| Dark spot that's dry and stays dry | Surface soiling, an old stain or inactive growth | Check moisture history; monitor rather than assuming it's harmless |
| Stain that reappears after drying | Ongoing leak or condensation source | Find and correct the source before repairs |
Read the pattern, not just the patch
A recurring stain means the original explanation may be incomplete. A repaired pipe won't solve rain entering through flashing, and repainting won't resolve condensation behind furniture against a cold wall.
Paint can hide deterioration without correcting it. A surface that looks newly finished may still have softened drywall or damp insulation behind it.
The visual examples in what water damage looks like can help you describe what you're seeing, but photographs can't establish moisture depth or confirm mold.
Before an inspection, record:
- Location: Note where the smell is strongest, including closets, baseboards and adjoining rooms.
- Material condition: Photograph swelling, peeling, softness and visible patches without disturbing them.
- Timing: Record when the stain appeared and whether weather, plumbing use or air-conditioning operation changes it.
- Previous work: Keep leak-repair invoices and photographs taken before finishes covered the area.
Don't scrape a patch to see what's underneath or open a suspect wall without considering what might be released. These observations are triage clues that justify investigation, not a confirmed diagnosis.
What Each Problem Requires
A water-damage inspection asks where water entered and how far it spread. A mold inspection adds another question: where is growth present, and what must be isolated, cleaned or removed?
Both start with the moisture history. The inspector needs to know whether the source was a supply line, drain backup, roof opening or floodwater, because contamination changes handling and salvage decisions.
Inspection and testing compared
| Inspection Element | Water Damage | Black Mold |
|---|---|---|
| Main question | Where did water enter and how far did it spread? | Is growth present, where is it, and is moisture feeding it? |
| Core tools | Moisture meter, thermal imaging, opened cavities | Visual inspection, odor detection, moisture readings, sampling if needed |
| Role of air sampling | Rarely the primary tool | Supplementary; visual and odor checks are more useful for locating problems |
| Species identification | Not relevant to drying decisions | Not required before corrective action |
| Finish standard | Materials returned to an appropriate dry baseline | Affected areas dry, cleaned and without remaining growth or mold odor |
| Documentation produced | Drying log, moisture map, insurance scope | Inspection report, remediation scope, clearance record when applicable |
Measurements need a reference
A moisture-meter reading means little without knowing the material and comparing it with an unaffected area. A contractor should compare wet framing with similar dry framing, not treat drywall and wood readings as interchangeable.
Thermal imaging helps locate temperature patterns worth investigating. It doesn't see mold or prove moisture by itself; the operator must confirm suspicious areas with a meter and, where necessary, controlled cavity access.
For established growth, CDC/NIOSH guidance says molds capable of producing mycotoxins, including Stachybotrys chartarum, should be handled like other indoor molds, and identifies thorough visual inspection and musty-odor detection as more reliable for locating problems than routine air testing alone. Paying to identify a species before stopping an obvious leak usually delays the work that matters.
Specify the work before authorizing it
A useful professional black mold removal scope should explain containment, material removal, cleaning and verification. A proposal that only lists spraying or fogging leaves the physical contamination and moisture problem unresolved.
Drying logs and moisture maps support water-loss decisions. Mold documentation should also identify affected boundaries, cleaning methods and any independent verification required for the project.
Before closing a wall: Require documentation of the source repair, affected materials, contamination assessment and final moisture condition.
Neither a pleasant smell nor a newly painted wall is a substitute for that record.
Health Risks and Who Should Stay Out
Black mold doesn't automatically mean poisoning. The EPA's mold and health guidance explains that mold can trigger allergic reactions, irritate the eyes, skin, nose, throat and lungs, and worsen asthma in people allergic to mold.
The practical decision is who should avoid exposure while the building is being assessed and cleaned. A restoration contractor can explain work-zone controls, but a healthcare professional should evaluate persistent symptoms and individual medical risk.
Occupant groups, risk level and precautions
| Occupant Group | Why Risk Is Higher | Precaution |
|---|---|---|
| People with asthma | Exposure can worsen asthma symptoms | Stay out of the affected area until cleanup is finished; review symptoms with a doctor |
| People with COPD or chronic lung disease | Respiratory irritation can be harder to tolerate | Avoid cleanup work; seek medical evaluation for symptoms |
| People with weakened immune systems | Greater vulnerability to mold-related infection | Keep out of the affected space and obtain individualized medical advice |
| People with mold allergy | Exposure can trigger eye, nose, skin and airway reactions | Limit exposure and follow a medical plan |
| Children, pets and service animals | Floor-level contact and difficulty maintaining work-zone boundaries | Keep out until cleanup is finished |
| Healthy adults doing small cleanups | Lower vulnerability doesn't eliminate irritation | Use a suitable particulate respirator, gloves and goggles |
Decide occupancy before demolition
Keeping someone out of a work zone doesn't always require leaving the entire property. The decision depends on whether the affected area can be isolated, whether shared ventilation could distribute contaminants and whether essential rooms remain usable.
For a vulnerable occupant, temporary relocation may be more practical than trying to maintain separation through an active cleanup. A landlord should communicate the affected areas, access restrictions and planned work in writing rather than relying on a hallway conversation.
- Before work: Identify vulnerable occupants and arrange access to medication, mobility equipment and service animals.
- During cleanup: Maintain barriers and keep occupants away from material removal and waste handling.
- Before return: Document completed cleaning, corrected moisture conditions and any outstanding restrictions.
Don't interpret coughing, fatigue or headaches as proof of a particular mold species. Symptoms can have other causes, and persistent or worsening symptoms deserve medical attention.
An air sample also can't certify that a building is safe for every person. Return-to-occupancy decisions need building-condition evidence and, where relevant, advice from the occupant's clinician.
How to Set the Remediation Order
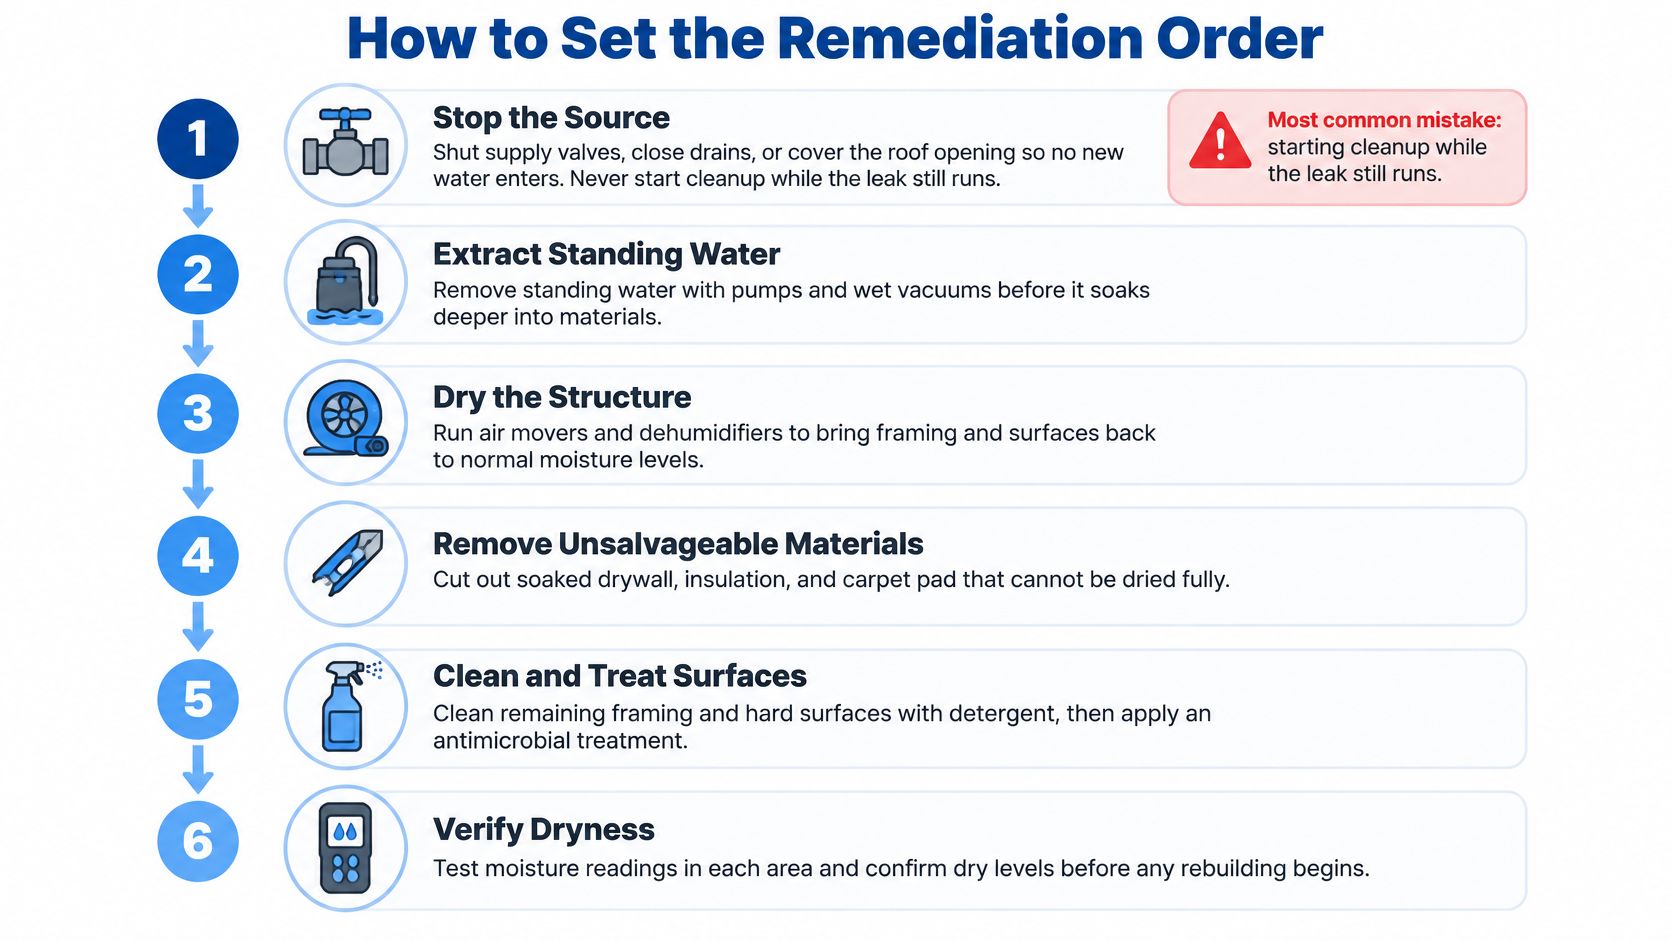
The sequence matters because the wrong action can spread contamination or conceal wet materials. Check safety and water contamination before deploying equipment, even though extraction and drying often happen in close succession.
Stop the source safely. Shut the accessible supply valve or arrange professional plumbing or roof repairs. The common mistake is paying for extraction while new water continues entering; don't climb onto a storm-damaged roof to improvise a cover.
Check hazards before extracting. Keep away from water near electrical equipment and from sagging ceilings. Use pumps or wet vacuums only when conditions permit, and don't enter sewage-contaminated water without appropriate controls; the mistake is treating every puddle like clean tap water.
Dry the structure deliberately. Position dehumidifiers and air movers to address the wet assembly, not merely make the room feel breezy. Don't aim fans across visible mold or contaminated debris, because that can distribute particles into clean areas.
Sort materials by salvageability. Evaluate carpet backing, pad, drywall, insulation, flooring and framing separately. The expensive mistake is preserving a cheap saturated layer that prevents access to a valuable subfloor or structural assembly.
Set contamination controls before disturbance. For sewage, suspect floodwater or established mold, isolate the work area and select protective equipment before removing materials. Don't carry uncovered debris through occupied rooms or allow contaminated equipment to become the next source of spread.
Remove contamination, then clean retained surfaces. Bag unsalvageable porous materials and clean sound framing and hard surfaces with methods appropriate to the material and contamination. Spraying over growth, dry brushing without capture and painting over damaged surfaces aren't substitutes for removal; antimicrobial products, when appropriate, supplement physical cleaning rather than replace it.
Verify and document before rebuilding. Record final moisture readings, locations, photographs and any remediation verification. The common mistake is authorizing insulation, flooring or drywall installation because the schedule says drying should be finished.
Use the flowchart with the safety checks
The simplified sequence below is useful for planning, but contamination controls may need to precede extraction, drying or demolition. Product treatment isn't a mandatory finishing step for every clean-water loss.
The best drying plan isn't necessarily the one with the most equipment. Targeted access, correct equipment placement and repeated measurements are more useful than leaving household fans running against an assembly that air can't reach.
Confirm the Order Before You Act
Black color alone does not set the cleanup order. Moisture duration, affected materials, contamination and occupant vulnerability matter more. A supply-line leak and a drain backup may soak the same floor, but the first action should reflect the water source and the conditions in the building.
First move by situation
| Situation | First Priority | Who to Involve |
|---|---|---|
| Clean supply-line burst, wet floor promptly dried | Extract water and verify drying; assess for growth if conditions warrant | Water restoration contractor |
| Backup or sewage-contaminated water | Assess safety, control access and determine whether porous materials need removal | Qualified restoration contractor |
| Floodwater after a Central Texas storm | Assess safety, extract and dry water, then check affected cavities | Water restoration contractor; mold inspector if dampness persists or growth is found |
| Musty odor with no known leak | Locate the moisture source before cosmetic cleanup | Inspector, then remediation contractor if needed |
| Small visible patch on a non-porous surface, healthy occupant | Correct the moisture source, clean appropriately, dry and monitor | Homeowner with suitable protection, or a professional if uncertain |
| Occupied unit with a vulnerable occupant | Limit exposure and document the affected area | Inspector and the occupant's healthcare provider |
Choose by conditions, not by the label
A recent clean-water event affecting accessible, salvageable materials may call mainly for extraction and drying. Persistent dampness, visible growth or contaminated water can require a wider scope, including containment and controlled material removal. The visible color of growth does not establish how far moisture has spread or whether hidden materials are affected.
DIY cleanup is a poor fit when the affected area is hidden, sewage is involved, the source is uncertain or removing finishes could spread contamination. People with allergies, immune suppression or chronic lung disease should avoid handling mold cleanup themselves.
For an uncertain loss, request moisture mapping rather than relying on a surface-only walkthrough. Ask for the affected boundaries, comparison readings, inaccessible areas and the proposed dry-or-remove decisions in writing. Those details help clarify whether the job is limited to drying or needs remediation.
RestoTek TX is a local option for emergency flood and backup response, moisture mapping and no-cost estimates in Georgetown and Austin. With any contractor, establish how long materials were wet, stop the source, and obtain an inspection that documents what needs drying, removal or further investigation.
RestoTek TX provides water extraction, structural drying and mold inspection to help distinguish a drying problem from a remediation job. Visit RestoTek TX to request an assessment in Austin or Georgetown and discuss the measurements and documentation needed before rebuilding.