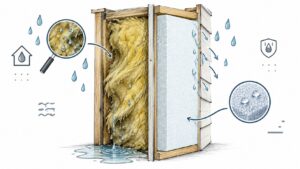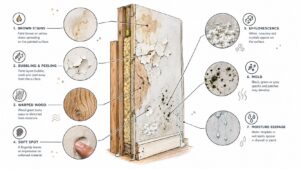
You notice a soft spot near the kitchen baseboard. When you pull the refrigerator forward, water is spraying from the line behind the cabinet, and the flooring already feels damp. The visible repair may be a loose fitting or cracked tube, but the underlying problem can be underneath the flooring, inside the cabinet toe-kick, or behind the drywall.
Treat a refrigerator water line leak as a water-loss event, not just an appliance nuisance. Shut off the supply, make the area safe, document what you find, and then verify that the structure is drying. A quick plumbing repair won't undo moisture that has already migrated into wood, flooring, or wall materials.
Why a Refrigerator Water Line Leak Needs Fast Action
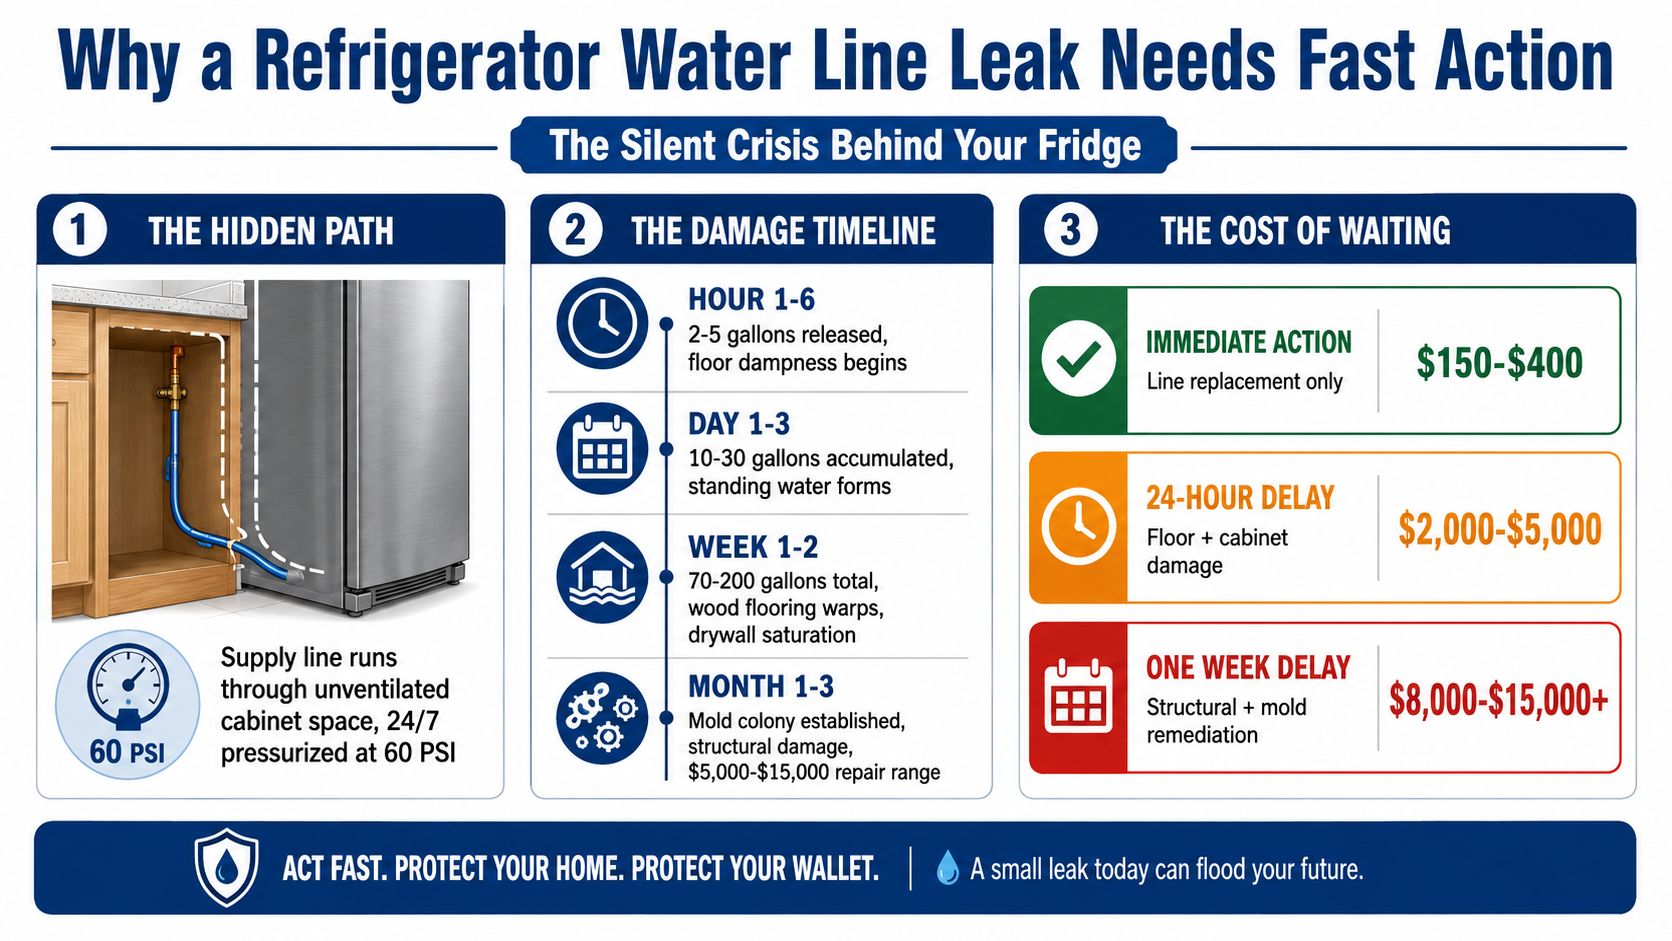
A refrigerator supply line stays pressurized whenever its shutoff is open. That means a small failure can continue releasing water while the kitchen looks normal from the outside. Cabinet bases conceal pooling, the enclosed toe-kick limits airflow, and water can travel beneath flooring before a noticeable puddle appears.
The first response should be simple:
- Stop the water. Close the local refrigerator shutoff. If it won't close, shut off the home's main valve.
- Make electricity safe. Unplug the refrigerator only if you can reach the plug without stepping through water. If the outlet or cord is wet, keep away and call an electrician.
- Expose the affected area. Move the refrigerator straight out if it can be done safely, then inspect the line, fittings, flooring, cabinet base, and nearby wall.
- Record the condition. Photograph the source, every wet surface, swollen material, and any visible staining before cleanup changes the scene.
Practical rule: Stop the water first, then preserve evidence. A dry floor after cleanup doesn't prove that the subfloor or cabinet base is dry.
A sudden refrigerator or appliance leak is generally handled differently from gradual seepage under homeowners insurance. Major insurer guidance commonly treats abrupt resulting water damage as covered while excluding the failed appliance itself, whereas long-term leakage and maintenance-related damage may be disputed. Farmers' guidance on homeowners insurance and appliance water damage explains that distinction.
The financial difference can be substantial. Published restoration examples place same-day damage at about $150–$600, minor flooring damage at $500–$2,000, cabinet and subfloor damage at $2,000–$6,000, and more extensive or long-undetected losses as high as $15,000–$30,000 or more when structural or mold complications develop. Refrigerator leak restoration cost examples show why the line replacement is often the smallest part of the loss.
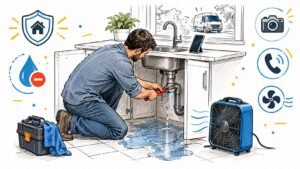
The right next decision is whether you're dealing with a pressurized plumbing failure, an appliance drainage problem, or both. That classification determines whether you need a plumber, drying equipment, an appliance technician, or an insurance claim file.
For additional local context on why early mitigation matters, review this guide to fast water damage restoration in Georgetown.
Spotting the Leak and Pinpointing the Type
Don't replace the supply line until you've proved that's where the water originates. Start with the floor and surrounding finishes. Look for darkened grout, a soft or raised flooring edge, swelling at the cabinet base, staining on the ceiling below, or a musty odor that becomes stronger near the refrigerator.
Pull the appliance forward carefully. Use a flashlight and inspect the complete route from the shutoff valve to the refrigerator inlet valve. Copper may show green corrosion, while braided lines can develop frayed sections, kinks, or mineral tracks around a connection. Place a clean, dry paper towel beneath each fitting, then operate the dispenser and watch for a fresh mark.
Separate supply leaks from internal leaks
The location of the water usually gives you the best diagnosis.
| Symptom | Likely Source | Quick Check |
|---|---|---|
| Moisture appears behind the refrigerator near a joint | Supply line or inlet valve | Dry every connection, restore water slowly, and watch the first fitting that wets |
| Water collects beneath the filter housing | Filter, filter head, or cracked housing | Remove and reseat the filter, inspect the O-ring and housing for damage |
| Water appears inside the refrigerator near the crisper drawers | Defrost drain | Check for ice or debris around the drain path rather than tightening the rear supply line |
| Water appears intermittently without a wet pressurized fitting | Condensation pan or drain system | Shut off the water supply and observe whether new water still appears |
| Water forms only while dispensing or making ice | Dispenser tubing, inlet valve, or icemaker circuit | Run each function separately with towels positioned below the connections |
Manufacturer troubleshooting guidance recommends checking the rear connection, tubing, and inlet valve for cracks, kinks, moisture, and an incompletely seated push-fit tube. If a black insertion mark shows two lines instead of one, reseat the tube until only one line remains visible. Then flush 2–3 gallons through the dispenser and observe whether the leak returns, as described in LG's refrigerator leak troubleshooting guidance.
A useful rule is to close the supply valve before touching internal plumbing. If water continues to appear after the valve is closed and the area has been dried, the source is probably not the pressurized refrigerator line. It may be condensation, a defrost drain, a drain pan, or water that has already migrated from another location. Leak detection guidance for tracing hidden moisture can help when the visible puddle doesn't match the actual source.
Stopping the Leak and Containing the Damage
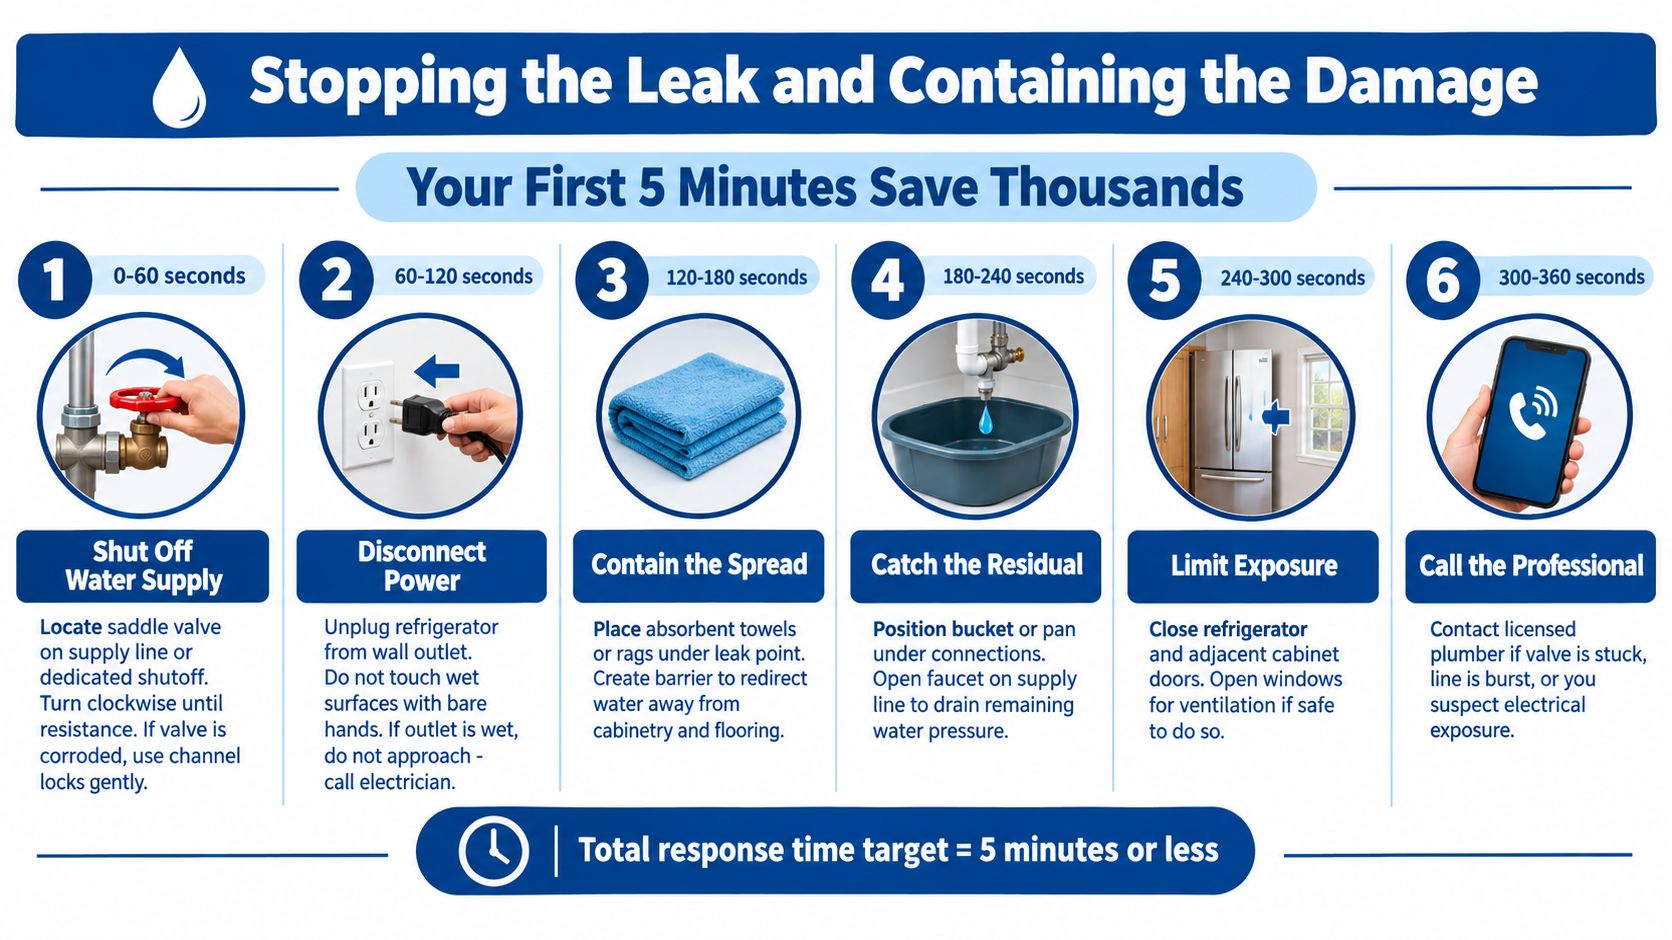
The first few minutes should reduce both water flow and electrical risk. Find the dedicated refrigerator valve or the valve installed near the sink, then turn it clockwise until it closes. Open the dispenser briefly to relieve pressure, but don't operate it if water has reached electrical components.
Use a controlled sequence
- First, shut off the supply. If the valve is stuck, corroded, or spinning without closing, don't force it until the line breaks. Shut off the main house valve and call a plumber.
- Next, disconnect power safely. Unplug the refrigerator if the outlet and floor around it are dry. Never reach across standing water to pull a cord.
- Then, contain the residual water. Slide a folded towel or shallow pan beneath the connection. Keep water from spreading toward cabinet ends, flooring seams, and nearby outlets.
- After that, expose the wet zone. Pull the appliance forward without dragging it across softened flooring. Open cabinet doors so trapped moisture can escape.
- Finally, start air movement. Use a fan and dehumidifier directed at the affected area when electrical conditions are safe.
Photograph the valve before and after shutoff, the failed line or fitting, the refrigerator model label, wet flooring, cabinet bases, baseboards, and any water staining. Keep receipts for emergency supplies, save messages with plumbers or restoration professionals, and write down when you found the leak and when you closed the valve.
Dry the surface, then check it again rather than assuming the repair worked. Restoration guidance recommends shutting off the supply, drying the area, and observing it for 24 hours. If no new water appears, the original source was likely upstream of the wet area, although concealed materials may still need moisture testing. Guidance on refrigerator supply-line leaks and mitigation explains why a dry visible surface isn't the same as a dry structure.
DIY Repairs, Parts to Replace, and What They Cost
The correct repair depends on the failure point. Tightening every fitting can make a slow leak worse if the tubing is cracked or the ferrule has already lost its seal.
A loose compression connection at the shutoff or wall outlet may only need to be disassembled, inspected, and reseated with a fresh ferrule. Use two adjustable wrenches, hold the valve body steady, and tighten the nut firmly without crushing the tubing. If the line has a kink, bulge, brittle section, or corrosion, replace the complete run instead of repairing one weak spot.
A braided stainless-steel refrigerator line is usually the practical replacement for damaged plastic tubing. Push-fit couplers can work where access is limited, but the tube must be cut cleanly and inserted to the marked depth. A coupler that looks tight but isn't fully seated can create another leak behind the appliance.
Match the fix to the evidence
| Repair Type | Parts Cost | Time | Skill Level | When to Choose |
|---|---|---|---|---|
| Reseat compression fitting | Low | Short | Basic | The tube and valve are sound, but one joint is damp |
| Replace the full supply line | Moderate | Moderate | Basic to intermediate | The line is kinked, brittle, punctured, or corroded |
| Install a push-fit coupler | Moderate | Short to moderate | Intermediate | A clean splice is accessible and soldering isn't practical |
| Replace a filter or O-ring | Moderate | Short | Basic | Water originates at the filter housing rather than the rear supply line |
| Replace a shutoff valve or soldered section | Variable | Longer | Advanced | The valve itself fails or copper work is required |
Turn the supply off and remove pressure before disconnecting anything. After installation, inspect both ends with a dry towel, restore water slowly, and operate the dispenser while watching every joint. Don't bury a splice behind cabinetry where you can't inspect it later.
DIY is reasonable when the valve works, the line is accessible, the affected materials are surface-dry, and the repair only involves standard fittings or a filter. It isn't a good project when copper must be soldered, a saddle valve must be replaced, the refrigerator sits in a tight built-in alcove, or water has already wicked into the subfloor. In those situations, professional water supply line replacement can address the plumbing without ignoring the structural damage.
Testing, Drying, and Verifying the Fix Held
A new line isn't a completed repair until it survives testing. Start with a slow pressure test. Open the shutoff gradually, place a dry paper towel under every connection, and run the dispenser or icemaker function that previously triggered the leak. Look for a fresh wet mark rather than relying on sound alone.
The next check is a 24-hour dwell test. Leave dry towels beneath the joints and replace them at the 6-, 12-, and 24-hour marks. A towel that remains dry during a single test only tells you that the joint was dry at that moment. It doesn't rule out a slow seepage pattern.
Verify the building materials
Use a pin-type moisture meter on the floor around and behind the refrigerator when one is available. On wood subfloor, readings above 17% indicate that moisture may still be present, while concrete should be evaluated through relative humidity testing, with 75% relative humidity signaling continued concern. These thresholds and the 24-hour observation approach are included in appliance and water-loss guidance from SERVPRO's refrigerator leak resource.
Drying requires more than pointing a household fan at the front of the appliance. Air movement should reach the wet flooring edge, cabinet base, and exposed wall area, while a dehumidifier removes moisture from the room. Don't close up swollen trim or reinstall the refrigerator until the affected materials have stabilized.
Over the following 72 hours, watch for a musty odor, cupping hardwood, raised laminate edges, soft baseboards, or renewed discoloration. Photograph dry meter readings, record the test times, and keep a short log of valve operation, drying equipment, and inspections. That record gives an adjuster or restoration technician a clear timeline if the loss later becomes more complicated.
Preventing More Damages and Avoiding Future Leaks
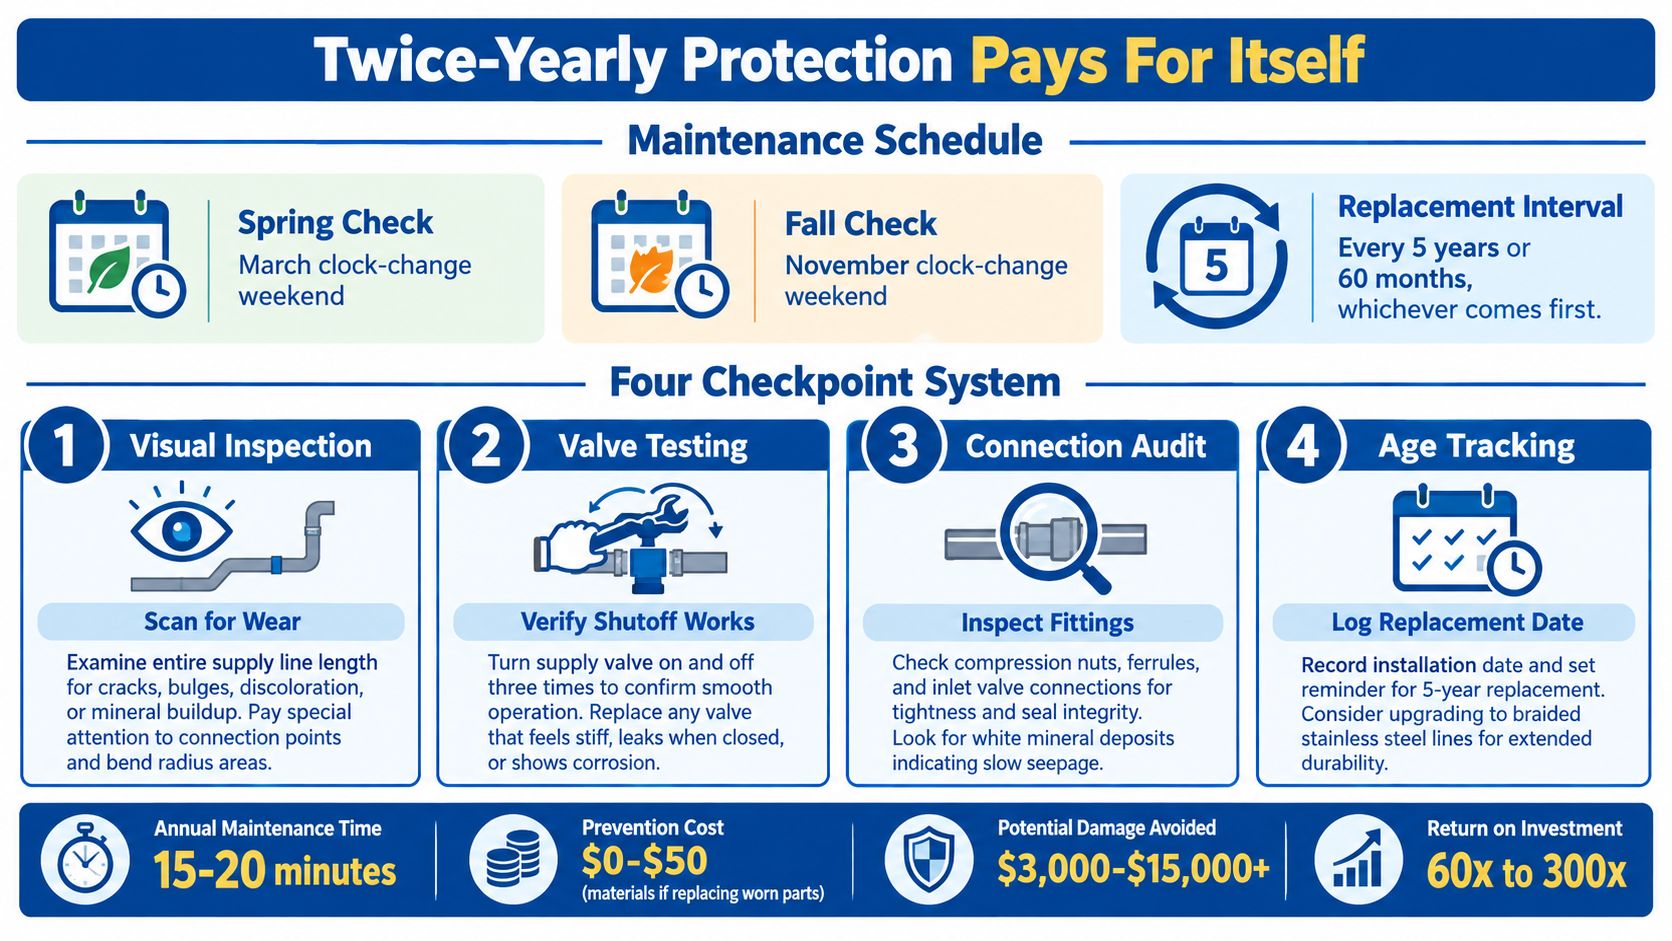
Prevention works best when it's attached to a habit you already keep. Use the spring and fall clock-change weekends as reminders to inspect the refrigerator line, test the shutoff, and check the filter area.
Pull the refrigerator forward far enough to see the full accessible line. Look for kinks, abrasion, discoloration, bulges, mineral residue, or dampness at the joints. Run a dry finger or paper towel around each fitting, then inspect the drip area beneath the filter housing. Check the icemaker branch separately because a pinched or frozen icemaker line can look like a rear supply failure.
Make the shutoff and line easier to service
A quarter-turn ball valve is easier to operate than a stiff multi-turn valve, and an accessible valve makes a faster emergency response possible. A braided stainless line is also a sensible upgrade when the existing plastic tube has become brittle or the connection is difficult to inspect.
Replace water filters according to the refrigerator manufacturer's schedule rather than waiting for poor dispenser flow. A filter housing, head, or O-ring can leak even when the rear supply line is intact. Keep the installation date and filter model with the appliance records.
A leak detector placed behind the refrigerator adds another layer of protection, especially where the shutoff and connection are hidden. It won't repair a failed line, but it can alert you before moisture travels beneath cabinets or flooring.
Annual inspection of refrigerator water lines and related hoses is emphasized in insurer and restoration guidance because concealed leakage becomes more damaging as it continues. Keep the valve reachable, avoid crushing the line when pushing the refrigerator back, and leave enough access to inspect the connection without dismantling the kitchen.
When to Call a Restoration or Plumbing Professional
The decision isn't DIY versus professional. Different failures call for different specialists.
Call a licensed plumber when the shutoff won't close, the line disappears into a wall, copper work is required, corrosion extends beyond a removable fitting, or the refrigerator inlet or icemaker valve needs replacement. Stop experimenting when the valve or wall connection is the failure point. A damaged valve can turn a controlled repair into an active supply leak.
Call a restoration professional when water has traveled beneath flooring, behind cabinets, into an adjacent room, or into wall cavities. Swollen subfloor, separated baseboards, persistent odor, or a floor that remains damp after the plumbing repair all indicate that the building needs assessment and drying, not just a new hose.
Use the evidence to choose the response
| Trigger You Notice | Who to Call | Documentation to Capture | Expected Response Time |
|---|---|---|---|
| Loose accessible fitting with no spread beyond the immediate area | Plumber or capable homeowner | Source, valve, fitting, and dry test photos | Promptly, before restoring full use |
| Stuck valve, damaged copper, concealed line, or failed inlet valve | Licensed plumber | Valve condition, model label, shutoff attempt, technician messages | Emergency or same-day when water is active |
| Wet flooring under cabinets or moisture behind the refrigerator | Restoration professional, often with a plumber | Wide and close photos, moisture readings, drying setup | Promptly, before materials remain wet |
| Swelling, odor, staining, or moisture that persists after repair | Restoration professional | Meter readings, timeline, affected materials, repair invoice | Immediate assessment |
| Sudden leak with documented resulting property damage | Plumber and insurer or restoration professional | Photos before cleanup, timestamps, failed component, receipts, communication log | Notify the insurer according to the policy |
Don't discard the failed hose, fitting, filter housing, or valve until you've photographed it and confirmed that an adjuster doesn't need it. Preserve the component in a dry bag or container, keep the repair invoice, and avoid permanent reconstruction before the affected area has been assessed.
If the water reached an outlet, electrical component, or hidden cavity, leave that work to qualified professionals. A restoration team can inspect moisture migration, extract water, set up controlled drying, and document conditions for the insurance file. A plumber can correct the active supply failure. When both problems exist, coordinating them prevents a repaired line from being followed by damaged flooring, cabinetry, or microbial concerns.
If a refrigerator water line leak has reached flooring, cabinets, or hidden spaces, RestoTek TX provides inspection, leak detection, water extraction, structural drying, microbial prevention, plumbing-related repairs, and reconstruction for properties in Georgetown, Austin, and surrounding Central Texas communities. Contact RestoTek TX for practical help documenting the loss, stopping the source, and deciding what needs to dry before the damage spreads.