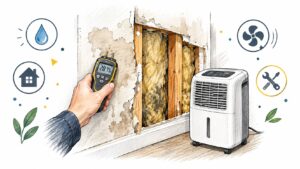
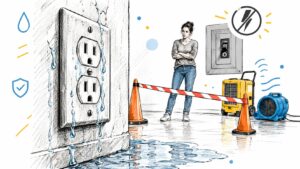
You're standing in the utility room on a Saturday morning, watching water spread across the slab near the water heater. The shutoff is closed, but the floor is already wet, the base of a nearby cabinet is swelling, and you're trying to decide whether this is a quick plumbing repair or the start of a much larger claim.
In Central Texas homes, water supply line replacement often begins with a failed pipe and ends with drying, demolition, documentation, and reconstruction. The pipe is only the first part of the job. This guide walks through how to recognize a failing line, prepare the work area, understand the replacement process, decide what belongs in the hands of a licensed plumber, and protect the insurance record after water reaches the building materials.
Why This Guide Matters for Central Texas Homeowners
A slab leak under a 1990s Georgetown home rarely stays a plumbing-only problem. Water can travel beneath flooring, wick into drywall, saturate insulation, and collect under cabinets before the surface clue becomes obvious. By the time water appears near the water heater or along a baseboard, the visible spot may not mark the actual failure location.
The first response is straightforward. Shut off the home's main water supply, stop using fixtures, keep people away from wet electrical areas, and call for a professional assessment. Take photographs before anyone removes flooring, opens drywall, or moves damaged contents. Those early images often provide the clearest record of the original condition.
The line and the loss are one project
A plumber may replace the failed section successfully, yet the home can still have wet framing, trapped moisture, damaged flooring, or contaminated contents. A complete response usually involves several coordinated tasks:
- Source control: Stop the leak and replace or repair the failed supply section.
- Moisture assessment: Identify wet drywall, insulation, flooring, cabinetry, and concealed cavities.
- Drying: Use air movement and dehumidification to reduce structural moisture.
- Selective removal: Remove materials that can't be dried or restored safely.
- Reconstruction: Replace damaged finishes and return the affected rooms to service.
- Claim documentation: Keep photographs, moisture records, estimates, invoices, and communication together.
The common mistake is thinking only about the pipe. A supply line failure can create a restoration loss even when the plumbing repair itself is relatively contained.
What to record before work starts
Photograph the water source, nearby finishes, contents, baseboards, flooring transitions, cabinetry, and any visible staining. Capture wide room views as well as close-ups. Save the plumber's written diagnosis and ask for the failed material, location, cause, and recommended scope in writing.
RestoTek TX can coordinate inspection, mitigation, plumbing-related work, structural drying, microbial prevention, and reconstruction through its Central Texas service network. Whether you use one provider or several trades, assign one person to maintain the project record. That handoff matters when the adjuster needs to understand why access openings, material removal, drying equipment, and rebuilding were necessary.
Practical rule: Treat the first hour as both an emergency response and evidence collection. Stop the water, protect people, and document the scene before changing it.
Warning Signs That Your Supply Line Needs Replacement
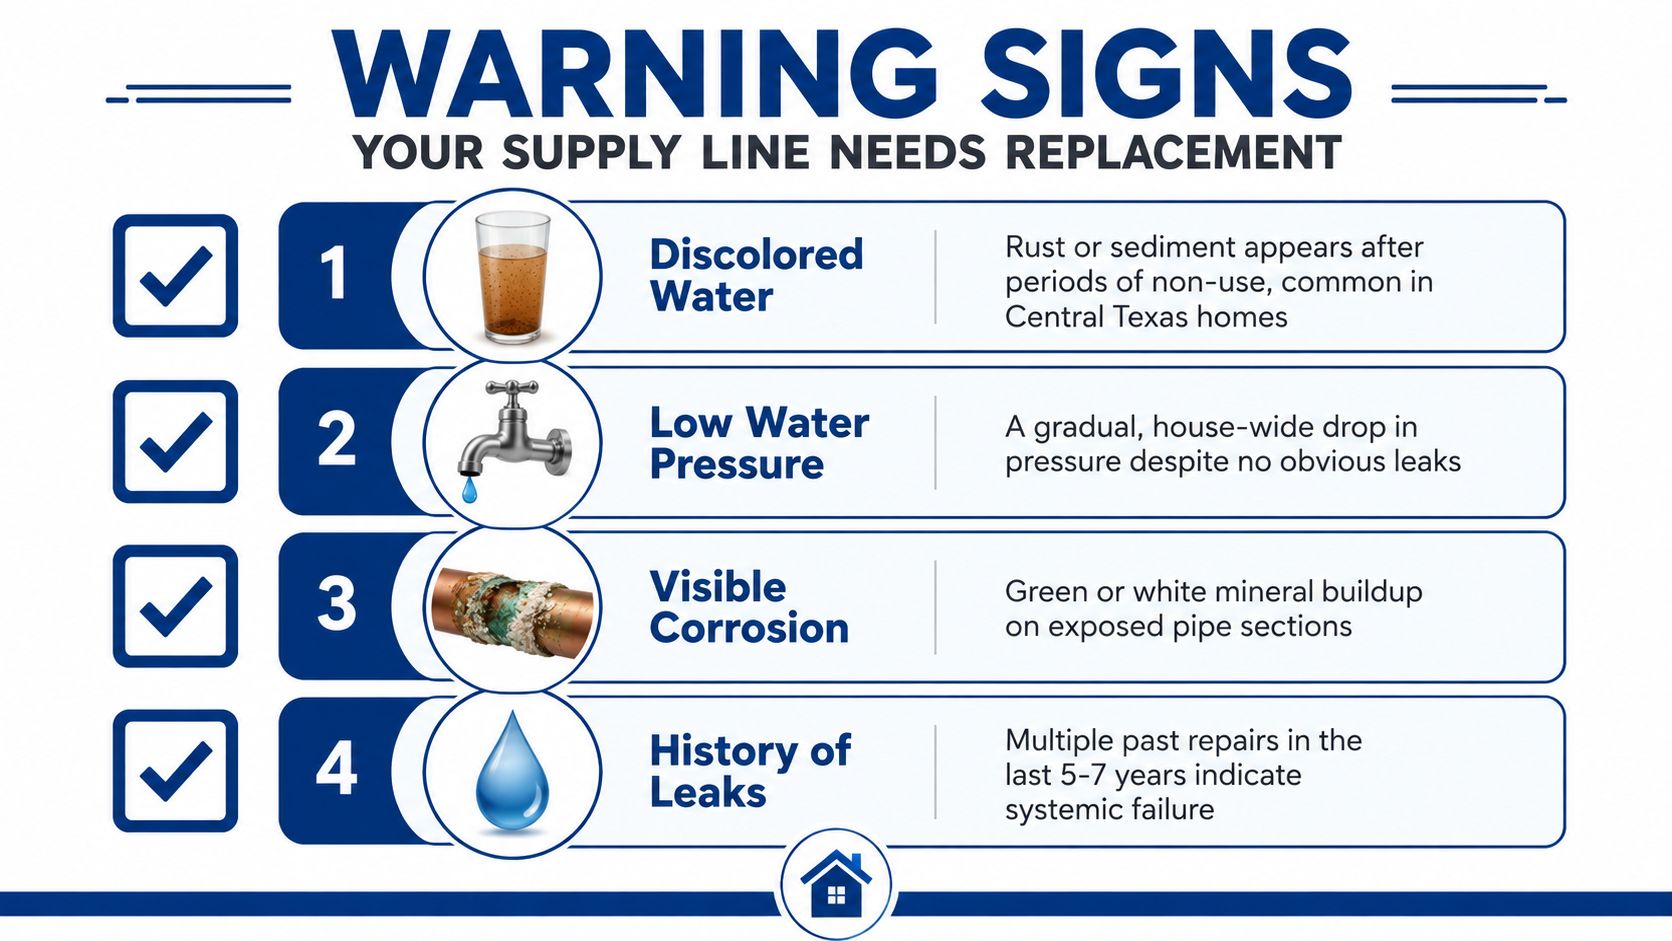
A failing supply line often gives you clues before it opens fully. The pattern matters more than any single symptom. A weak faucet can come from a clogged aerator, while a house-wide pressure drop points to a restriction, leak, failing valve, or deteriorating service line.
Read the early clues
Discolored water after the home has been idle can indicate rust or sediment inside galvanized piping. It can also come from work on the municipal system or disturbance in a local section, so the plumber should compare hot and cold fixtures and inspect accessible pipe.
A gradual, property-wide pressure decline suggests a problem upstream of individual fixtures. Internal corrosion can narrow older galvanized lines, while a leak between the meter and the home can reduce available flow. If only one faucet is weak, start with the aerator, stop valve, cartridge, or branch connection.
Hissing inside a wall or ceiling deserves prompt attention. Pressurized water escaping through a pinhole or loose connection can produce a steady sound, even when no water is visible. Turn off nearby fixtures and listen again. If the sound stops when the main is closed, the supply system becomes more likely than a drain.
An unexplained water-bill increase can point to a hidden continuous leak. Check every toilet, hose bib, appliance connection, and fixture first. If the meter registers flow while all water use is stopped, arrange professional leak detection rather than opening walls at random.
Separate supply leaks from drain leaks
Supply lines carry pressurized clean water to fixtures. They can leak when no fixture is running. Drain lines carry wastewater away after a fixture is used, so their leaks usually correlate with a shower, sink, toilet, or appliance discharge.
Warm spots on a slab can indicate a hot-water supply leak beneath the foundation. Damp baseboards, soft flooring, or a cabinet bottom may reflect either a nearby branch failure or water traveling from another location. Green or white mineral buildup at an exposed shutoff, flexible connector, or fitting suggests an active or recurring leak, but it doesn't prove the entire home needs a repipe.
Do this before guessing: Close the main, open a nearby faucet to relieve pressure, and inspect exposed connections. If the area remains wet or the source is concealed, stop dismantling finishes and arrange a professional plumbing system inspection.
Call a plumber for pressure loss, recurring corrosion, suspected slab leaks, or work near the meter. Call a restoration team when drywall, flooring, insulation, cabinetry, or contents have absorbed water. If both conditions exist, coordinate both responses so the repair doesn't begin before the affected area is documented.
Assessing the Job and Preparing the Work Area
The quality of a replacement depends heavily on what happens before the first cut. Start by finding the home's main shutoff and testing it. A valve that turns but doesn't close fully can leave the plumber working against residual pressure and can delay emergency control.
Next, identify which portion of the system has failed. The service line generally runs from the meter toward the house, while interior supply piping branches through walls, ceilings, floors, or the slab. Responsibility and permit requirements can change at the meter, curb stop, property line, or public right-of-way, so don't assume an interior repair and a service-line replacement follow the same rules.
Build a clear map
Record where the meter, main shutoff, water heater, pressure-reducing valve, hose bibs, and visible branch lines are located. Note whether the suspected route crosses a slab, attic, wall cavity, ceiling, cabinet, or garden area. A plumber can use pressure testing, acoustic equipment, thermal observations, and other external methods to narrow the problem without immediately creating exploratory openings. Leak detection services are especially useful when the water source is concealed.
Identify the existing material where it is safely accessible. Common possibilities include:
- Copper, with soldered joints and potential pinhole corrosion.
- Galvanized steel, with threaded connections and internal scale.
- CPVC, a rigid plastic system that can become brittle with age or impact.
- PEX, flexible plastic tubing commonly routed through cavities.
- Lead, which requires special public-health and inventory considerations.
Don't cut into an unknown pipe based only on its color. A magnet, visual inspection, fitting type, and written plumber assessment can help distinguish materials, but concealed or potentially hazardous materials require professional handling.
Make the area safe
Shut off the main, open nearby fixtures, and allow the system to drain. If water is near outlets, appliances, wiring, or an electrical panel, turn off the affected circuit only if you can do so safely. Never stand in water while reaching for electrical equipment.
Protect unaffected finishes with drop cloths and plastic sheeting, but don't seal wet cavities before they've been assessed. Move contents away from the affected area, label anything that must be discarded, and photograph it before removal. Stage a bucket, towels, a flashlight, and basic hand tools, but leave cutting, soldering, crimping, and slab access to the appropriate professional.
Permit rules vary by city, property location, and scope. Interior work may follow different requirements from work at the meter, in a right-of-way, or on a buried service line. Ask the licensed plumber who will obtain permits, arrange inspections, coordinate utility markings, and restore disturbed surfaces.
How the Replacement Actually Gets Done
A real replacement starts with confirmation, not demolition. The crew isolates the affected section, verifies that the main is closed, opens fixtures to drain pressure, and protects the surrounding finishes. If water remains in the line, connections can fail, solder can be unsafe, and the work area can become wetter than necessary.
The failed section is then exposed and removed. The cut must leave sound pipe with enough working room for the new connection. On a corroded line, the visible leak may be only the weakest point, so the plumber examines nearby fittings, joints, supports, and transitions before deciding whether a short repair is responsible or whether a longer section should be replaced.
Match the connection to the system
The new material and fitting method should be compatible with the existing pipe, water service, access conditions, and local requirements. Depending on the installation, the connection may use a push-to-connect coupling, a sweat-soldered copper joint, a PEX crimp-ring connection, or a threaded transition between different metals.
Each method has a different failure risk. Push-fit connections need properly prepared, round pipe and correct insertion depth. Soldered copper joints need clean, dry surfaces and safe heat control around framing. PEX connections need the correct tubing, fitting, crimp ring, and calibrated tool. Threaded transitions need compatible fittings and careful support so movement doesn't stress the joint.
The plumber should support the new line, protect it from abrasion, maintain required clearances, and avoid forcing a rigid connection into a moving or poorly supported route. A replacement that looks watertight at the fitting can still fail later if the pipe is under tension.
Pressure testing is more than turning the valve
The system comes back online slowly. The crew watches each new joint, nearby transitions, shutoffs, the water heater connections, and accessible branches while fixtures are opened to purge air. They also check flow at representative fixtures and confirm that the pressure-reducing valve and thermal expansion control still behave properly.
A slab leak adds another layer. The plumber may access the line through the slab, reroute the pipe through a wall or attic, or replace a larger section to avoid returning to the same failure area. The right choice depends on the line route, structural access, finish damage, and the condition of nearby pipe.
Ask for before-and-after evidence: Keep the failed fitting or pipe section when practical, photograph the exposed route, and request written confirmation that the replacement was pressure-tested and checked for flow.
Materials, Costs, and DIY Versus Hiring a Pro
The right material depends on access, compatibility, local approval, and the condition of the existing system. PEX is often practical for Central Texas retrofits because it can bend through existing cavities and reduce the number of concealed joints. Copper remains familiar and durable when installed correctly, but it requires more access and heat control. CPVC can work in approved applications, though its rigidity and brittleness can make alterations less forgiving.
Cost isn't a single pipe-price question. A short, accessible branch replacement is a different project from a full-home repipe, and both differ from a service line under a yard, driveway, or slab. Labor access, demolition, permits, material transitions, pressure testing, drying, flooring, cabinetry, drywall, texture, paint, and final cleaning can all change the scope.
Because the brief provides no verified local dollar ranges, any exact Austin or Georgetown price would be guesswork. Request an itemized estimate that separates plumbing, access and demolition, drying, disposal, permits, restoration, and reconstruction.
Supply line material trade-offs for Central Texas homes
| Material | Typical Use | Pros | Cons |
|---|---|---|---|
| PEX | Interior repipes and accessible branch routes | Flexible, efficient through cavities, fewer concealed joints | Requires compatible fittings and correct crimp or clamp installation |
| Copper | Existing copper systems and exposed or accessible runs | Familiar, rigid, widely understood by plumbers | Soldering needs heat control, and older installations may have corrosion |
| CPVC | Approved interior plastic supply applications | Lightweight and easy to cut | Rigid, less tolerant of impact, and can be difficult to alter in tight spaces |
| Galvanized steel | Older homes and legacy systems | Strong when new | Internal corrosion and scale can make spot repairs temporary |
| Lead | Legacy service lines | Existing material only | Replacement is a public-health priority, not a normal repair choice |
Where DIY makes sense
A capable homeowner may handle an accessible single-line repair when the shutoff works, the line is fully exposed, the correct fittings are available, and no structural finish or buried service line is involved. The work still requires careful material preparation, a compatible connection method, slow repressurization, and a leak check.
The tool investment can become unreasonable quickly. Depending on the system, you may need a tubing cutter, deburring tool, PEX crimper or clamp tool, soldering equipment, heat shields, a pressure gauge, protective equipment, and a way to dry and protect the work area. Buying tools doesn't replace the judgment needed to identify hidden damage or comply with local requirements.
Where hiring is the safer choice
Hire a licensed plumber for work at the meter, curb stop, right-of-way, slab, pressure-reducing valve, or main service route. Use a professional for soldering near framing, unknown materials, lead-related work, recurring failures, or any repair where a mistake could release water inside a wall or beneath flooring.
If the home has older plastic or metal piping that doesn't match the current layout, ask whether a full assessment is warranted. A material-specific concern, such as Kitec piping and its replacement implications, should be evaluated before isolated repairs multiply.
The practical middle ground is often the most efficient. The homeowner can photograph the loss, clear the work area, contact the insurer, and organize contents. The plumber handles the pressure system, while a restoration contractor manages moisture assessment and rebuilding.
What Comes After the Plumber Leaves
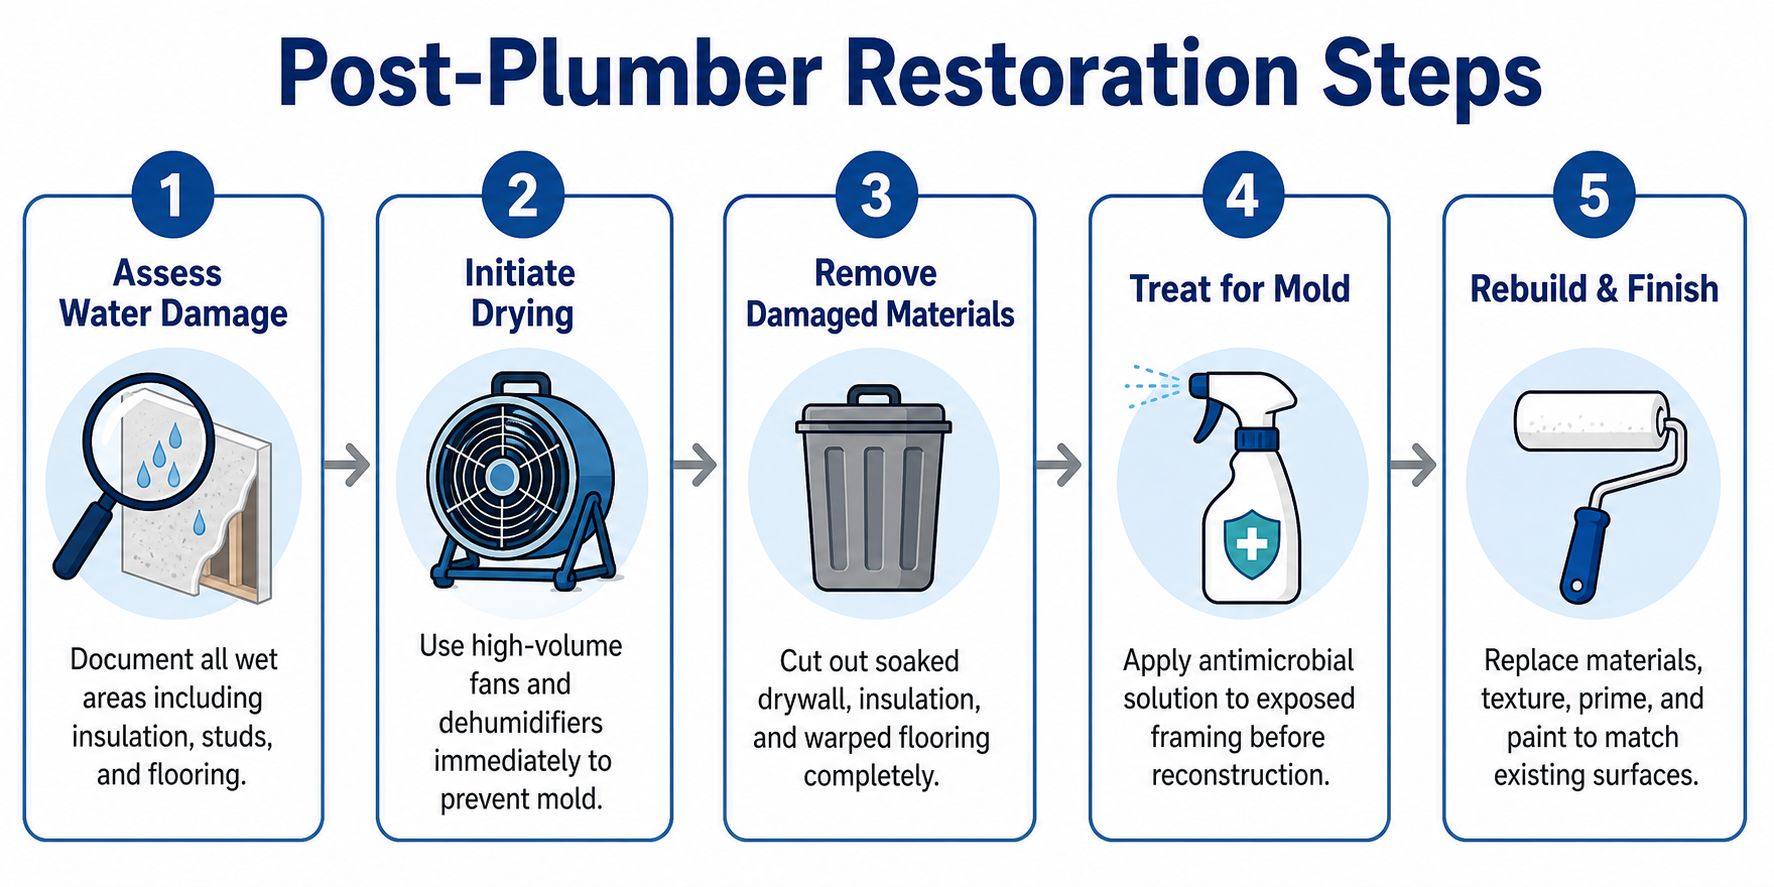
A new line that holds pressure doesn't prove the room is dry. Water can remain behind baseboards, under flooring, inside wall cavities, beneath cabinets, and in insulation after the visible leak stops. Drying decisions should come from moisture readings and material condition, not from how the surface feels to your hand.
A restoration crew may use air movers to move moisture out of materials and dehumidifiers to remove it from the indoor environment. They'll compare readings in affected areas with unaffected materials, document the drying progress, and determine which materials can be cleaned and dried and which need removal.
Protect the structure and the claim
Wet drywall, insulation, warped flooring, and swollen cabinet bases may require selective demolition. The crew should document the condition before removal, identify the affected materials, and keep demolition limited to what is necessary for drying and safe reconstruction. Microbial prevention and deodorization may be appropriate on affected surfaces, but they don't substitute for removing trapped moisture.
Mold testing isn't automatically necessary after every leak. It becomes more useful when there's visible growth, a persistent odor, an uncertain moisture history, occupant concerns, or a dispute about the affected area. Asbestos testing may be required before cutting or disturbing older building materials. That decision belongs with qualified professionals who can assess the material and the planned work.
Keep a simple claim file containing:
- Initial photographs: Wide views, close-ups, water paths, damaged contents, and the failed plumbing.
- Moisture records: Readings, affected rooms, equipment placement, and drying progress.
- Itemized contents: Descriptions of damaged belongings, condition, and disposal decisions.
- Invoices and estimates: Plumbing, extraction, drying, testing, demolition, reconstruction, and cleaning.
- Communication: Adjuster messages, contractor notes, approvals, and changes in scope.
One provider coordinating plumbing, drying, and reconstruction can reduce missed handoffs. It also gives the adjuster a clearer timeline from source control through rebuild, although you should still review each scope and invoice before authorizing work.
Avoiding Repeat Failures and Knowing When to Call for Help
A successful pressure test marks the end of the leak repair, not the end of your responsibility. Once the work is complete, inspect accessible connections periodically, run rarely used fixtures, and keep shutoff valves operable. A valve that won't close is a problem during the next emergency.
Simple maintenance helps you catch changes earlier:
- Flush seasonal lines: Run water through rarely used hose bibs and fixtures to reduce stagnation.
- Exercise shutoffs: Operate accessible shutoff valves gently and confirm they close and reopen.
- Use leak monitoring: Place a smart leak sensor near the water heater, washing machine, and other high-risk connections.
- Watch the meter area: Keep vegetation and stored materials away from the service route so changes in soil or surface conditions remain visible.
- Track water quality: Note new discoloration, metallic taste, sediment, or recurring pressure changes and report them promptly.
Stop DIY work when the repair reaches the meter or curb stop, when water may be under the slab, or when the work is close to electrical equipment. Visible mold, damage across multiple rooms, soaked insulation, or a loss that requires demolition also calls for a restoration assessment.
A supply line replacement isn't just a plumbing repair. It's a chance to harden the home against the next loss, preserve the documentation that supports recovery, and restore the structure correctly instead of covering wet materials with new finishes.
If a failed line has already affected your Austin or Georgetown home, contact RestoTek TX for water damage inspection, mitigation, structural drying, plumbing coordination, microbial prevention, and reconstruction support. Share your photos and the leak location when you reach out so the team can help organize the next response.