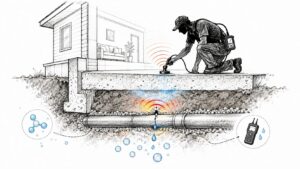
A lot of Georgetown homeowners first notice a slab leak in a way that feels almost insulting. The house looks normal. There's no burst pipe in the wall, no dramatic puddle in the kitchen, no rain coming through the ceiling. Then the water bill jumps, one patch of floor feels odd under bare feet, or a room starts to smell a little earthy for no clear reason.
That's what makes leak detection under concrete slab so stressful. The problem sits below a hard surface you can't see through, in a place many never think about until something goes wrong. By the time the signs feel obvious, the leak may have already soaked soil, affected flooring, or fed moisture into the indoor air.
In slab-on-grade homes, hidden leaks matter because they stay hidden. One industry citation reported that more than 42% of commercial building water losses were traced to concealed slab leaks, which helps explain why under-slab monitoring has become a much bigger maintenance issue in concrete construction (industry discussion of concealed slab leak losses and non-invasive methods). Homes and commercial buildings aren't the same, but the lesson carries over clearly. Water below concrete often escapes attention until it has had time to spread.
This guide is written for the person who's standing in that uncertainty right now. You may be wondering whether a warm floor means a hot-water leak, whether shifting clay can fool detection tools, or whether you're heading toward a small spot repair or a bigger reroute decision. Those are good questions.
Introduction to Hidden Leaks Beneath Your Slab
You wake up to a higher water bill, but the kitchen is dry, the bathrooms look normal, and there is no dripping pipe in sight. Later that day, one stretch of floor feels a little warmer than the rest, or a grout line near the bathroom stays dark long after everyone has showered. In many Georgetown homes, that is how an under-slab leak announces itself. And from below.

Why people miss it at first
A slab leak hides in a place homeowners cannot inspect with a quick glance. Water often moves sideways through soil before it shows up in flooring, baseboards, or indoor air. By the time you see a stain or feel a warped board, the leak itself may have been active for much longer.
That hidden travel path causes a lot of confusion.
People often expect a plumbing leak to act like a spilled glass. Under a slab, it behaves more like water soaking into a sponge and spreading through packed earth. The slab blocks your view, and the soil can hold and redirect moisture before any surface clue appears.
Some plumbing guides note that slab leaks can waste a large amount of water each day, depending on pipe size, water pressure, and whether the break is a pinhole, split, or failed joint (published slab leak signs and detection guide). The exact loss in a home varies, but the practical lesson is simple. A leak does not need to be dramatic to affect your bill, your flooring, or the air inside the house.
Practical rule: If your home looks mostly normal but your water use changes for no clear reason, treat that mismatch as a real warning sign.
Why this is different in Georgetown
Homes in Georgetown and the Austin area often sit on slab-on-grade foundations, with plumbing routed in or beneath the concrete. That setup makes hidden leaks harder to spot than leaks in a crawlspace or unfinished basement. It also changes how professionals confirm the problem.
Local ground conditions matter here. Georgetown limestone can reflect sound in ways that make acoustic tools less clear than homeowners expect. Expansive clay can hold moisture, shift with wet and dry cycles, and blur the line between an active plumbing leak and older moisture that has lingered in the soil. A warm spot may point toward a hot water line leak. It can also be heat traveling along the slab from another location.
That is why good leak detection is not just about having advanced tools. It is about knowing which tool answers which question, and when a reading may mislead you in Central Texas conditions.
What this guide will help you sort out
Professional detection usually starts with suspicion, then moves to confirmation, then to repair planning. Acoustic listening may help narrow the search, but limestone and household noise can interfere. Infrared cameras can reveal temperature differences, but they do not see through concrete and may miss cold-water leaks. Moisture meters can show where water has reached the surface layers, but not always where it began. Pressure testing can confirm that a line is losing water, yet it cannot always pinpoint the exact break.
The goal is not to guess faster. The goal is to reduce uncertainty step by step, so you can decide whether you are looking at a small targeted repair, a reroute, or more investigation before anyone cuts concrete.
Why Slab Foundations in Central Texas Develop Hidden Leaks
A slab-on-grade home is a little like a body with a hard outer shell. The concrete slab is the skin, and the water lines underneath act like veins carrying pressurized water to sinks, tubs, showers, and appliances. When one of those lines weakens or rubs through, water doesn't spray into open air. It escapes into the narrow space around the pipe, the soil below, or the underside of the slab.

The slab isn't the problem by itself
Concrete doesn't cause every leak. The trouble comes from the relationship between the slab, the pipes, and the ground below them. In Central Texas, that ground often moves more than homeowners expect.
Georgetown limestone can create a firm-looking base, but homes don't always sit on one perfectly uniform layer. Some sections may bear differently than others. Nearby expansive clay can swell when wet and shrink when dry. Over time, that push-pull cycle can place stress on rigid plumbing lines, especially at bends, joints, or places where the pipe already had a weak point from installation.
Common causes that make hidden leaks more likely
Several conditions tend to show up again and again in slab leak investigations:
- Soil movement: Expansive clay reacts to rain and drought cycles. That movement can nudge foundations and strain pipes below.
- Abrasion against concrete: As pipes expand and contract with temperature changes, they can rub against rough surfaces.
- Corrosion and mineral stress: Hard water conditions can be tough on certain metal lines over time.
- Installation issues: Sharp bends, unsupported sections, or stressed connections may fail sooner than expected.
- Pressure wear: Constant water pressure exposes weak spots every hour of the day.
A homeowner usually experiences these causes as symptoms, not as visible failures. The floor gets warm. The pressure at a fixture seems weaker. A plank seam lifts. Moisture appears where no one spilled anything.
For homes where moisture has already started affecting the slab or flooring assembly, a concrete moisture evaluation often helps separate plumbing leakage from surface humidity or unrelated dampness. A focused concrete slab moisture inspection can clarify whether water is migrating upward through the slab or entering from somewhere else.
Georgetown homes often sit on conditions that can hide a leak and distort its path. The leak may start in one place and show itself in another.
Why the damage pattern feels confusing
People expect water to go straight up. Under a slab, it often doesn't. Water follows resistance, temperature differences, tiny gaps, and soil paths. It can travel laterally before it ever shows on the surface. That's why the wet spot you see isn't always directly over the pipe break.
This is also why homeowners can get mixed signals. You may have a musty smell in one room, a warm tile in another, and a water bill issue that seems disconnected from both. They may all tie back to the same under-slab line.
Early Warning Signs You Can Spot Without Tools
You walk barefoot across the kitchen early in the morning and one tile feels oddly warm. Later that week, the water bill looks higher than usual. Then you notice a faint musty smell near a bedroom wall, but there is no obvious spill, no dripping faucet, and no puddle to explain it.
That pattern is common with leaks under a concrete slab. The clues usually show up in small, disconnected ways first. The job at this stage is not to prove the leak. It is to notice whether several clues point in the same direction.
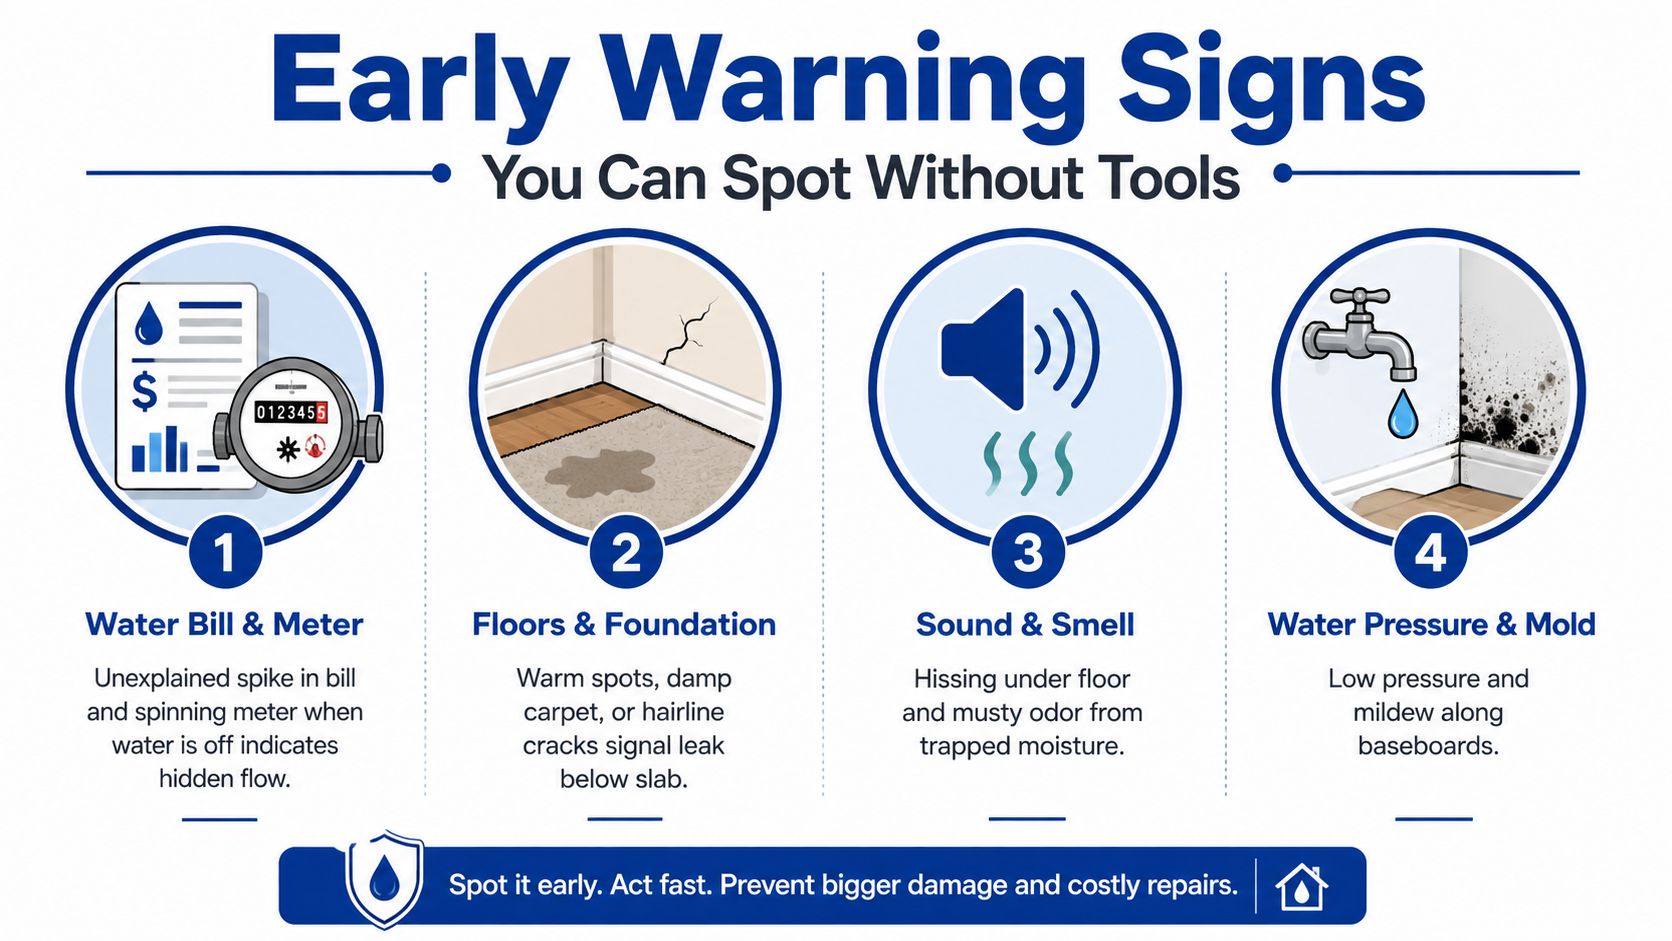
Watch your bill and your meter
Your water meter works like a heartbeat monitor for the house. If everything inside is off and the meter still moves, the plumbing system is still losing water somewhere.
A higher bill does not always mean a slab leak. Irrigation changes, guests, and seasonal use can raise consumption too. But if your routine stayed about the same and the bill jumped anyway, checking the meter is a calm, low-cost next step.
The EPA household leak checklist outlines that basic meter-check process for homeowners (EPA leak checklist for household water-use checks and meter confirmation).
Use this routine:
- Turn off fixtures and water-using appliances in the house.
- Wait a few minutes so ice makers, softeners, and other normal cycles stop.
- Look at the meter and see whether the leak indicator or numbers continue to move.
- Take a photo so you can compare it later.
- Check again after a short wait if you want a second reading.
If the meter moves while the home is quiet, that does not confirm the leak is under the slab. It does confirm that more testing makes sense.
Check floors, walls, and trim
Water under a slab rarely rises straight up in a neat column. It tends to wander along easier paths, a lot like coffee spreading through a paper towel. That is why the place you notice damage may be near the leak, not directly above it.
Look for changes such as:
- Warm flooring: A hot-water line leak can create a warm area in tile, stone, or vinyl.
- Buckling, cupping, or lifting: Wood and laminate often react when moisture pushes up from below.
- Damp carpet edges: Moisture may collect near tack strips, baseboards, or room transitions.
- Baseboard swelling or staining: Water can wick into trim and drywall at the bottom of the wall.
Central Texas soils can make this more confusing. Georgetown limestone and expansive clay can redirect moisture sideways before it reaches the surface, so the visible symptom may show up a few feet away from the actual pipe break.
One clue alone can mislead you. A warm floor near a sunny window may just be sun exposure. A warped plank near an exterior door may come from rain intrusion. Several clues that keep returning deserve more attention.
Listen and smell, especially when the house is quiet
Night often makes hidden leaks easier to notice. Appliance noise drops. Foot traffic stops. Small sounds stand out.
Listen for a faint hiss, a soft rushing sound, or water noise when nobody is using water. Smell matters too. A persistent damp or musty odor can be one of the first signs that moisture has been trapped below flooring or along the slab edge for a while.
Sound clues are helpful, but they have limits. In Georgetown-area homes, dense slab materials and local soil conditions can muffle or distort where the sound seems to come from. That is one reason early suspicion and final confirmation are two different steps.
If you hear water when the plumbing should be still, treat that as a reason to investigate, not a reason to panic.
Document patterns before you call
Good notes help shorten the path from suspicion to confirmation. They also help a leak detection specialist choose the right tools instead of guessing.
Keep it simple:
- Record the location: Which room, wall, or floor area feels different?
- Take repeat photos: Use the same angle each day if flooring, trim, or staining changes.
- Log the timing: Does the sound show up overnight, after showers, or all day?
- Notice pressure changes: Is one fixture weak, or does the whole house seem affected?
Those details help sort out what comes next. For example, a warm patch and musty smell may point a technician toward a hot-water line first. A moving meter with no warm area may shift attention toward a cold-water supply line. If the signs stay limited to one area but the meter is still, the next question may be whether moisture is coming from a drain line or from a source unrelated to plumbing.
How Modern Detection Technologies Find Water Under Concrete
Professional leak detection under concrete slab is a process of narrowing, confirming, and cross-checking. A good technician is not trying to guess where to break concrete. They are trying to rule out wrong paths first, then build confidence around one small target area.
Under a Central Texas slab, that matters because the ground changes how each tool behaves. Georgetown limestone can carry sound sharply in one direction and scatter it in another. Expansive clay can absorb or mute those sound clues, then let moisture travel sideways before it shows up at the surface.
The usual order starts with one simple question. Is a plumbing line losing pressure? If the answer is yes, the next question is which line is involved, then which tool has the best chance of tracing that leak through your slab and soil conditions.
Acoustic listening works like a stethoscope
When pressurized water escapes from a pipe, it creates vibration and sound. Sensitive listening equipment helps a technician compare one part of the floor to another and locate the area where that sound is strongest. A technical explanation of slab leak acoustic behavior describes how these leak sounds can span a wide frequency range under concrete (technical explanation of slab leak acoustic and thermal behavior).
Acoustic testing is often a strong first locator for active supply-line leaks because it is fast and non-invasive. But it depends on how well the slab and surrounding materials carry sound.
On limestone-dominant lots in Georgetown, sound may reflect off dense stone and reinforced slab sections, so the loudest spot can land near the leak instead of directly over it. On expansive clay sites, the problem often flips. The clay can dull the vibration enough that the leak sounds softer than expected at the surface.
That is why local decision-making matters. If pressure isolation points to a pressurized line and the lot is limestone-heavy, many technicians will try acoustic listening early, then confirm with a second method before marking a break point. If the home sits over clay and the sound picture is weak or inconsistent, acoustic results usually need backup from tracer gas or moisture mapping.
Infrared thermography sees heat movement, not pipe location
Infrared cameras read surface temperature differences. They are looking for the footprint of heat, not a photo of the pipe itself.
That makes thermal imaging especially helpful with hot-water leaks. Warm water escaping below the slab can create a heat plume that rises and spreads toward the finished floor. A local guide to thermal imaging for leak detection explains why those temperature patterns are clues that need confirmation, not proof by themselves.
Thermal imaging is less useful on cold-water lines, under thick insulating floor finishes, or in rooms with competing heat sources like direct sun, HVAC vents, appliances, or large rugs. In mixed-floor homes, tile and vinyl may show a temperature difference more clearly than carpet or wood.
Georgetown conditions add another layer. Limestone-related density changes in the slab can redirect how heat reaches the surface, so the warm area may show where heat surfaced easiest rather than where the pipe opened. Expansive clay can also shift moisture paths and slightly alter the shape of the temperature pattern, which is why thermal findings work best when they are paired with pressure testing and another locator.
Tracer gas helps when sound and temperature are unclear
Tracer gas testing fills an isolated pipe with a safe test gas, then uses a detector to find where that gas escapes and rises through tiny paths in the slab, joints, or edges.
This method is often useful when a cold-water leak does not create a clear thermal signature or when acoustic listening is unreliable. In clay-heavy areas where sound is muted, tracer gas can move the investigation forward because it does not depend on vibration traveling cleanly through the slab.
It has limits too. Dense floor coverings, cabinets, crack patterns, and multi-layer flooring can redirect where the gas surfaces. In practical terms, the strongest reading may show the easiest escape route, not the exact hole in the pipe.
Moisture mapping shows where water traveled after the leak started
Moisture meters and mapping tools answer a different question. They do not usually identify the break itself. They help show where water has moved into flooring, baseboards, drywall, or slab-adjacent materials.
That distinction helps homeowners avoid a common misunderstanding. The damage trail is not always the leak location.
In a Georgetown house with expansive clay, moisture can migrate toward slab edges, low spots, seams, or wall lines before it becomes visible above the floor. A technician may find the wettest material several feet away from the failed section of pipe. Moisture mapping is valuable because it helps define the affected area, supports insurance documentation in some cases, and gives another layer of confirmation when paired with pressure loss and line tracing.
Comparing Non-Invasive Slab Leak Detection Methods
| Technology | What It Detects | Best For | Limitation to Know |
|---|---|---|---|
| Acoustic listening | Sound from pressurized water escaping | Active pressurized supply leaks, especially where sound carries clearly through the slab | Limestone can reflect sound, and expansive clay can mute it |
| Infrared thermography | Surface temperature anomalies | Hot-water leaks and heat plumes near the slab surface | Cold lines, insulation, sun exposure, and floor type can hide or distort the pattern |
| Tracer gas | Gas escaping from an isolated pipe breach | Cold-line leaks or cases where acoustic results are weak | Gas may surface along an easier path than the actual pipe failure |
| Moisture mapping | Moisture spread in finishes and nearby materials | Defining affected areas and checking how far water migrated | Shows the water trail, not always the break point |
The best results come from overlap. Pressure testing identifies the suspect line. Then the choice of locator should match the ground conditions. On limestone-heavy lots, start with pressure isolation and acoustic work, then confirm before cutting. On expansive clay, where sound often weakens and moisture can drift, tracer gas and moisture mapping usually deserve earlier priority, with thermal imaging used mainly when a hot-water line is in question.
What to Expect During a Professional Detection Visit
You call because the floor feels warm in one room, your water bill jumped, and now you are bracing for someone to start breaking concrete. A professional visit usually goes in a much calmer order. The goal is to reduce guesswork until the plumber can answer three practical questions: is a leak active, which line is involved, and where would access make sense if a repair is needed.

The visit starts with a story, then a search pattern
Before any instrument comes out, the technician usually asks for a timeline. When did the bill rise. Does the warm area stay constant or show up after showers. Did pressure drop at one fixture or across the house. Has flooring cupped, loosened, or changed color.
Those answers shape the test path. A hot line leak that appears after morning water use points in a different direction than a constant meter movement with no heat at all.
Then comes a visual walkthrough. The technician checks the meter, nearby fixtures, walls, baseboards, flooring transitions, and any place a visible leak could be fooling everyone. That step matters because a dishwasher line, water heater connection, or exterior irrigation issue can mimic a slab leak from across the room.
Pressure testing separates suspicion from confirmation
Once the easy visible causes are ruled out, the next phase often focuses on isolation and pressure testing. The plumbing system is divided into smaller sections so the technician can see which part holds pressure and which part does not.
This is the point where many homeowners expect a jackhammer decision. Usually, that decision comes later.
Pressure testing works like closing doors in a hallway to figure out which room the sound is coming from. It does not always name the exact inch of damaged pipe, but it can narrow the problem from the whole house to one hot line, one cold branch, or one loop under a specific area. That narrower target is what makes the next tool choice smarter.
The tools are chosen based on your soil and slab conditions
A careful technician does not run every tool in the same order at every house. Georgetown limestone and Central Texas clay change how leaks show themselves.
If the home sits over limestone-heavy ground, acoustic equipment may be tried earlier because sound can travel well through a dense slab. The catch is that limestone can also bounce sound and create a false strongest point. In that case, the technician may mark more than one candidate area and use pressure isolation or moisture confirmation before recommending any opening.
If the lot has expansive clay, the pattern can flip. Clay often dampens sound and lets moisture drift sideways before it shows at the surface. A listening device may give a weak result even when a leak is active. That is when tracer gas, moisture mapping, or thermal imaging on a hot line can move higher in the sequence.
The practical idea is simple. Detection is less about one miracle tool and more about choosing the right tool for the ground under your home.
Expect confirmation before anyone recommends cutting
Good detection work is layered. One result raises suspicion. A second result confirms it.
That matters because published accuracy figures for acoustic emission systems are often drawn from industrial test conditions, not from occupied Georgetown homes with floor coverings, furniture, mixed pipe materials, and variable soil behavior. In residential slab work, professionals use overlap for that reason. They listen, isolate, compare moisture spread, and confirm the pattern before marking an access point.
During this phase, you may see some mix of:
- Acoustic listening devices to compare leak noise from point to point
- Thermal imaging to check for heat patterns from a suspected hot-water line
- Moisture meters to outline where water has migrated into finishes
- Tracer gas equipment when sound is weak or the suspected line is hard to confirm
A provider such as RestoTek TX may also document moisture impact and drying needs if water has already reached flooring or wall materials. That does not change where the pipe break is, but it helps you understand the full repair decision instead of treating the plumbing problem in isolation.
What you can do before the appointment
A little preparation saves time and can reduce repeat testing.
- Clear access to suspect areas. Move rugs, storage bins, and small furniture.
- Have a short symptom timeline ready. Note when you first noticed heat, sound, dampness, or higher bills.
- Set out recent water bills if available. Patterns help, even if they do not prove the leak.
- Ask for marked locations and written findings. That is useful if you need repair bids or insurance documentation.
Calm, specific notes help more than a long retelling. A simple list by room is often enough.
Costs Risks and When to Call a Pro in Georgetown and Austin
A slab leak decision usually starts with a simple question. How much will this cost? In Georgetown and Austin, a better question is how long the water has been traveling before anyone can see it. Water under a slab works like a slow detour. It may start at one pipe, then show up as warped flooring, damp baseboards, musty air, or soil movement somewhere else.
One 2026 source says slab leak detection typically ranges from $200 to $900+, and this local guide on leak detection service costs explains what can push that number up or down. Price usually changes with access, plumbing layout, home size, and whether one test is enough or several tools are needed to confirm the leak.
Georgetown conditions add another layer. Limestone can carry sound in misleading ways. Expansive clay can spread moisture away from the actual break. That means the cheapest visit is not always the lowest-cost outcome if it leads to a bad mark, unnecessary concrete cutting, or a repair aimed at the wrong spot.
When basic checks are still reasonable
You can start with your own observations if the signs are light and stable. The key word is stable.
A short watch-and-record phase makes sense when:
- The meter suggests a possible leak, but damage is not spreading
- Bills are climbing without a clear reason
- One floor area feels slightly warm or damp, but finishes still look normal
- You notice an occasional musty odor or faint water sound, but not every day
Those checks help answer one question. Is there enough evidence to suspect a hidden leak? They do not answer the next question, which matters more in slab homes. Where is the leak, and how certain is that location before anyone opens concrete?
When to call a pro quickly
Call sooner when signs start stacking up or changing. That usually means the leak has moved past suspicion and into active damage.
A faster professional visit makes sense when:
- Flooring is cupping, lifting, or staining
- A damp or musty smell stays concentrated near one room
- Water pressure drops across more than one fixture
- You hear water movement when the house is quiet and no fixture is running
- You own a rental or commercial property and need documentation, speed, or both
Central Texas soil makes delay riskier. Expansive clay swells when it gets wet and shrinks as it dries. A long-running leak can keep one area of soil wetter than the rest, which is one reason plumbers and restoration teams try to confirm the source before choosing a repair.
Repair, reroute, or abandon the line
Once the leak is confirmed, the repair choice should match the condition of the whole run, not just the hole that was found.
A spot repair fits a localized break when the surrounding pipe still looks dependable. A reroute often makes more sense when the failed line runs through a hard-to-access slab section or the pipe material has a history of repeated trouble. Some owners choose to abandon the slab line and install a new route through walls or attic spaces if that lowers the chance of future slab access work.
Local soil and rock conditions matter again. A method that confirms one leak does not promise the rest of the buried line is in good shape. A careful contractor will separate two decisions. First, confirm the leak location. Second, choose the repair path that makes sense for that pipe, that slab, and that house.
Waiting raises more than the plumbing bill. It can add drying, flooring replacement, odor treatment, and concrete access work to the same event.
Your Next Steps After Finding a Slab Leak
Once a slab leak is suspected, your job is to move from uncertainty to proof without tearing up the house too soon. Start with the signs you can confirm. Watch the meter, log the symptoms, and note whether the issue looks tied to hot water, a specific room, or a broader pressure change.
After that, push for confirmation with a methodical, non-invasive workflow. The most reliable approach usually combines pressure testing with acoustic, thermal, moisture, or gas-based tools instead of betting everything on one reading. That matters even more in Georgetown homes where limestone conditions and expansive clay can distort how sound, heat, and moisture travel.
When a leak is found, don't stop at pipe repair alone. Make sure the affected materials are checked for lingering moisture, and verify that structural drying reaches dry standards before rebuild work closes everything back up. That follow-through helps reduce future odor, flooring, and microbial issues.
A slab leak feels invisible at first, but the response shouldn't be. Clear notes, careful detection, a defined repair choice, and proper drying give you the best chance of solving the whole problem instead of just the first symptom.
If you're dealing with suspected water under a slab in Georgetown or Austin, RestoTek TX handles the full process from inspection and leak detection through mitigation, structural drying, and reconstruction. If you want clear next steps without guessing where the water is traveling, visit RestoTek TX to request help and review their Central Texas restoration services.