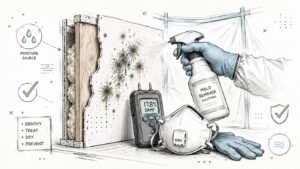
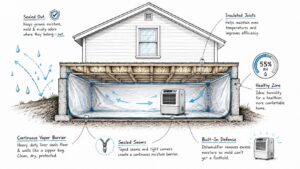
An encapsulated crawl space is a sealed, moisture-controlled crawl space that uses a heavy-duty vapor barrier, sealed vents, and active humidity control to keep relative humidity below about 50% to 60%. In plain terms, it turns the damp space under your house into a controlled part of the building instead of a dusty gap where moisture just collects.
If you live in Central Texas, this question usually shows up after a storm, when the house smells musty, the floors feel a little off, or the summer air seems to hang inside the home longer than it should. A crawl space can look harmless from the outside and still be driving odor, humidity, and wood damage underneath the rooms you use every day.
What an Encapsulated Crawl Space Actually Is
Many homeowners hear “encapsulation” and picture a sheet of plastic laid over dirt. That's only part of the story. The core idea is to seal the crawl space so it stops acting like a damp tunnel and starts behaving like a controlled building assembly.
A simple way to think about it
If a vented crawl space is like leaving a closet door open in a humid house, an encapsulated crawl space is more like closing the closet, lining it with a moisture barrier, and giving it its own small climate system. That's why the working definition matters: an encapsulated crawl space is a sealed, moisture-controlled assembly with a vapor barrier on the floor and walls, sealed vents, and humidity control that keeps the air from getting swampy.
That definition matters even more after a Central Texas rain event. Clay soils hold water differently than sandy ground, and when moisture lingers below the house, the crawl space can start to smell long before the living room gives you a clear warning. The smell is often the first clue homeowners notice, but it's usually not the first problem that started.
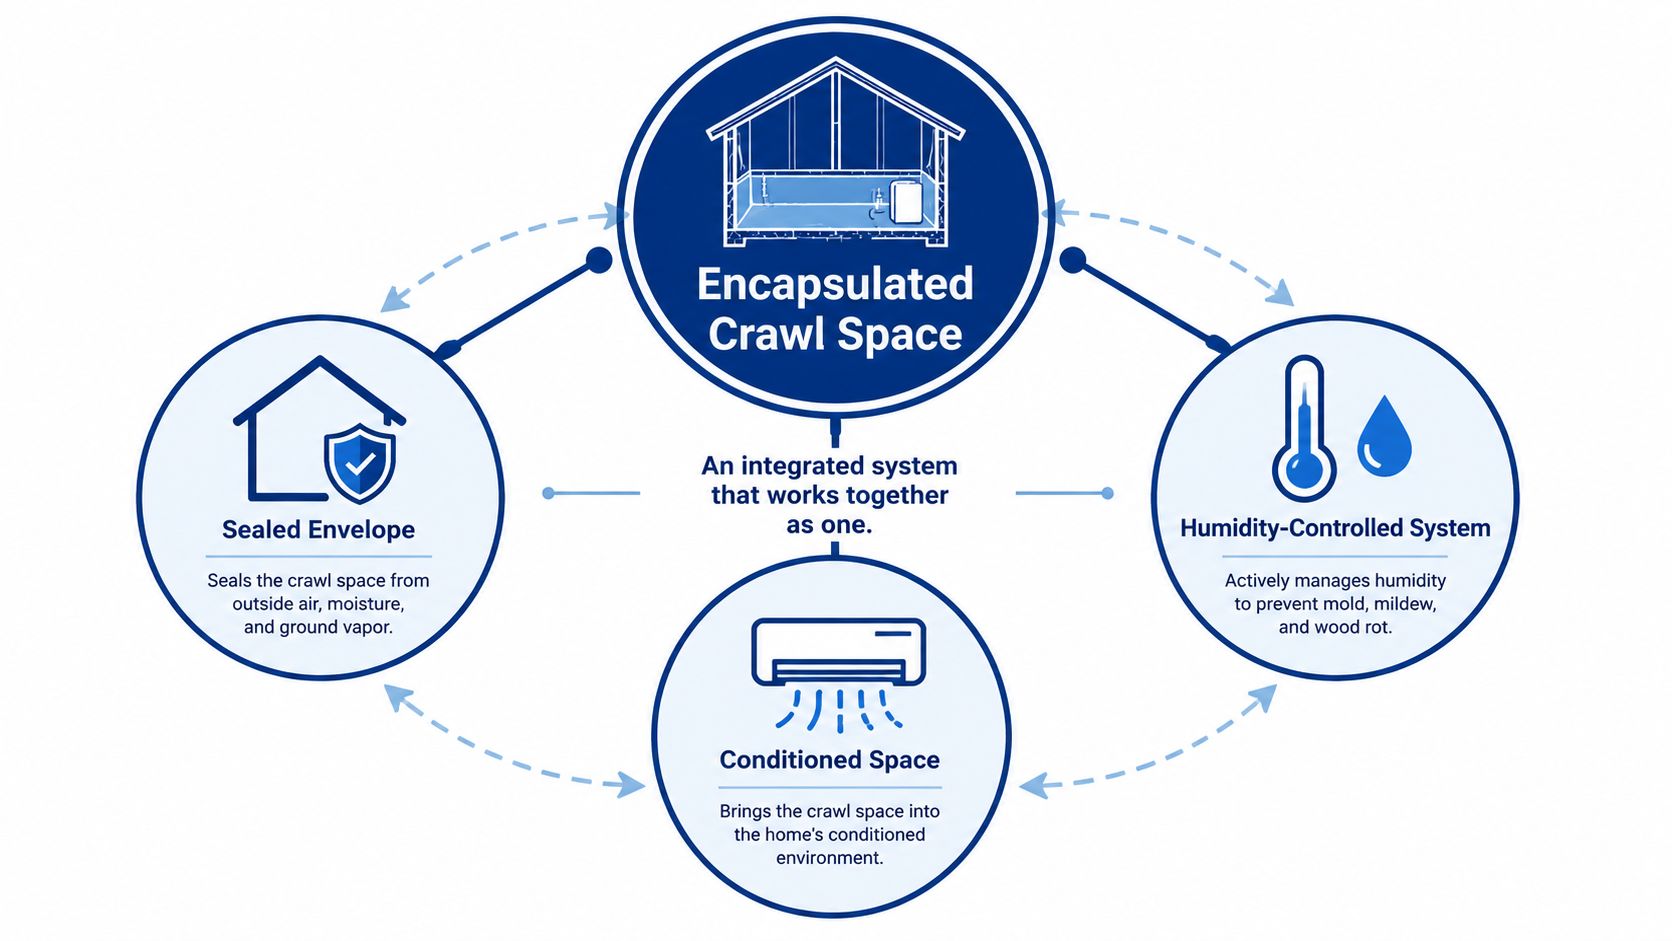
Practical rule: if the crawl space can still breathe freely to the outside, it's not truly encapsulated.
The reason builders and moisture specialists started treating this space differently is straightforward. Open crawl spaces let outside air, ground moisture, and pests enter too easily. Encapsulation changes that by treating the space beneath the house as part of the home's moisture strategy instead of ignoring it.
The Building Blocks of a Proper Encapsulation System
A real encapsulation job is not one layer of plastic. It's a system, and every layer has a job. If one piece is missing, the whole setup can underperform or fail.
What each part does
The foundation starts with a 10 to 20 mil vapor barrier, which is thick enough to stand up to long-term use better than thin plastic sheeting. That barrier should cover the ground fully, then run up the walls and around penetrations so moisture from the soil has fewer paths into the crawl space.
Seams and vents matter just as much as the liner itself. If seams are left loose or vents stay open, humid outdoor air can still move through the space and condense on cooler surfaces. That's why a proper job also seals joints, pipe openings, and foundation vents instead of just covering the dirt and calling it done.
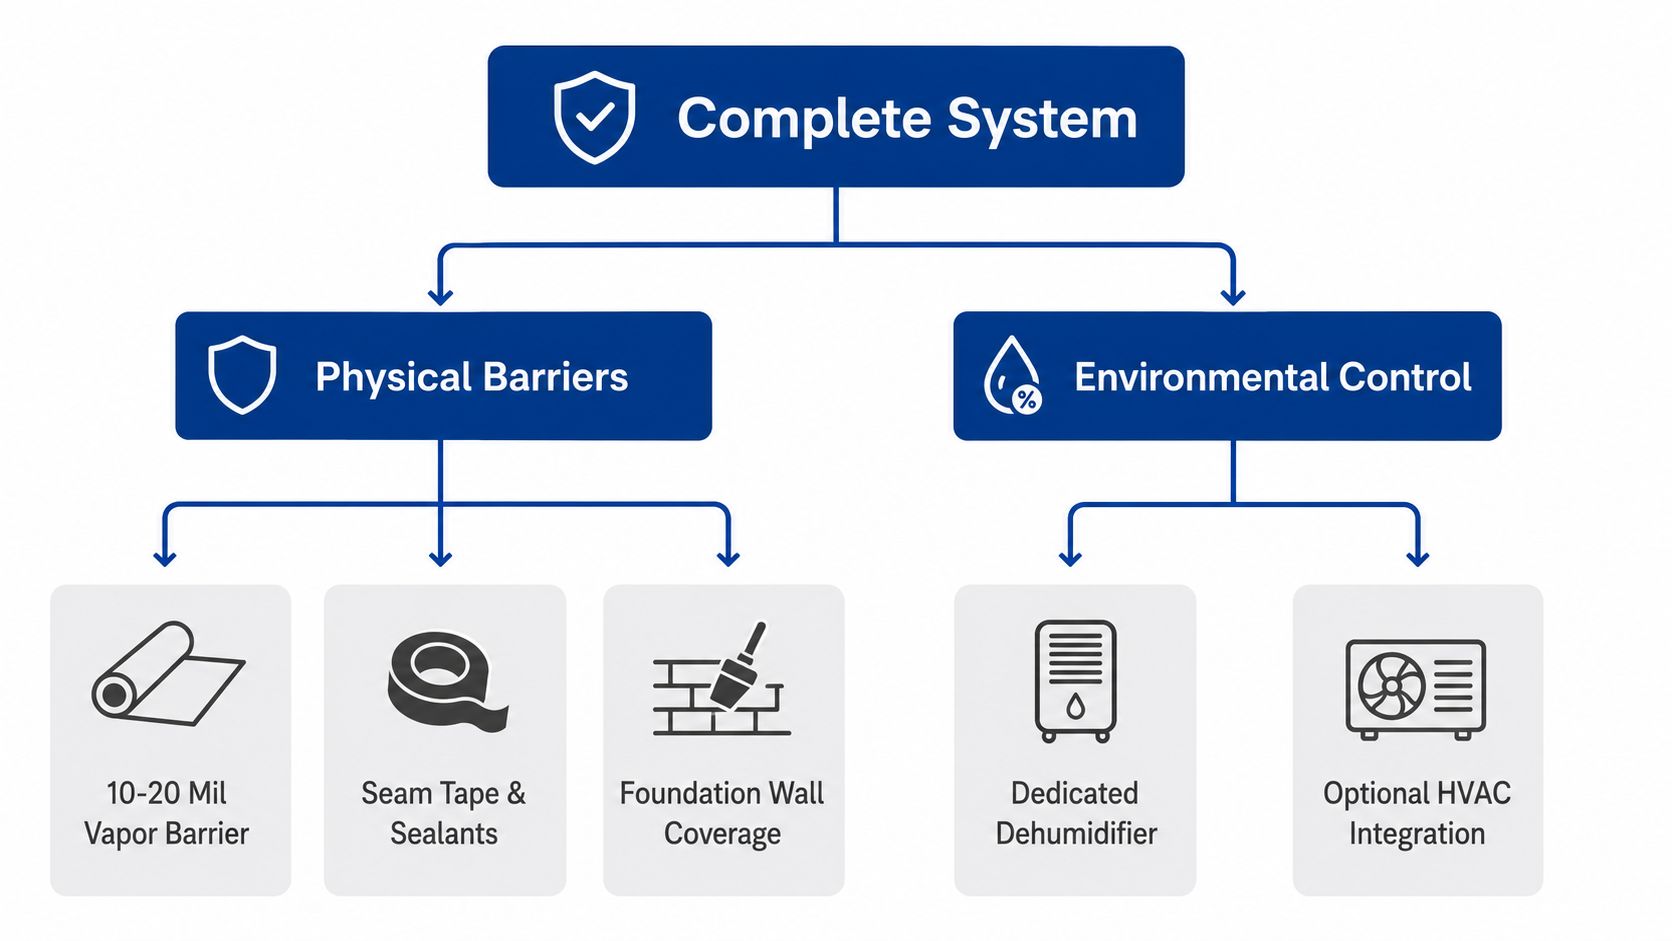
The other major piece is active humidity control, often with a dehumidifier, sometimes with conditioned supply air, and in some cases with limited exhaust or ventilation strategy. In practice, the crawl space is being managed like a small mechanical zone, not left to the weather.
A liner without humidity control is just a liner. A sealed system without humidity management can still trap damp air if the moisture load stays high.
The point of wall and rim-joist insulation is simple too. Those surfaces sit in the boundary between the crawl space and the rest of the house, so insulating them helps keep temperature swings and condensation from working against the seal. When those pieces are installed together, the crawl space behaves much more like an enclosed building component than an open pit under the home.
Why Encapsulation Is Not a Cure-All for Water Problems
Encapsulation gets oversold all the time. It can help a lot, but it is not a magic fix for every moisture issue under a house. If you seal a wet crawl space before solving the water source, you can trap the problem instead of correcting it.
What has to be handled first
Standing water is the biggest red flag. So are drainage defects, plumbing leaks, structural rot, and active mold growth. If those issues are still present, the vapor barrier can end up locking moisture beneath the liner, where it keeps feeding the problem out of sight.
That matters in Central Texas because a homeowner may see a dry-looking surface and assume the crawl space is fine, while the soil below is still holding water from a storm or a grading problem. Flash floods, pooling around foundations, and shifting clay soils can all create conditions that need to be corrected before any seal goes in.
The right question is not, “Should I encapsulate?” The better question is, “What water-source problem has to be fixed first?”
When a hidden leak is part of the issue, finding it early makes the whole project cleaner and safer. A focused leak check can prevent a lot of guesswork, especially when the crawl space keeps getting wet in the same spot. Leak detection guidance for hidden losses becomes relevant here because the moisture source often isn't the soil alone.
If the crawl space has active intrusion, the order of operations should be repair, dry, then seal. That sequence is what keeps encapsulation from becoming a cosmetic cover-up.
Dehumidifier, Conditioned Air, or Vented Approaches Compared
Once a crawl space is sealed, moisture still has to be managed. That's where homeowners get stuck, because different articles give different answers. The choice usually comes down to three approaches, and the best one depends on the home, the crawl space size, and how much moisture the space sees.
The three common strategies
A dedicated dehumidifier is the most direct option. It gives the crawl space its own humidity-control system, which is why it's often used when the space needs steady moisture management rather than occasional help.
Conditioned air means the crawl space gets some supply air from the home's HVAC system. That can work in some setups, but it ties crawl-space control to the performance and design of the house's main system, so it needs to be planned carefully.
A limited exhaust or vented approach is the least effective of the three. It may fit mild situations, but it gives up some control in humid weather, which is exactly when Central Texas homes can struggle most.
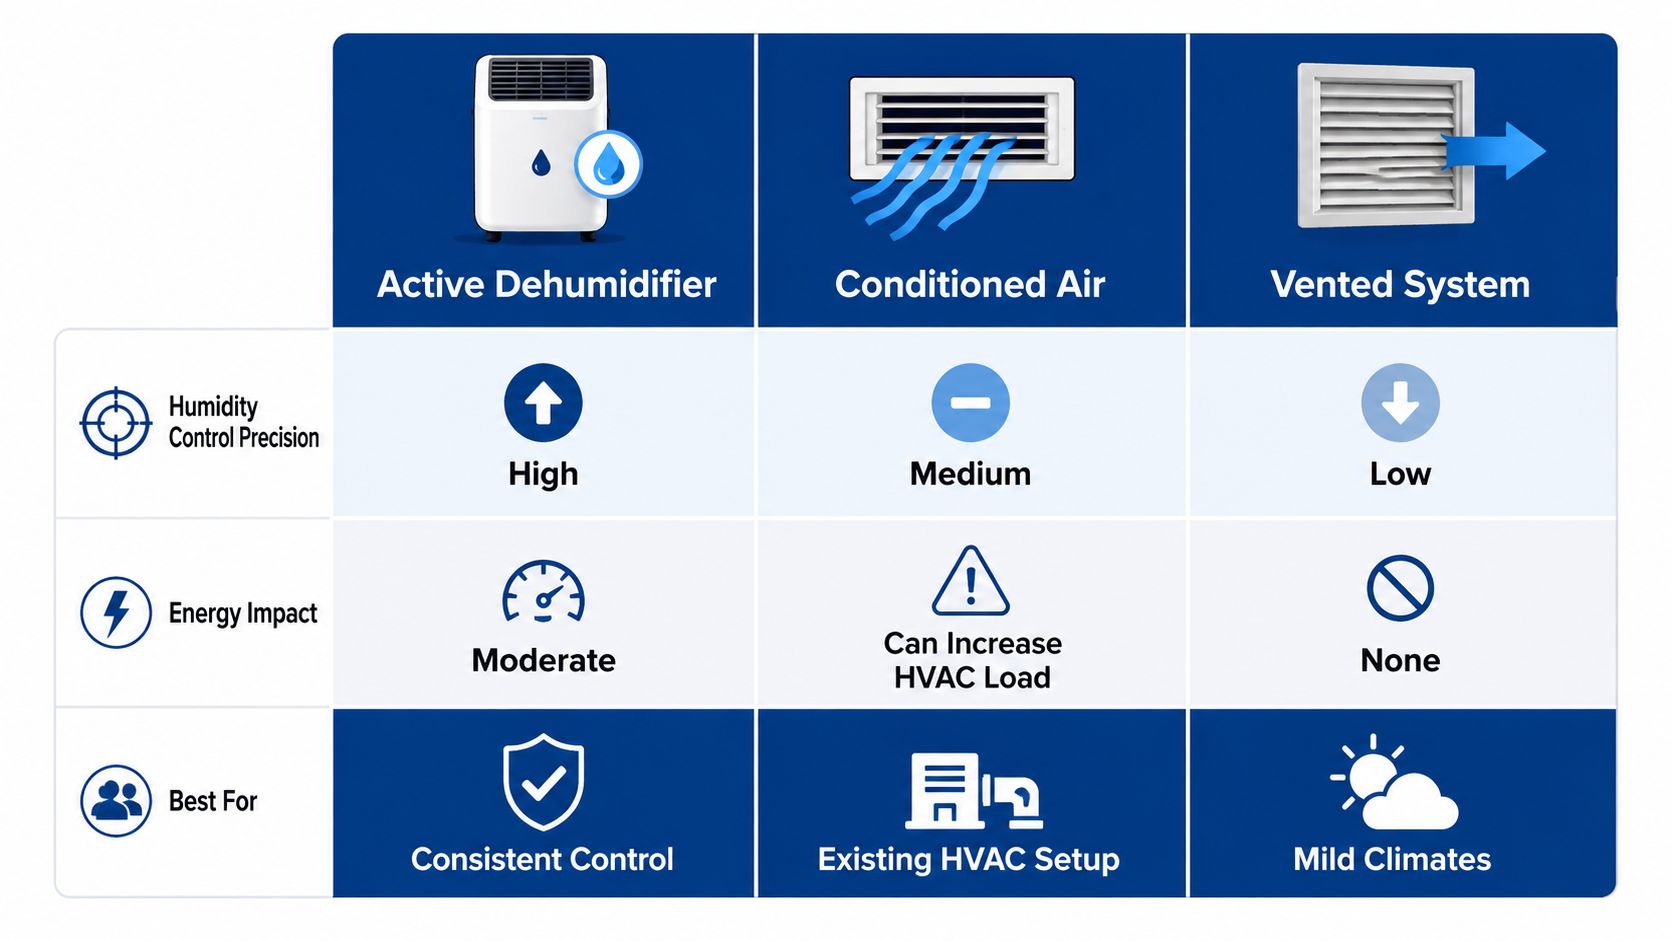
Best fit matters more than brand loyalty. A method that works in one climate or crawl-space layout can be a poor match in another.
For homeowners in Georgetown or Austin, the biggest practical question is stability. A crawl-space dehumidifier is often the clearest way to keep relative humidity in the safe range when outside air stays sticky for long stretches. If the home already has a thoughtful HVAC design, supply air may be part of the answer. If the space still depends on outdoor air to “dry out,” that usually deserves a second look.
What Encapsulation Actually Costs in 2026
Cost is where a lot of homeowners pause, because encapsulation sounds technical until the quote arrives. Once you see the numbers, it helps to think in terms of scope, not just price.
What the range means in real life
Typical crawl space encapsulation pricing is about $2 to $10 per square foot, with a national average around $5,000 to $15,000 for a full system and roughly $5,500 in one 2026 estimate. A 1,000-square-foot crawl space may cost $2,000 to $10,000, while a 2,000-square-foot space may cost $4,000 to $20,000. Those figures come from a mainstream cost guide, and they show how quickly total cost scales with size and condition. Crawl space encapsulation cost guide
| Crawl Space Size | Typical Cost Range | Notes |
|---|---|---|
| 1,000 square feet | $2,000 to $10,000 | Smaller footprint, but condition still affects price |
| 2,000 square feet | $4,000 to $20,000 | Larger area, more material and labor |
The biggest price drivers are rarely the liner itself. Drainage work, sump pump installation, mold remediation, plumbing repairs, and structural drying can all move the project upward because those items come before or alongside encapsulation. In a Central Texas home, that can happen fast if a storm has pushed water toward the foundation or if clay soils have kept the crawl space damp longer than expected.
A useful quote to ask for is a scope that separates water-source correction, drying, encapsulation materials, and ongoing humidity control. That makes it much easier to compare bids and spot a low price that leaves out critical work.
If you're trying to budget for related repair work, it helps to look at the restoration side of the equation too. Water damage repair cost factors can influence how much of the project has to happen before encapsulation is even appropriate.
Warning Signs Your Home May Need Encapsulation
Most crawl-space problems announce themselves upstairs before anyone opens the access door. The clues are usually small at first, then they start to line up with each other.
What homeowners notice first
A persistent musty odor that gets worse after rain is one of the clearest signals. So is visible moisture on pipes, ductwork, or framing under the house. If the floor above starts to feel soft in a spot, or if you see sagging, that's a sign the crawl space deserves immediate attention.
Mold spots on joists or subfloor boards are another warning. They often show up where moisture lingers instead of draining away, and they usually mean the problem has been building for a while. High indoor humidity in summer is another clue, especially if the house feels sticky even when the air conditioner is running.
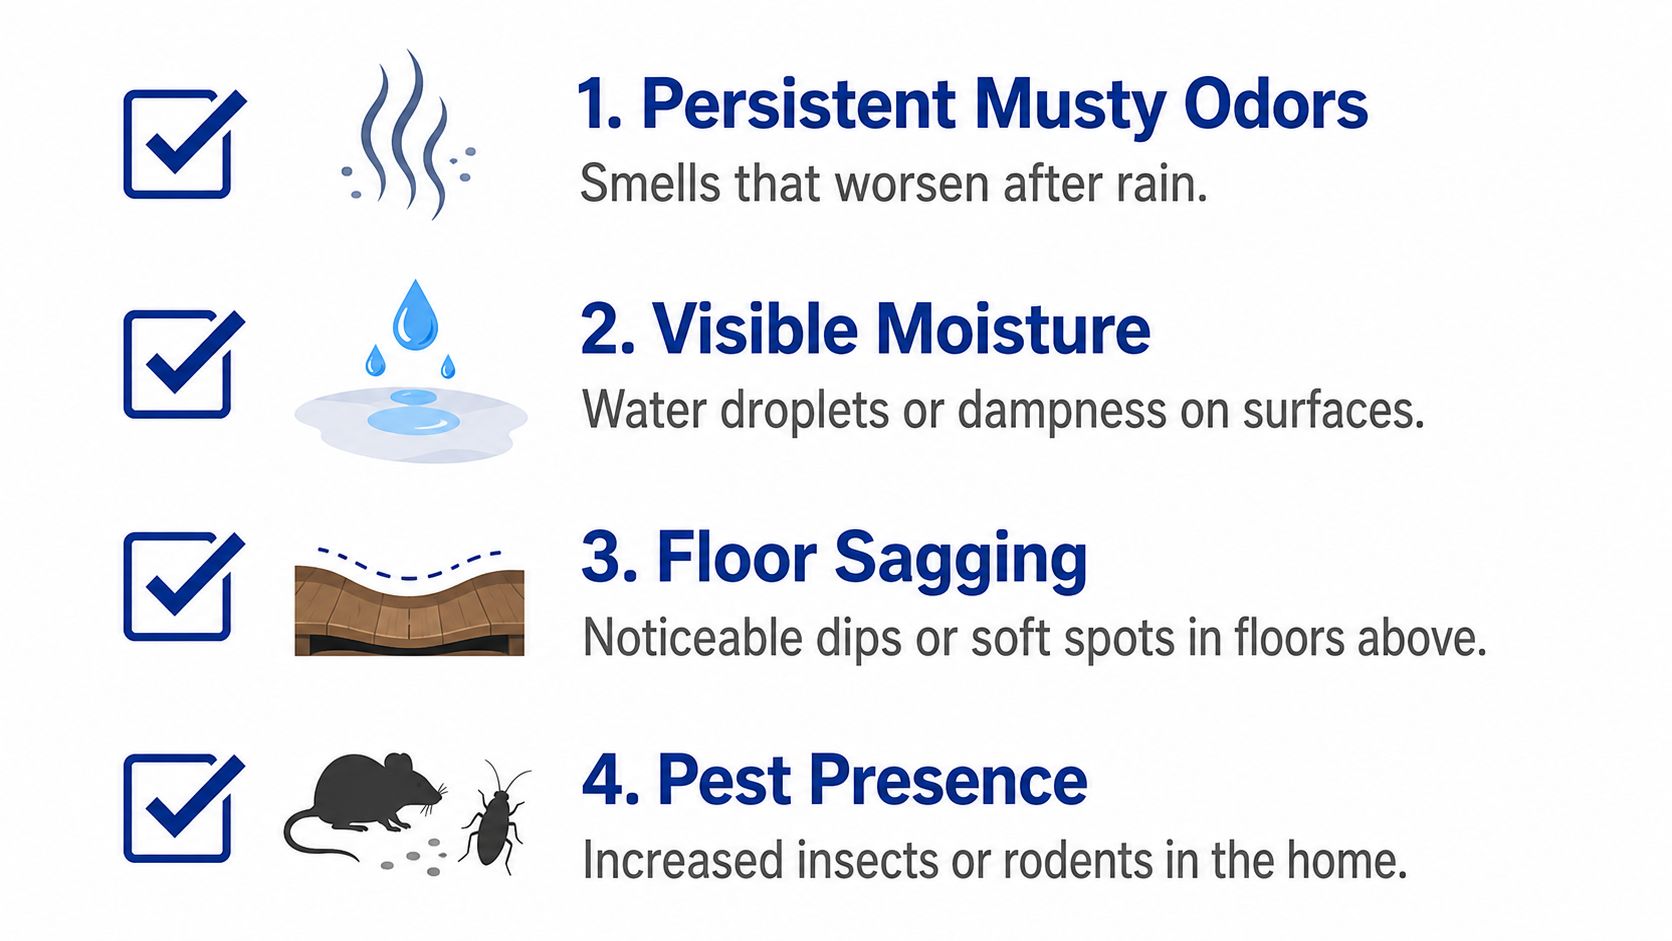
- Persistent Musty Odors: Smells that worsen after rain usually point to moisture below the home.
- Visible Moisture: Water droplets, damp soil, or condensation on surfaces suggest the space is not staying dry.
- Floor Sagging: Noticeable dips or soft spots in floors above can point to hidden damage below.
- Pest Presence: More insects or rodents often means the crawl space is open, damp, or both.
When those symptoms show up together, encapsulation may be part of the solution, but only after the source of water is addressed. In older Georgetown and Austin homes, a crawl-space inspection can reveal whether the issue is mainly humidity, or whether it's really drainage, leaks, or rot. If mold is already suspected, a mold inspection in Georgetown can help separate a cosmetic smell from a real contamination problem.
Maintenance and Central Texas Climate Considerations
An encapsulated crawl space still needs attention. It's not a set-it-and-forget-it upgrade, because moisture systems work best when someone keeps an eye on them.
A simple maintenance rhythm
Check humidity with a basic digital gauge so you know whether the space is staying stable. Inspect the dehumidifier filter and make sure the unit is running the way it should. If the home has a sump pump, test it before storm season, not after the water starts rising.
After major rain events, inspect the vapor barrier for movement, tears, or loose seams. Re-check seals around plumbing penetrations and access points as part of a yearly routine. That kind of habit catches small failures before they become expensive ones.
Central Texas makes that routine more important. Expansive clay soils can shift foundations, heavy spring and fall storms can load the ground quickly, and flash-flood events can send water where it doesn't belong. Summer heat also pushes the outdoor air toward sticky conditions that make moisture control under the house harder, not easier.
The practical takeaway is simple. If you're in this region, encapsulation should be designed with storm response and inspection in mind, not just day-one installation. The system has to keep performing when the weather swings hard, because that's when weak seals and poor drainage show up.
Hiring a Professional and What to Expect From RestoTek TX
A good crawl-space contractor starts with inspection, not with a sales pitch. The first visit should include moisture readings, a look at drainage conditions, a check for visible damage, and a written scope that explains what gets fixed before the space is sealed.
What a solid quote should cover
You want to see the difference between mitigation, drying, encapsulation, and reconstruction. If a quote lumps everything together without a baseline for moisture or a plan for existing water issues, that's a red flag. The project should also make clear whether any mold testing, microbial prevention, or structural repair is part of the job.
In Central Texas, that sequencing matters. A crawl space that has been exposed to stormwater or a hidden leak can't usually jump straight to sealing. The work has to move from investigation to drying to repair, then to encapsulation and any rebuild items that remain.
RestoTek TX is a family-operated company led by Joan and Josh Garza, serving Georgetown, Austin, and surrounding Central Texas communities with 24/7 emergency response. The company's services cover water damage inspection, structural drying, leak detection, mold testing, microbial prevention, and reconstruction, which means a homeowner can get help from the first assessment through the final repair under one provider. Free estimates are available through the website, which makes it easier to compare next steps before committing to work.
If your crawl space smells wrong, feels damp, or has already been exposed to water, don't wait for the damage to spread upstairs. Reach out to RestoTek TX to request a free estimate, get a clear inspection, and find out whether your home needs drying, repair, encapsulation, or a combination of all three.